Oh, the best laid plans of mice and men... Originally we had planned to go up the Branderschrofen near Füssen today to scope some sites for the next astro shoot, but there's still a tad too much snow, the weather forecast wasn't really playing ball and we would have had to have tested to get on the cable car. Not really an issue, but a faff nevertheless. So instead we packed the car and headed off to the Starzlach Gorge near Sonthofen to stretch the legs and play with my new filters; the Kase Wolverine magnetic filters. I figured that if they're good enough for Nigel, they're good enough for me 😉.
 |
| Hard and Soft || Olympus 44 mm, f/4, 1/2", ISO 200 |
My previous filters were a set of Lee Seven5 90 x 75 mm rectangular filters with a traditional filter-holder. These were always such a fiddle to mount, plus the astute reader will remember from my
comparison with the Kase system that as soon as you put the polariser on the front of the filters, the system becomes completely unusable at wide angle because you can see the filters in the corners of the photos. Well, more than the corners actually. In fact they were so unusable on a day-to-day basis that I did the unthinkable and bought myself a sneaky cross-pol variable filter (but shush, don't tell Matthias, he'll disown me).
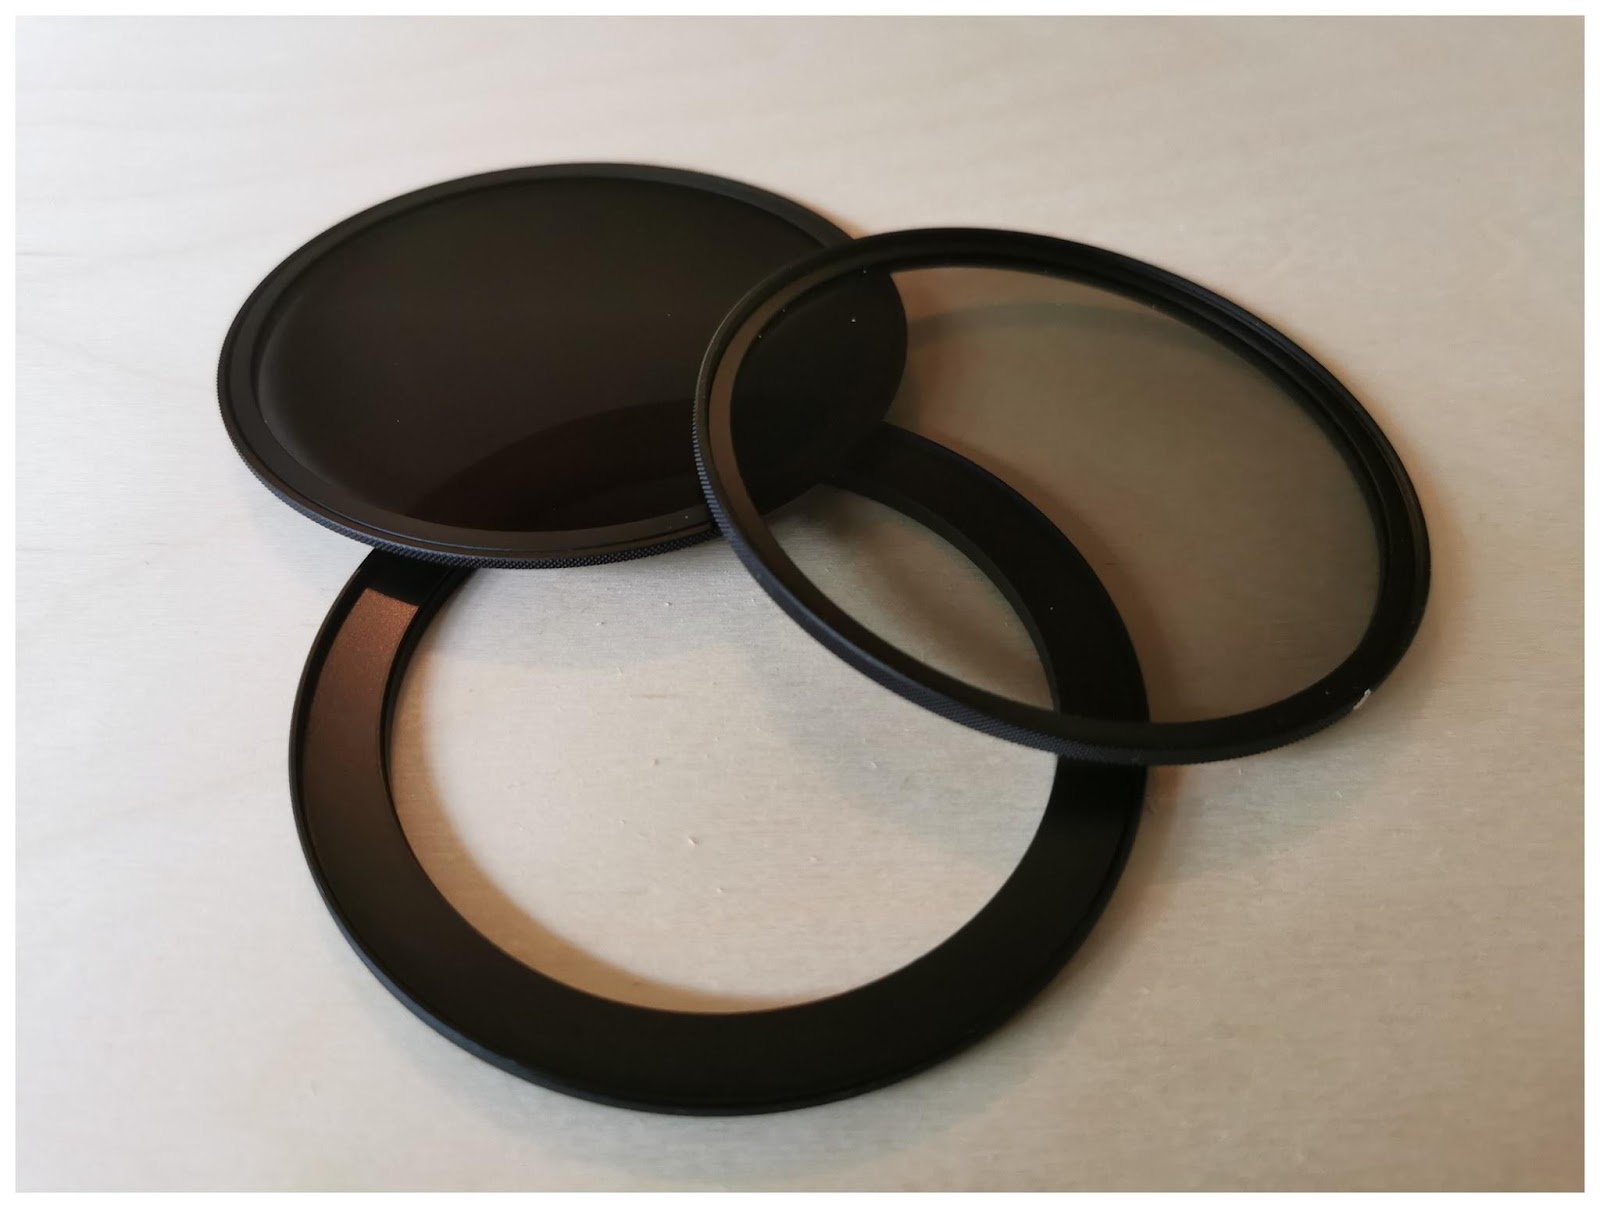
The handy alternative is the Kase Wolverine magnetic filter system. You screw a circular metal plate to the front of the camera lens and layer the filters you want in front of the plate. They stick to the plate using powerful magnets and stay reliably in place, even with the camera attached to my shoulder strap using the Peak Design capture system, though I would be wary of doing this when climbing. I absolutely love the ease of use of the Kase filters, the leather box fits conveniently in the side pocket of my lens bag and are always on hand. If I had two complaints, it would be that there's no marking on the CPL to tell me where the maximum filter mark is (I've overcome this using Tippex) and that I can't use the system in conjunction with my lens hood, which has lead to some sun-flare issues.
- Attachment ring, ND 8 filter and CPL
- Filters Stacked...
- ...and mounted
The first significant water fall in the gorge is just below the ticket booth. They charge € 3.50 to use the path along the gorge, perfectly fair in my mind as they do a fair amount of upkeep with railings and footings to keep you safe in very slippery conditions. The Starzlach Gorge isn't as well known or long as the Partnach Klamm near Garmisch or the Breitach Klamm near Oberstdorf, but it's an absolute delight with some very picturesque cascades. The gorge runs roughly from west to east if you want to bear this in mind for light direction. I usually find shooting gorges works best on overcast days where the clouds form a giant softbox, otherwise things can get very contrasty leaving you with completely burnt out or dark photos.
They also sell a local cheese at the booth. If you like character cheese, something which is normally quite hard to find in German supermarkets, get some. It has a wonderfully nutty flavour, like a good Emmentaler and you'll be supporting local farmers. There are a lot of local cheese sellers all around the Allgäu and we've yet to be disappointed by them.
 |
| Entrance to the Gorge || Olympus 13 mm, f/8, 2", ISO 200 |
The length of exposure under these conditions is purely a matter of taste. Some people don't care for long exposures at all, which is fair enough. I dislike long exposures of the sky with stretched out clouds. But I do like a wispy waterfall image. Depending on the speed of the water, generally anything from 1/5" up to about 5" should cover most eventualities. Most cameras would struggle with exposures like this hand held, but the Olympus have industry-leading IBIS - In Body Image Stabilisation, meaning that I can shoot around 2" and still come away with a sharp image, depending on the focal length of course.
 |
| Dual Flows || Olympus 12 mm, f/7.1, 1/2", ISO 200 |
Shooting in a gorge is usually from a narrow pathway and most people wouldn't take kindly to getting stuck behind someone setting up an unwieldy tripod, so generally you'll need to take most of your shots hand-held in relatively dark conditions.
 |
| Coffee on Tap || Olympus 100 mm, f/9, 1/2", ISO 200 |
Sometimes it isn't about getting the bigger picture, but about finding a detail that captures the mood of the place. This short drop in the water gave a nice little curve and helped emphasise the coffee colour in the water caused by all the recent rain that we've been having. The photos are all about balance and flow - images that aren't weighted down on one side or the other - which would be the result of a clean rule of thirds composition.
 |
| Gorge Bridge || Olympus 34 mm, f/6.3, 1", ISO 200 |
 |
| Deep Water || Olympus 24 mm, f/7.1, 1/2", ISO 200 |
Once we were out of the gorge there was time to look around a little more. The forest floor is really greening up right now, ferns are unfurling (I would have shot some as this is a favourite motif of mine, but I couldn't find any where I would have been able to get good separation between the foreground and background.
Separation was easier on these two members of the broader thistle family with its white seeds against the greenery in the background and isolated completely from the background with the macro lens.
 |
| Thistle Thingy I || Olympus 92 mm, f/4, 1/30", ISO 200 |
 |
| Thistle Thingy II || Olympus 60 mm, f/6.3, 1/200", ISO 200 |