Showing posts with label Olympus. Show all posts

Sunday 9 January 2022

Revisiting Old Haunts - A Winter Photography Guide to Füssen and Surroundings

I think we probably all have our favourite local places for photography. We're lucky where we are with my local little woodland and Lake Ammersee only 10 min away by car. One of my other go-to places for a day-long photo trip is Füssen, home to the (in)famous Castle Neuschwanstein. I've only been to the castle once, and that was before I was living in Germany, and I have avoided the area like the plague for a number of years, but as I've gotten back into photography, I've rediscovered the area and have gone back countless times, either to hike or just to blow away the cobwebs with camera in hand.

A Wintery Neuschwanstein || Olympus 34 mm, f/7.1, 1/80 s, ISO 200
I was at a bit of a loose end in the week after New Years, and one of the other photographers in the Munich Expat Photo Group reached out to me to see whether I wanted to join him for a day's shooting. We'd been trying to get together for quite a while and this seemed like a great opportunity to hit the trail, especially with the fresh snow and icy temperatures forecast. I think autumn and winter are my favourite times of year for shooting here, with the mixed forest providing some great colours and winter providing, well, none. 

Wintery Scenes || Olympus 35 mm, f/6.3, 1/15 s, ISO 200
We'd chosen our day well; it had snowed the day before, it was still cold and there was little wind to speak of, so there was a good chance of shooting with the snow still on the trees. Of course it's possible to shoot in winter without the snow on the trees, but I always find it to be too contrasty, unless it's something simple like a silhouetted tree against a beautiful sky. So fresh snow was looking good to (re-)capture some old favourites and take some new ones that have been on the list.

All of the photos shot here are within a 30 min walk from the respective car parks and should be well within the reach of most people. I would strongly recommend sturdy footwear, or even boots if you venture into the water as suggested below for some of the waterfall shots. 

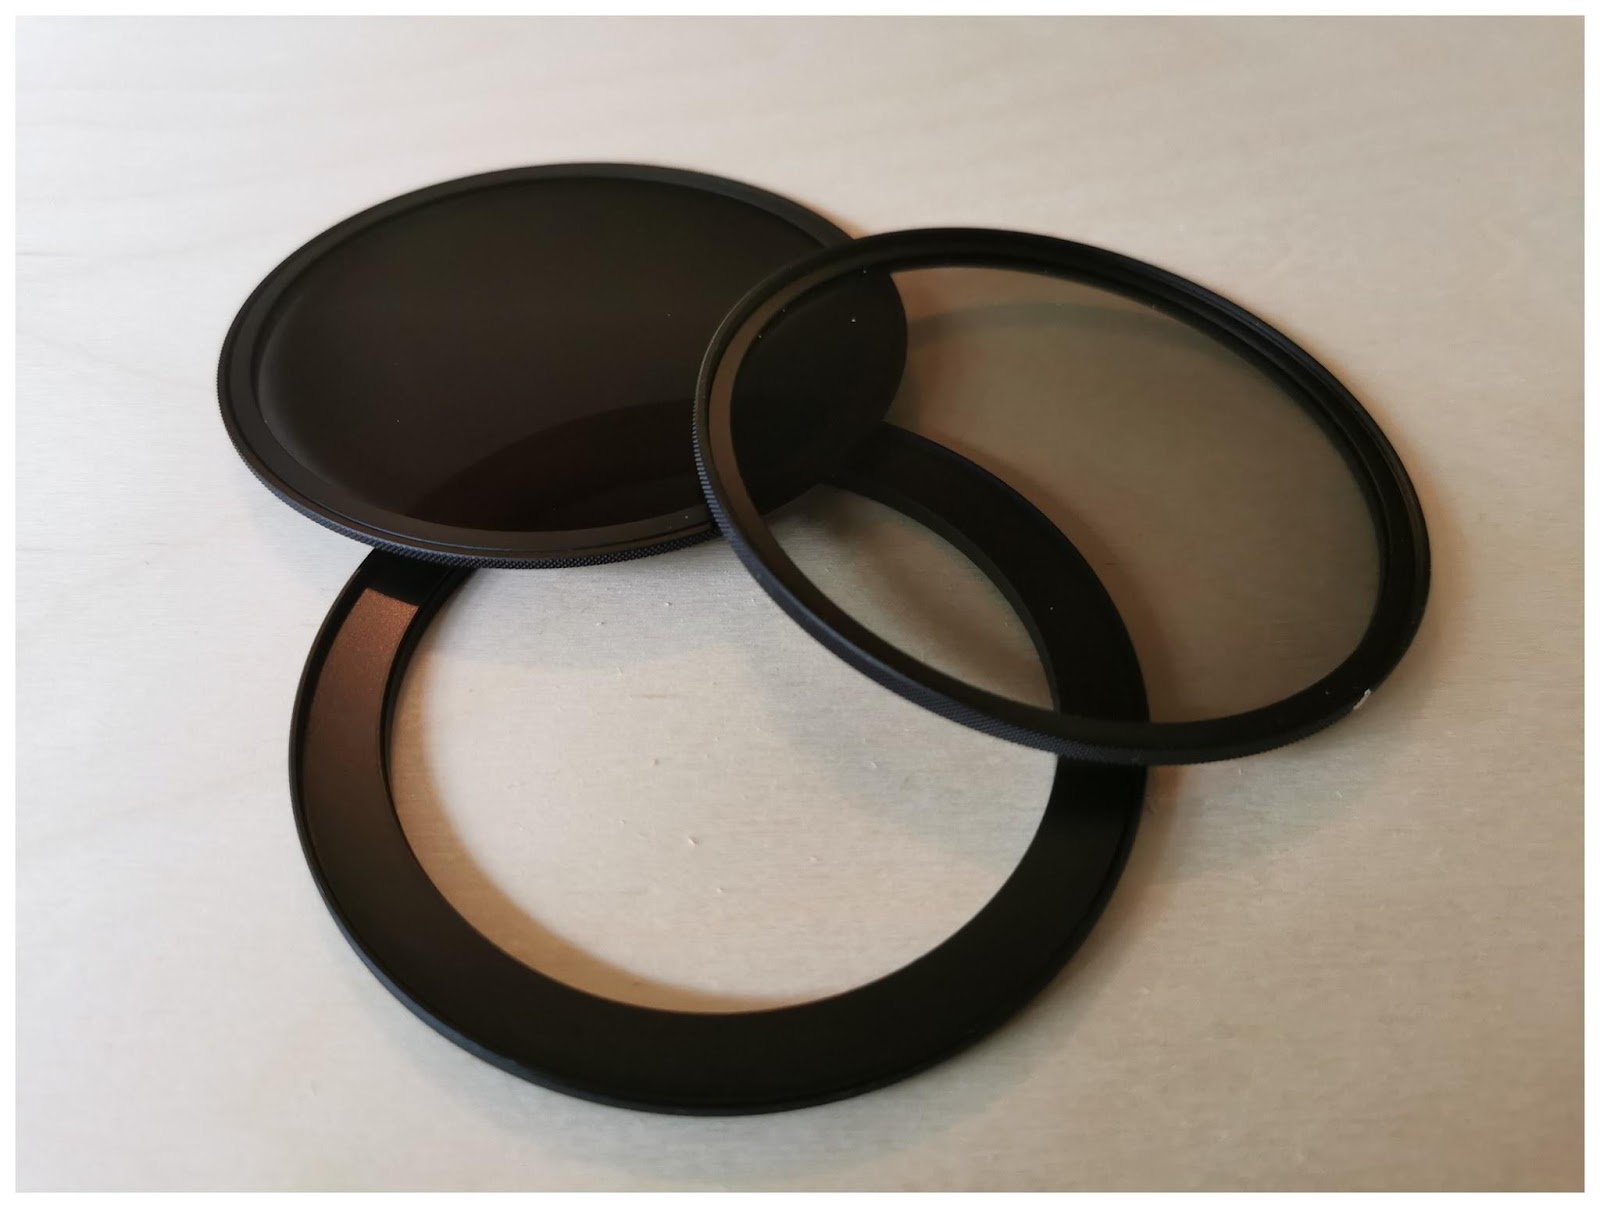
Alongside your camera, a tripod, polarising filter and even neutral density filter help, as well as spare batteries if your camera is susceptible to the cold.

St. Coloman Church

One of the images that has been on my list for a while is the church of St. Coloman on the flat valley floor below the castles. The snow simplifies this image beautifully, as does the hoar frost on the surrounding trees. This image was also a very interesting object lesson in the benefits of the Olympus hand-held high-res (HHHR) mode. The sky was very tricky here - quite bright even compared to the snowy foreground. The single-shot didn't leave much detail left in the sky. Enter Olympus HHHR. This puts the camera into overdrive, it shoots multiple (16) 20 MP images and assembles them together as a 50 MP RAW file in camera (there is also a tripod high-res mode which boosts the size to 80 MP with fewer shots). The process is relatively slow and no good for moving objects (think leaves or grass in the wind), but for scenes like this it works nicely. The trees here had obviously lost most of their snow already, but they'd picked up a bit of frost overnight (subtly enhanced in post-processing), rescuing the photo.

St. Coloman, Hohenschwangau || Olympus 41 mm, f/6.3, 1/100 s, ISO 200 
I don't often include the beta images here, but in this instance I will. Below is the original photo before editing (compare the sky) as well as a non-HHHR image where I've attempted to tone down the sky in ON1 Photo Raw and just got a muddy blur.

HHHR Unedited
Non-HHHR, Edited
This is definitely a first-thing-in-the-morning shot. Sadly, our lazy asses had missed the first colour of sunrise, but I'm still very happy with this photo, especially as there are no other vehicles in sight; often there are cars parked off to the left of the church. This morning there were no such obstructions.

Castle Neuschwanstein

After parking at the Tegelberg car park, we first headed up the trail to the Rohrkopfhütte. There are two vantage points for taking good photos of Neuschwanstein; the Marienbrücke above the castle (presently closed, due to re-open in autumn 2022) and the path up to the aforementioned hut. Reaching the vantage point for this photo entails a 30 min hike along well-trodden gravel paths; you don't need to do the full 90 min trek to the hut (though it's culinarily worth it, the hut has a good selection of food). If you're not going to go the extra mile, once you've seen this scene twice on successive switchbacks, that's it; there are no further shots of the castle to be had.

Greetings from König Ludwig || Olympus 80 mm, f/6.3, 1/100 s, ISO 200
Because you're looking westwards, it's normally best to shoot this scene early-ish in the morning with the rising sunlight on the face of the castle emphasising the red bricks, Whether you shoot wide or telephoto is up to you, but do be aware that you may encounter difficulties selling shots of the castle itself - the Bavarian Palace Administration is fairly strict about permission for commercial photos. 

There are some nice images to be had here of the larger picture - Füssen itself or even just a catch of some valley detail. With my m43 12-200 mm lens (24-200 mm in full-frame terms), I didn't need to change lens all day and can take the larger vista or pick out details like these lines in the landscape very nicely.

Füssen from the trail up to the Rohrkopfhütte || Olympus 29 mm, f/8, 1/125 s, ISO 200
Winter Lines || Olympus 100 mm, f/8, 1/125 s, ISO 200
Returning to the valley we came across this micro-scene underneath one of the snow canons in action. I love discovering little motifs like this and get more of a kick out of an original shot than the big well-known scenes; it's the reward of originality. This may even be one of my favourite images of the day.

Winter Gems || Olympus 47 mm, f/11, 1/5 s, ISO 200
Working the composition; Photo Mike Didrich

The Pöllat Gorge

Descending back to the Tegelberg car park, we took a left past the Reith Alm towards the bottom of the Pöllat gorge - always worth the detour. I swear that the gypsum mill at the bottom of the gorge looks more and more dilapidated every time I pass by. We didn't stop this time but bypassed the provisional barrier at the entrance to the gorge (as everyone else does) to get to the mill race. The gorge itself is closed again at the moment as it is extremely prone to rockfalls, but the best photos (IMHO) are to be found at the bottom of the gorge, with my favourite golden rock and the green pool below. I don't know what it is about the rocks in the eastern Allgäu mountains, but the water here is almost emerald. It seems to react with the rock as well leading to quite yellow colours, a really pleasing combination.

The Mill Race || Olympus 34 mm, f/5.6, 1/15 s, ISO 200
One of my favourite shots here is to the left of the mill race; a pool below a rock spout. Admittedly I've taken a little liberty with the colours here, but more a nudge than a shove, if you know what I mean.

Golden Trail || Olympus 61 mm, f/16, 4  s, ISO 200
There's one winter scene at the bottom of the mill race that has always eluded me; I've shot it several times, but it's never worked for me. I've been trying to capture it using Joshua Cripp's principle of identifying the element of a scene that first catches your attention and emphasising that in the photo using all the tricks of the trade - making the image a caricature of that aspect of the scene. The iced-up fallen branch is a real attention grabber and I want to make it part of the image. My companion for the day used another principle - eliminate all distractions, cropping out the branch and seemed to get an altogether more pleasing image (this is my version of that). Neither of them are going to end up in my personal gallery though.

Too Many Elements || Olympus 66 mm, f/18, 1 s, ISO 200
Simplifying the Scene || Olympus 100 mm, f/16, 15 s, ISO 200 

Icy Candelabra || Olympus 100 mm, f/16, 1/2 s, ISO 200

The Lech Falls

Mike (the other Mike) had indicated that he wanted to check out the Lech Falls whilst we were on site. It's not a subject that I'd normally shoot, but a while back I'd seen a cool shot of the falls with a cute wooden cabin above them. The falls are an artificial structure (probably why I don't relate to them very well), regulating the water flow through the narrow gorge just before Füssen. Don't forget to look down as you cross the bridge!

Into the Gorge || Olympus 12 mm, f/11, 1/15 s, ISO 200
We were surprised when we arrived to see a heavy flow of water coming over the steps, in fact there was so much that you could barely see the steps at all. Finding the angle to catch the falls and the hut proved almost impossible. I'll post the image that I managed to get here more for information than anything else. If anyone else can do better, I'd be very interested to learn where you shot it from (providing it wasn't a drone shot).

Lechfall || Olympus 12 mm, f/16, 1/2 s, ISO 200
The elusive cabin shot || Olympus 23 mm, f/16, 1/5 s, ISO 200

Stuiben Falls

The Stuiben Falls just outside Reutte (20 min away from Füssen by car) are one of my absolute favourite locations for a number of reasons; not too many people know about them, they're a bugger to find the first time you're there, but once you find out where they are, they're super accessible - just a 5 min walk from the car park over the bridge at the end of the valley. Lastly, the colours are superb, though I definitely need to get back here in deep winter with tons of snow and a bit more ice. To get the best out of these falls, you'll need a tripod and either a remote control / cable release or an on-board timer to enable you to take slow exposures, allowing you to capture the misty water flow. A special dark filter (GND) can help here as well. Depending on the effect you are after, I generally find a shutter speed of 1/5, 1/2, 1, 2 or 15 seconds gives satisfying results.

Looking down on the first section of the falls || Olympus 12 mm, f/16, 1 s, ISO 100
To get to the falls, walk behind the transformer field beyond the car park (over the bridge), cross the footbridge and you're there. The falls themselves break down into three sections in terms of photo opportunities; the first one is just over the footbridge. You can either drop down into the riverbed  and stone-hop to a suitable location (watch out for fluctuations in the water flow, especially if there's a storm over the Plansee) or shoot it from one of the platforms along the path. When shooting from the platforms, do watch out for any vibrations if you're using a tripod for long exposures. The grounding isn't as solid as it looks and if other people are walking nearby, you'll probably have to wait for them to pass before getting a crisp-sharp image.

Lower Falls Detail || Olympus 16 mm, f/11, 1 s, ISO 100
Section two is best shot from the narrow sloping bridge above the first falls looking east. Again, you'll need to coordinate with other people, whether fellow photographers or hikers. The bridge really is quite narrow and setting up tripods is not straightforward. A Gorilla Pod that you can attach to the handrail might even be a better option.

The Middle Falls || Olympus 21 mm, f/16, 1 s, ISO 100
Middle Falls Detail || Olympus 66 mm, f/16, 2 s, ISO 100
To get to the third section worth shooting, carry on up the trail for a couple of minutes until it levels off and you can drop  down to the stream. You'll then need to cross the stream (see caveat above) to look into a mini horseshoe falls. These work either as a detail shot or as a smaller element of the larger scene. Whichever it is though, make sure you have a polarising filter with you to cut out the surface glare.

Upper Falls - Detail || Olympus 31 mm, f/11, 10 s, ISO 100
Upper Falls - In Situ || Olympus 29 mm, f/9, 5 s, ISO 100

Other Locations

Under other conditions, it's often worth a trip to the Marienbrücke for a classic shot of Neuschwanstein with the Forggensee in the background.

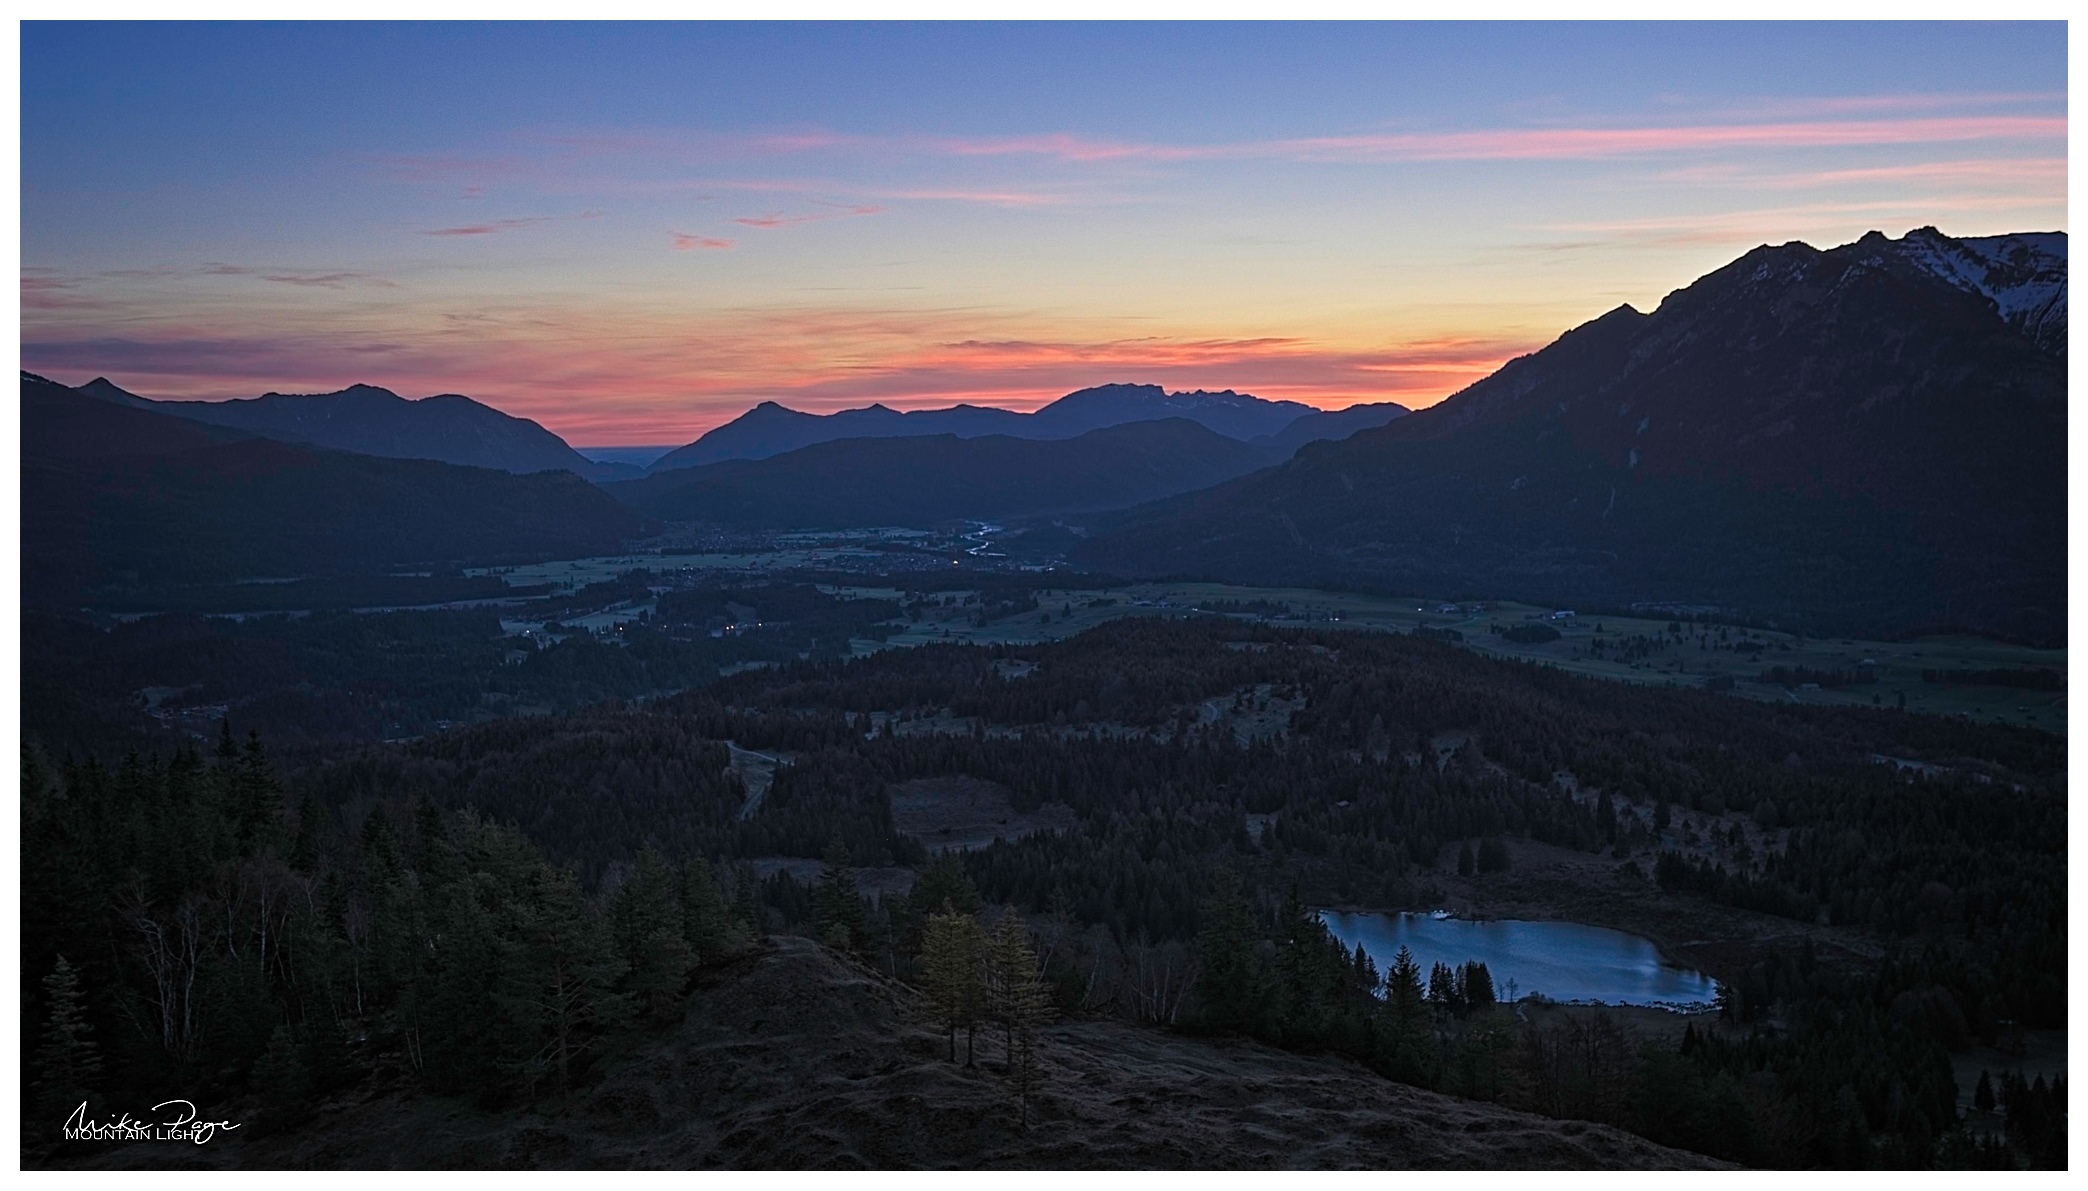
Plan A for the day had been to shoot sunset over the water or ice at Hopfensee, a charming location, if a little overrun with Influenzas these days for my tastes. The clouds had already come in though, so we decided to cut our losses and run.

Driving down to Füssen along the B17 there are a couple of spots along the road with vistas overlooking the Bannwaldsee. Given the right conditions (morning mist, evening colour), these spots can be worth stopping at too.

There are nice panoramas of Füssen and the Forggensee to be had from the top of the Tegernsee Cable Car. Be aware that you won't be able to see Neuschwanstein from here though.

Saturday 24 July 2021

The Best Laid Plans of Mice and Men

So I've been playing about a bit with PhotoPills recently, a really geeky photographer's planning App. There's a steep learning curve, but once you've got the gist of it, it's really quite useful, particularly for sun/moon-set/rise shots and astrophotograpy. I'm not a huge fan of shooting the full moon - it can be a bit bland because the crater shadows are so short (like shooting terrestrially at noon), but if the moon is positioned well, it can still give usable results.

Full Moon and Kloster Andechs | Olympus 400 mm, f/6.3. 1/2 s ± 2 stops, ISO 400
Back in June I already tried shooting the full moon rising behind Kloster Andechs, a local landmark. Unfortunately I got my planning slightly off, meaning that the moon was much further south of the monastery than I'd envisioned, it was a day past full moon due to cloud cover the night before and despite having clear skies at home, there was a cloud bank low on the horizon to the east, obscuring the view and it was quite dark.

Obscured by Clouds | Olympus 123 mm, f/5.7. 60 s, ISO 400
Back home I went over the PhotoPills planning again and found out what my problem was. There are a number of variables that have to be entered; position of the subject, position of the photographer, time, etc. The App determines the distance between the two as well as the elevation distance and you can then select the precise time at which the moon will be at the correct elevation and work out the optimal place to stand in order to fine-tune the position to shoot from. It turned out that I'd taken the elevation into account and then used the wrong line in the map - the one 

Come July and the full moon fell on a Friday again, always good for a late shoot, plus moonrise was 8 minutes after sunset, meaning that there would still be a significant amount of ambient light to shoot with; it wouldn't just be a bright moon against a dark background (🥱). Back in PhotoPills I realised that I'd forgotten all the steps necessary to plan the shoot, so it was back to their helpful YouTube tutorial for a quick refresher.

  1. Subject to be photographed
  2. Standpoint to shoot from
  3. Second panel of Planner
  4. Altitude difference standpoint ⇾ subject
  5. Dial in Moon height using time slider (8)
  6. Line indicating direction of moonrise
  7. Line indicating direction of moon at selected time
  8. Time slider (magnified view).

Slide the time slider back and forth to give the correct elevation to match the altitude difference (4) and then reposition the standpoint pin (2) to position the moon direction line (7). Simples!
Getting into position about a half-hour ahead of time we discovered that the place on the lake shore that we'd worked out in the App was obscured by 2 m high reeds and so we backtracked 150 m north to just outside the Wasserwacht by the Pavillion at Utting. Waiting for the moon to appear we scanned around us for other motives. The sky colours were getting really pretty and pastelly at this stage and so I whipped out the smartphone for this grab. Actually one of my favourite of the evening in the end.

Pastel Tones | Huawei P30 Pro Smartphone
Moonrise came and went and we didn't see anything. Check the App. Oh yes, we have to wait for it to rise sufficiently to be seen behind the 173 m higher horizon to the east. I'd figured that into the planning, but I'd been looking at the moonrise time rather then the time that I'd dialled into PhotoPills. Bang on 21:33 we saw a red-pink glow on the horizon north of the monastery. Our move to a clearer spot had pushed the moon further north than I'd hoped for.

Ah, There She Is! | Olympus 150 mm, f/5.7. 1/3 s, ISO 400 
Starting with the moon 'upstream' of the monastery was much better than downstream, however, since it could only move into constellation and not out of to start with. It was now a waiting game, waiting for the moon to come into a good position, adjusting the tripod position every now and then to make sure the reflection of the moon's light was unobstructed - it would have been messy to have it interrupted by the boats or jetty at this stage. Avoiding this meant repositioning the tripod every five minutes or so.

Moon and Andechs | Olympus 138 mm, f/5.7. 1/2 s, ISO 400

With  as spectacle like this, we weren't the only 'togs out of course. Not sure whether this chap was a planner or an opportunist staying at the local campsite. I always go out of my way and exchange a few friendly words with anyone out shooting. I seem to get two types of reaction; folks are either really ultra friendly and chatty or they give the impression that you're treading on their toes, poaching their photos. It isn't a competition and generally we can only learn from each other. I'm always happy to promote other's photos on social media too if I see merit that deserves sharing. We need to be building each other up, not tearing each other down.

Photographer's Paradise | Olympus 169 mm, f/5.8. 0.8 s ± 2 stops, ISO 400
As we watched the moon rise, we could see the transition in colour from red to orange to yellow. Just like the sun, the more atmosphere the light reflecting from the sun has to travel through, the redder it appears as the shorter wavelengths of light get bounced off into space. Now we could zoom in with the Olympus f/5.6 100-400 to catch a couple of full frame images. Believe it or not, I've toned down the saturation of the moon here as it looked simply too artificial.

Moon and Andechs: Exposure Blend | Olympus 400 mm, f/6.3. 0.8 s ± 2 stops, ISO 400
As the distance between moon and monastery increased, so the size of the two elements in the picture as I had to zoom out as well as the contrast in brightness as dusk slowly arrived. Our work here was done. Almost. Sharon actually spotted this composition of the light playing on the water next to the jetty. And with that we were done.

Moonglow Reflected | Olympus 400 mm, f/6.3. 1 s, ISO 400
Do you have a subject that you'd like to shoot at full moon some time? Want some help planning exactly when and where to stand to take that shot instead of using trial and error? Drop me a line and we'll see if we can set you up.


Monday 24 May 2021

Olympus IBIS + Kase Wolverine Filters = Dream Team

Oh, the best laid plans of mice and men... Originally we had planned to go up the Branderschrofen near Füssen today to scope some sites for the next astro shoot, but there's still a tad too much snow, the weather forecast wasn't really playing ball and we would have had to have tested to get on the cable car. Not really an issue, but a faff nevertheless. So instead we packed the car and headed off to the Starzlach Gorge near Sonthofen to stretch the legs and play with my new filters; the Kase Wolverine magnetic filters. I figured that if they're good enough for Nigel, they're good enough for me 😉. 

Hard and Soft || Olympus 44 mm, f/4, 1/2", ISO 200 
My previous filters were a set of Lee Seven5 90 x 75 mm rectangular filters with a traditional filter-holder. These were always such a fiddle to mount, plus the astute reader will remember from my comparison with the Kase system that as soon as you put the polariser on the front of the filters, the system becomes completely unusable at wide angle because you can see the filters in the corners of the photos. Well, more than the corners actually. In fact they were so unusable on a day-to-day basis that I did the unthinkable and bought myself a sneaky cross-pol variable filter (but shush, don't tell Matthias, he'll disown me).

The handy alternative is the Kase Wolverine magnetic filter system. You screw a circular metal plate to the front of the camera lens and layer the filters you want in front of the plate. They stick to the plate using powerful magnets and stay reliably in place, even with the camera attached to my shoulder strap using the Peak Design capture system, though I would be wary of doing this when climbing. I absolutely love the ease of use of the Kase filters, the leather box fits conveniently in the side pocket of my lens bag and are always on hand. If I had two complaints, it would be that there's no marking on the CPL to tell me where the maximum filter mark is (I've overcome this using Tippex) and that I can't use the system in conjunction with my lens hood, which has lead to some sun-flare issues.


  1. Attachment ring, ND 8 filter and CPL
  2. Filters Stacked...
  3. ...and mounted
The first significant water fall in the gorge is just below the ticket booth. They charge € 3.50 to use the path along the gorge, perfectly fair in my mind as they do a fair amount of upkeep with railings and footings to keep you safe in very slippery conditions. The Starzlach Gorge isn't as well known or long as the Partnach Klamm near Garmisch or the Breitach Klamm near Oberstdorf, but it's an absolute delight with some very picturesque cascades. The gorge runs roughly from west to east if you want to bear this in mind for light direction. I usually find shooting gorges works best on overcast days where the clouds form a giant softbox, otherwise things can get very contrasty leaving you with completely burnt out or dark photos.

They also sell a local cheese at the booth. If you like character cheese, something which is normally quite hard to find in German supermarkets, get some. It has a wonderfully nutty flavour, like a good Emmentaler and you'll be supporting local farmers. There are a lot of local cheese sellers all around the Allgäu and we've yet to be disappointed by them.

Entrance to the Gorge || Olympus 13 mm, f/8, 2", ISO 200
The length of exposure under these conditions is purely a matter of taste. Some people don't care for long exposures at all, which is fair enough. I dislike long exposures of the sky with stretched out clouds. But I do like a wispy waterfall image. Depending on the speed of the water, generally anything from 1/5" up to about 5" should cover most eventualities. Most cameras would struggle with exposures like this hand held, but the Olympus have industry-leading IBIS - In Body Image Stabilisation, meaning that I can shoot around 2" and still come away with a sharp image, depending on the focal length of course.

Dual Flows || Olympus 12 mm, f/7.1, 1/2", ISO 200
Shooting in a gorge is usually from a narrow pathway and most people wouldn't take kindly to getting stuck behind someone setting up an unwieldy tripod, so generally you'll need to take most of your shots hand-held in relatively dark conditions.

Coffee on Tap || Olympus 100 mm, f/9, 1/2", ISO 200
Sometimes it isn't about getting the bigger picture, but about finding a detail that captures the mood of the place. This short drop in the water gave a nice little curve and helped emphasise the coffee colour in the water caused by all the recent rain that we've been having. The photos are all about balance and flow - images that aren't weighted down on one side or the other - which would be the result of a clean rule of thirds composition.

Gorge Bridge || Olympus 34 mm, f/6.3, 1", ISO 200

Deep Water || Olympus 24 mm, f/7.1, 1/2", ISO 200
Once we were out of the gorge there was time to look around a little more. The forest floor is really greening up right now, ferns are unfurling (I would have shot some as this is a favourite motif of mine, but I couldn't find any where I would have been able to get good separation between the foreground and background.

Separation was easier on these two members of the broader thistle family with its white seeds against the greenery in the background and isolated completely from the background with the macro lens.

Thistle Thingy I  || Olympus 92 mm, f/4, 1/30", ISO 200

Thistle Thingy II  || Olympus 60 mm, f/6.3, 1/200", ISO 200

Thursday 13 May 2021

Twenty-Four Hours in the Mountains

New moon is upon us once more and I was itching to get out and test not only my E-M1 Mk III that I bought after the but also Move Shoot Move star tracker that would let me break the 25 s exposure limit that I was experiencing with my present set up.

Mittenwald and the Karwendel || 6-shot panorama, Olympus 8 mm, f/5.6, 1/500 s, ISO 200 
It's been a while since I was this keyed up for a trip of any sort and by Friday evening I must have had packed and unpacked my gear around 4 times already. Saturday morning and my rucksack was feeling suspiciously light. Huh? Oh yes, the all important camera gear bag. Phew.

It had been a couple of weeks since we'd had a leg-stretch and so Sharon and I set off for Garmisch after a comfortable breakfast on Saturday morning to hike up to the Hausberg. It had been raining on and off for the previous few days in Kaltenberg, but in the mountains it had been snowing. In the first light of sun, the tops were shining pristine and I was really excited about the night to come and the images we would hopefully be able to make. After last year's successes in the Allgäu I have absolutely fallen in love with taking photos in the mountains in early summer as the sun goes down. The snow fields radiate in the late evening light both before and after the sun goes down and I was trigger happy after a few weeks out of the field.

Wetterstein || Olympus 100 mm, f/8, 1/640 s, ISO 200 
The hike up the Hausberg afforded us occasional glimpses of the surrounding snow peaks but no real photo opportunities beyond the occasional spring flowers and a friendly squorrel. The saving grace of the tour was Weißbier and Wurst at the kiosk at the Bayernhaus. It's been too long! 

Alpspitz through the Trees || Olympus 57 mm, f/8, 1/500 s, ISO 200

Forest Foliage || Olympus 100 mm, f/8, 1/640 s, ISO 200

Friendly Squorrel || Olympus 100 mm, f/5.6, 1/160 s, ISO 200
We were at the Mittenwald car park 10 min after Matthias arrived - not bad considering the different journeys we'd had. Sharon then returned home complete with my woolly hat and thermos flask of hot tea (entirely my fault) whilst Matthias and I headed up the Kranzberg via the delightfully situated Korbinian Hütte. Although my shoulders were aching like heck at this point due to all the photographic gear and warm clothing I was carrying in my ancient Deuter rucksack, our spirits were still high at this stage as the clear skies looked set to last.

Korbinian Hütte and Karwendel Spitze  || Olympus 20 mm, f/5.6, 1/800 s, ISO 200
Unfortunately this wasn't the case and we arrived at the summit only to find clouds rolling in from the west. Although this might be fun for the sunset, it was not what we were looking for for the night. We used the time to set up the tripods and snap a few evening shots as well as taking a blue hour panorama of Mittenwald and the Karwendel that would later serve as foreground for the starry landscapes. We waited for the lights in the town to come out for this; a darkened-down shot of a light-less town would not look right and if we left it too late then the difference between the bright lights and the dark mountains would have been too much, plus the exposure would take several minutes at low ISO, time that we'd rather invest in the sky. The combination of sky and ground has to look natural for the photo to work.

Blue-Hour over Mittenwald || 6-shot panorama, Olympus 8 mm, f/8, 2 s, ISO 200
Now it was just a question of waiting for the clouds to go and the stars to come out. Olympus cameras have a built-in intervalometer and can automatically generate time-lapse videos from the shots. Here's my offering from the evening's shenanigans. I'd hoped to catch one of the Milky Way rising over the mountains as well, but failed in that undertaking. 

Video ©️ Mike Page and Rhage Designs

There were plenty of vistas to occupy us while we waited; the Kranzberg boasts a 360° view of the Karwendel and Wetterstein mountains and we must have been able to see at least 50 or more summits of the surrounding mountains. We left the tripods where they were; they were important markers for taking the later shots, and one was recording a time lapse. There was enough light left not to need them with the Olympus cameras anyway. What they lack in noise levels when you jack the ISO up they make up for in spades with out-of-this-world image stabilisation.

Solitary Pine || Olympus 86 mm, f/5.6, 1/200 s, ISO 200

Skeletal Birch || Olympus 80 mm, f/5.6, 1/6 s, ISO 200

Kranzberg Gipfelhaus || Olympus 15 mm, f/5.6, 1/1000 s, ISO 200

Austrian Karwendel || Olympus 50 mm, f/5.6, 1/250 s, ISO 200

Wettersteinspitze || Olympus 20 mm, f/5.6, 1/100 s, ISO 200

Sunset Silhouette || Olympus 100 mm, f/5.6, 1/400 s, ISO 400 
Unfortunately the clouds were teasingly reluctant. Although we could see a clear horizon to the west where the prevailing wind was coming from, the more it blew the more clouds seemed to appear. And Mittenwald is bright at night. Around midnight we began to see more and more stars appearing overhead, but the wind was increasing, the temperature decreasing and there were still bands of cloud over Munich, Mittenwald and Innsbruck that were robbing us of the darkness that you need for really good pictures of the Milky Way. I'd had high hopes of some cool blue-hour photos of the first stars over the Karwendel mountain range. They didn't manifest either.

Best of a Poor Sky || 2x6-Shot panorama, Olympus 8 mm, f/8/2.8, 1/640/25 s, ISO 200/3200
In the end I gave up around 12:30, giving it up as a bad job and retreating to the log cabin on top of the Kranzberg to shiver the night away on a hard wooden bench. Matthias stuck it out in the wind-shadow of the cabin and actually got a half-way decent shot of the arch of the Milky Way over the mountains during a 10 minute interval in the clouds, the composition that I'd been after. But even then, the galactic core wasn't popping the way it can sometimes and so I didn't berate myself for not having stuck it out. I was missing a vital bit of kit for getting a solid panorama anyway and I just wasn't feeling it after my hike during the day as well.

My sleep was interrupted around 4:00 am by a couple of revellers from the valley, who for some bizarre reason decided that the top of the Kranzberg was the ideal place to smoke some whacky baccy and sing badly to German rap blaring out of a ghetto blaster. They blinded Matthias' acquired night vision with a blast from their torch and generally annoyed us for 15-30 min before deciding that shorts and a hoody were insufficient protection from the elements and buggered off whence they had come. Good riddance.

We were up at 5:00 to catch a glimpse of first light. Of course all the interesting clouds had gone by this stage and all we were left with was that typical narrow but intense band of colour low on the horizon as the sun made its welcome face known.

Mountain Dawn || 3-Shot HDR Olympus 8 mm, f/5.6, 1/10 s, ISO 200

Pretty in Pink || Olympus 18 mm, f/5.6, 1/15 s, ISO 200
Matthias had one surprise composition left before we headed down to the car and home, an alpine meadow complete with wooden hay barn in front of the Wettersteinspitze. Another tricky exposure that I've had to exposure blend to make the barn visible against the bright snowy mountain.

Alm Landscape Underneath the Wetterstein || Exposure Blend Olympus 18 mm, f/8, 1/50 s, ISO 200
90 minutes later, after having been standing in the same clothes for 24 h we were back home in blazing sunshine. 

So was it worth it given the disappointing astro' conditions? Every trip like this I learn something. I don't always come away with the shots that I wanted. Sometimes (often) I come away with bonus images that I hadn't expected or even contemplated. So yes, I'm a better - or at least more experienced - photographer than I was this time last week and next time I'll be in a better position to get that shot.