Showing posts with label Tripod. Show all posts

Thursday 13 May 2021

Twenty-Four Hours in the Mountains

New moon is upon us once more and I was itching to get out and test not only my E-M1 Mk III that I bought after the but also Move Shoot Move star tracker that would let me break the 25 s exposure limit that I was experiencing with my present set up.

Mittenwald and the Karwendel || 6-shot panorama, Olympus 8 mm, f/5.6, 1/500 s, ISO 200 
It's been a while since I was this keyed up for a trip of any sort and by Friday evening I must have had packed and unpacked my gear around 4 times already. Saturday morning and my rucksack was feeling suspiciously light. Huh? Oh yes, the all important camera gear bag. Phew.

It had been a couple of weeks since we'd had a leg-stretch and so Sharon and I set off for Garmisch after a comfortable breakfast on Saturday morning to hike up to the Hausberg. It had been raining on and off for the previous few days in Kaltenberg, but in the mountains it had been snowing. In the first light of sun, the tops were shining pristine and I was really excited about the night to come and the images we would hopefully be able to make. After last year's successes in the Allgäu I have absolutely fallen in love with taking photos in the mountains in early summer as the sun goes down. The snow fields radiate in the late evening light both before and after the sun goes down and I was trigger happy after a few weeks out of the field.

Wetterstein || Olympus 100 mm, f/8, 1/640 s, ISO 200 
The hike up the Hausberg afforded us occasional glimpses of the surrounding snow peaks but no real photo opportunities beyond the occasional spring flowers and a friendly squorrel. The saving grace of the tour was Weißbier and Wurst at the kiosk at the Bayernhaus. It's been too long! 

Alpspitz through the Trees || Olympus 57 mm, f/8, 1/500 s, ISO 200

Forest Foliage || Olympus 100 mm, f/8, 1/640 s, ISO 200

Friendly Squorrel || Olympus 100 mm, f/5.6, 1/160 s, ISO 200
We were at the Mittenwald car park 10 min after Matthias arrived - not bad considering the different journeys we'd had. Sharon then returned home complete with my woolly hat and thermos flask of hot tea (entirely my fault) whilst Matthias and I headed up the Kranzberg via the delightfully situated Korbinian Hütte. Although my shoulders were aching like heck at this point due to all the photographic gear and warm clothing I was carrying in my ancient Deuter rucksack, our spirits were still high at this stage as the clear skies looked set to last.

Korbinian Hütte and Karwendel Spitze  || Olympus 20 mm, f/5.6, 1/800 s, ISO 200
Unfortunately this wasn't the case and we arrived at the summit only to find clouds rolling in from the west. Although this might be fun for the sunset, it was not what we were looking for for the night. We used the time to set up the tripods and snap a few evening shots as well as taking a blue hour panorama of Mittenwald and the Karwendel that would later serve as foreground for the starry landscapes. We waited for the lights in the town to come out for this; a darkened-down shot of a light-less town would not look right and if we left it too late then the difference between the bright lights and the dark mountains would have been too much, plus the exposure would take several minutes at low ISO, time that we'd rather invest in the sky. The combination of sky and ground has to look natural for the photo to work.

Blue-Hour over Mittenwald || 6-shot panorama, Olympus 8 mm, f/8, 2 s, ISO 200
Now it was just a question of waiting for the clouds to go and the stars to come out. Olympus cameras have a built-in intervalometer and can automatically generate time-lapse videos from the shots. Here's my offering from the evening's shenanigans. I'd hoped to catch one of the Milky Way rising over the mountains as well, but failed in that undertaking. 

Video ©️ Mike Page and Rhage Designs

There were plenty of vistas to occupy us while we waited; the Kranzberg boasts a 360° view of the Karwendel and Wetterstein mountains and we must have been able to see at least 50 or more summits of the surrounding mountains. We left the tripods where they were; they were important markers for taking the later shots, and one was recording a time lapse. There was enough light left not to need them with the Olympus cameras anyway. What they lack in noise levels when you jack the ISO up they make up for in spades with out-of-this-world image stabilisation.

Solitary Pine || Olympus 86 mm, f/5.6, 1/200 s, ISO 200

Skeletal Birch || Olympus 80 mm, f/5.6, 1/6 s, ISO 200

Kranzberg Gipfelhaus || Olympus 15 mm, f/5.6, 1/1000 s, ISO 200

Austrian Karwendel || Olympus 50 mm, f/5.6, 1/250 s, ISO 200

Wettersteinspitze || Olympus 20 mm, f/5.6, 1/100 s, ISO 200

Sunset Silhouette || Olympus 100 mm, f/5.6, 1/400 s, ISO 400 
Unfortunately the clouds were teasingly reluctant. Although we could see a clear horizon to the west where the prevailing wind was coming from, the more it blew the more clouds seemed to appear. And Mittenwald is bright at night. Around midnight we began to see more and more stars appearing overhead, but the wind was increasing, the temperature decreasing and there were still bands of cloud over Munich, Mittenwald and Innsbruck that were robbing us of the darkness that you need for really good pictures of the Milky Way. I'd had high hopes of some cool blue-hour photos of the first stars over the Karwendel mountain range. They didn't manifest either.

Best of a Poor Sky || 2x6-Shot panorama, Olympus 8 mm, f/8/2.8, 1/640/25 s, ISO 200/3200
In the end I gave up around 12:30, giving it up as a bad job and retreating to the log cabin on top of the Kranzberg to shiver the night away on a hard wooden bench. Matthias stuck it out in the wind-shadow of the cabin and actually got a half-way decent shot of the arch of the Milky Way over the mountains during a 10 minute interval in the clouds, the composition that I'd been after. But even then, the galactic core wasn't popping the way it can sometimes and so I didn't berate myself for not having stuck it out. I was missing a vital bit of kit for getting a solid panorama anyway and I just wasn't feeling it after my hike during the day as well.

My sleep was interrupted around 4:00 am by a couple of revellers from the valley, who for some bizarre reason decided that the top of the Kranzberg was the ideal place to smoke some whacky baccy and sing badly to German rap blaring out of a ghetto blaster. They blinded Matthias' acquired night vision with a blast from their torch and generally annoyed us for 15-30 min before deciding that shorts and a hoody were insufficient protection from the elements and buggered off whence they had come. Good riddance.

We were up at 5:00 to catch a glimpse of first light. Of course all the interesting clouds had gone by this stage and all we were left with was that typical narrow but intense band of colour low on the horizon as the sun made its welcome face known.

Mountain Dawn || 3-Shot HDR Olympus 8 mm, f/5.6, 1/10 s, ISO 200

Pretty in Pink || Olympus 18 mm, f/5.6, 1/15 s, ISO 200
Matthias had one surprise composition left before we headed down to the car and home, an alpine meadow complete with wooden hay barn in front of the Wettersteinspitze. Another tricky exposure that I've had to exposure blend to make the barn visible against the bright snowy mountain.

Alm Landscape Underneath the Wetterstein || Exposure Blend Olympus 18 mm, f/8, 1/50 s, ISO 200
90 minutes later, after having been standing in the same clothes for 24 h we were back home in blazing sunshine. 

So was it worth it given the disappointing astro' conditions? Every trip like this I learn something. I don't always come away with the shots that I wanted. Sometimes (often) I come away with bonus images that I hadn't expected or even contemplated. So yes, I'm a better - or at least more experienced - photographer than I was this time last week and next time I'll be in a better position to get that shot.

Monday 15 February 2021

Winter Sundowner at the Ammersee

I have the enormous privilege of living about a 10 min car ride from one of Bavaria's most picturesque lakes, the Ammersee. We've seen it in all conditions, from balmy sunny evenings, after torrential rain with mosquito plagues, autumn storms with huge waves and speeding kite surfers to completely frozen over in 2006. Working from home it's really easy to get there for a quick excursion. Although it's really chilly here at the moment - we're talking negative double digit Celsius - I was really surprised not to find more ice when I took off after work on Friday afternoon to check it out. Dawn that day had been really pretty and I had high hopes for the sunset despite the lack of significant cloud.

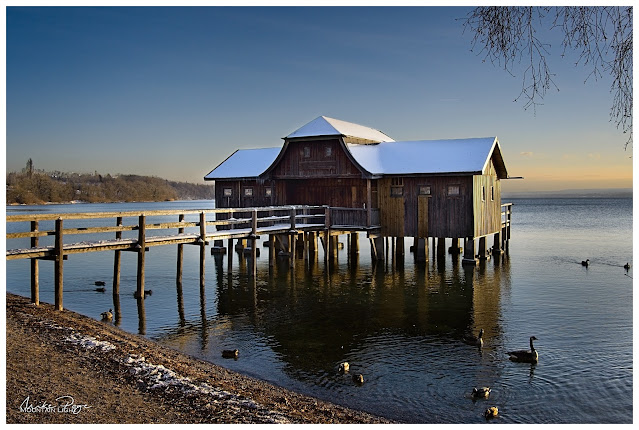
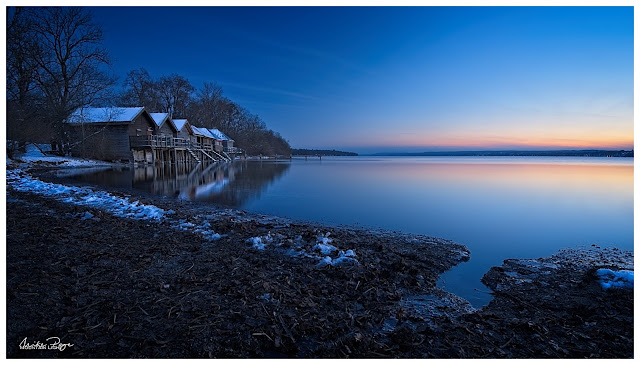
The Boathouse at Stegen I || Olympus 12 mm, f/4, 15 s, ISO 200 
Dressing up warm is critical in conditions like this. I knew I was going to be spending quite a while outside and so I put on downhill ski trousers over my jeans, heavy mountain boots with a second pair of socks, a windproof jacket, scarf, woolly hat and my latest acquisition, my Vallerret Markhof Pro 2.0 photography gloves. These are great thick gloves with foldable tips on the index fingers and thumbs allowing you to access all the necessary dials and buttons on the camera without exposing your whole hand. The finger tips fold back on strong magnets hidden unobtrusively within the fabric to keep out of the way.

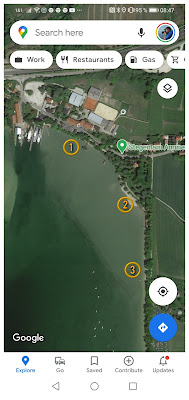
I've included a screenshot of a Google map of Stegen (am Ammersee) detailing where each shot was taken in case you're interested. For more original ideas and inspiration regarding where to shoot at the Ammersee, Google images of the Ammersee or check out some of the local photo websites, such as Werner's Fototräume (also great for other photo spots in the vicinity).
Photo Locations from this Blog


The Solitary Boathouse at Stegen (1)

Arriving at the car park as most people were beginning to leave - not that the car park was very full anyway (had I mentioned how nippy it was?) - I was at first disappointed at the lack of ice, but I'd had the foresight to bring my neutral density filters and was confidant that I'd be able to get a few decent images out of the evening.

The Boathouse at Stegen II || Olympus 16 mm, f/8, 1/50 s, ISO 200
Once you get past the restaurants, the first landmark is the boathouse next to the beer garden. Always a thankful motive in the evening sun. The light was quite challenging so I slipped the Olympus into exposure bracketing mode and hand-took this image. It's not an HDR, but it is an exposure blend, with the sky, water and boathouse are all taken from separate images and assembled in ON1 Photo Raw - though any decent processing software will do the trick.

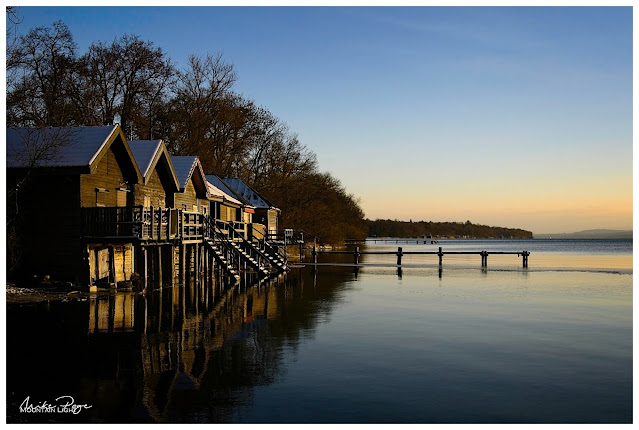
Boathouse Row at Stegen (2)

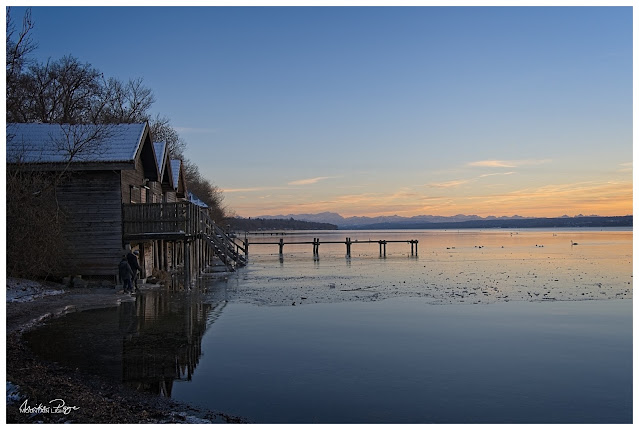
The second landmark is the row of boathouses with the Wasserwacht or lifeguard station. Again, sunset is always kind to these huts as you can see here. Whether or not you use the shoreline as a curved leading line is entirely up to you. On a clear day, the Alps form a pleasing backdrop to the right inviting you to taking a wider panorama. This time I had to be content with a pleasant orange glow on the horizon, which also works. The way the trees echo the line of the houses and the reflection all emphasise the structures in the scene.

Boathouse Row I || Olympus 23 mm, f/8, 1/125 s, ISO 200

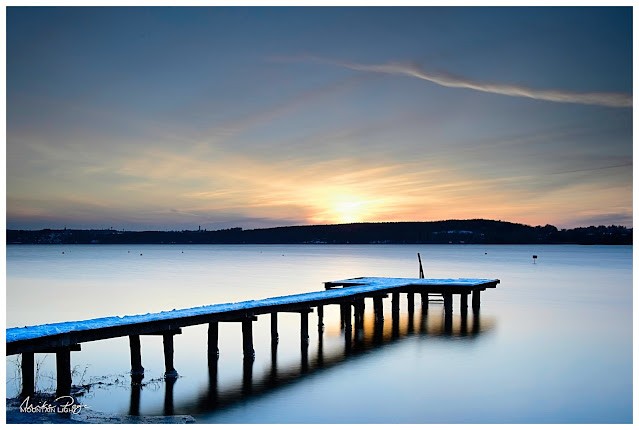
The Jetty at Stegen (3)

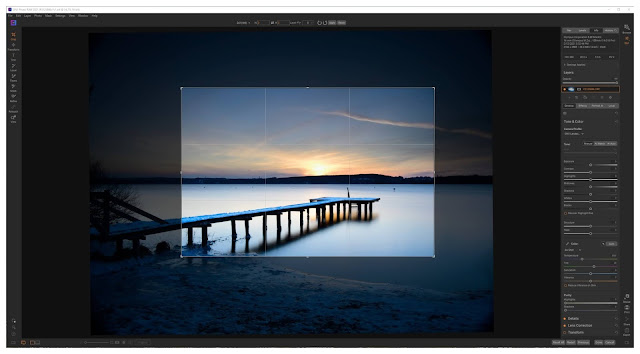
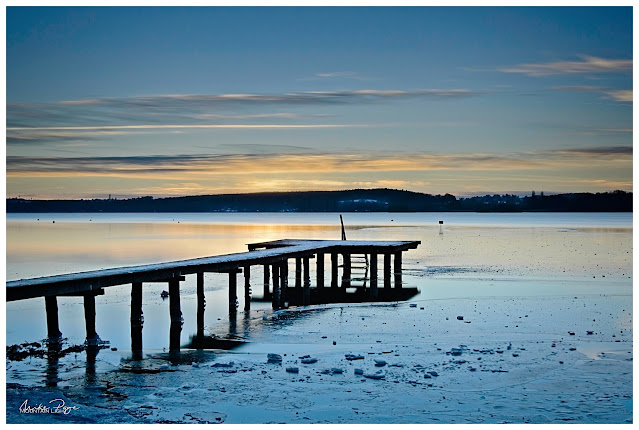
The third stop and my actual destination was the background jetty in the photo here. The jetty leading from the beach huts doesn't work as there are no crosspieces down at the moment and looking along it you just get a wooden skeleton. I took my time setting up for this shot. At other times of the year you can line up the jetty pointing at the sun, but in February that's just not going to work. In order to bring a connection between the elements I elected for this 'compromise', placing the setting sun just over the end of the jetty. Tripod out, filters out. Assemble everything together, careful not to zoom out too far as my filters tend to vignette below about 14 mm. It was here that I noticed that the L-bracket had come loose. The clever people at Vallerret had anticipated this eventuality though. The back of each glove has a little pocket that you can stuff things like lens cloths in. The left pocket comes with a tripod key on a lengthy lanyard and so instead of having to fumble around in the fading light for the necessary tool, it was literally to hand.

You can see from the previous shot of the huts that the although the water near the shore was protected and relatively flat, further out the wind was ruffling the surface. In order to reduce the impact of the phenomenon it was time for the Big Stopper, an almost opaque piece of glass that goes in front of lens to reduce light, turning a 1/60 s exposure into a 20 s exposure, the minimum that was needed to iron out those waves. The almost direct sun was a bit of a problem so the next tool in the bag was the graduated filter. This is less dark than the Big Stopper but is gradated, one half being clear and the other darker for bringing down dark skies.

The Jetty I || Olympus 16 mm, f/5.6, 20 s, ISO 200
Processing-wise there wasn't a lot to do here. I've further darkened the sky and actually de-saturated it a bit to make the colours more pastel. I've done my usual trick of actually brightening the snow on the jetty to emphasise the line. As long as you don't blow the exposure, this is a really great technique to make an image stand out that I discovered when astro-shooting in the Alps in the early summer and revisited in my November edit of an image of the first snow of the season. They say that a good photo has rhythm - a difficult thing to define. One of the things I like about this photo is the repeating structures of the lines which are nicely parallel, from the jetty to the clouds and contrails (remember them?).

I shot quite a few of this scene as the sun sank below the horizon, but I think this one was the best of the set. There are always going to be shots that are blurred due to slight movements of the tripod, so shoot a few and sort out the best when you get back to the warm.

Back to Boathouse Row (2)

With the sun well and truly set it was time to start walking back to the car. A couple more 'togs were lingering around the boathouses and so I stopped to scout around to see what the fuss was about. I found this tiny inlet in the shore that caught my interest. Not a classical leading line, but it still takes the  viewer's eye in the right direction. I went as wide as I could, having put the Panasonic Leica 8-18 mm on the camera for this shot. The tripod was set low to the ground too.

Boathouse Row II || Olympus 8 mm, f/4.5, 5 s, ISO 64
Satisfied that I'd got the best out of the boathouses for the day I combed the beach back towards the restaurants. The sky still had a lot of interesting colour in it and it looked beautiful above the docked pleasure steamers at Stegen. Unfortunately, looking beautiful doesn't always translate to a great photo. I took a few, but none made the cut.

The Solitary Boathouse Revisited (1)

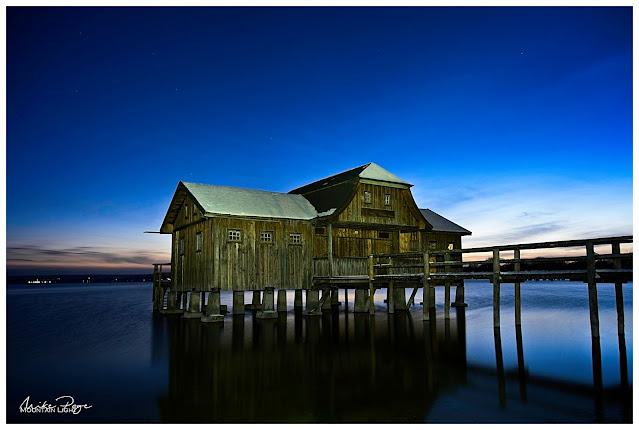
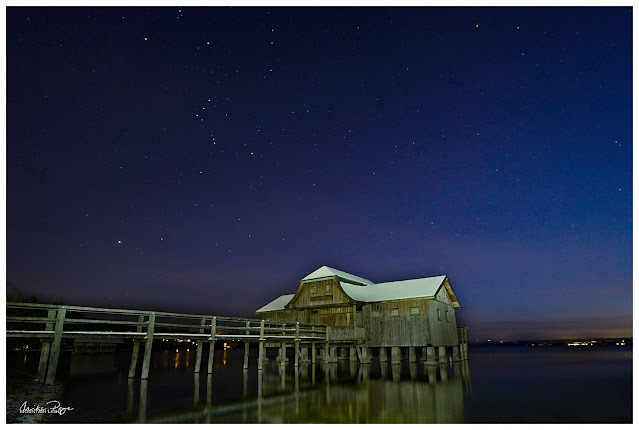
The last port of call was the original boathouse. By now, even though there was still a bit of colour in the sky, it was getting quite dark. But I'd come prepared with both my LumeCube panel and a head torch. The panel didn't like the cold very much. Even though I'd charged it completely before coming out it was only showing 30% power, plus it wasn't really cutting through the dark as I'd hoped. It wasn't the light source for the job. Fortunately the head torch was. My first image was from the east looking towards the sunset (first photo above). You can imagine from the photo why a little extra illumination was necessary. The light beam from the torch was quite narrow and so I waved my head back and forth over the wooden structure over the whole 15 s exposure. If you look carefully you can see the first stars beginning to appear in the sky. This for me is the magic window of light for photography - enough ambient light to be able to see features on the ground, the first stars visible and with a bit of colour in the sky from the setting sun. As you can imagine, it's a very narrow window, but if you get it right you can get some stunning images.

The Boathouse at Stegen III || Olympus 12 mm, f/4, 20 s, ISO 400
This last image is from the other side of the boathouse as the light was really fading. Again the boathouse was lit by my head torch. By playing around I found that if I illuminated for 10 s out of a 20 s exposure the light on the house was about right, though I did adjust it a bit in post - it's always difficult to accurately assess exposure in the dark as the camera screen always looks comparatively bright unless you dim it down. Keeping an eye on the histogram can certainly help, but here it was tricky to judge exactly how much light to add. I was certainly glad of the Vallerrets at this point. I really didn't want to have to be taking gloves on and off to fiddle with the settings in those temperatures.

I love how prominent Orion's Belt is in the winter sky here. Given the wide aperture I was surprised that the stars were as sharp as they have turned out here. That's micro four thirds cameras for you.

If you're local to us in Bavaria and are interested in a pair of Vallerret Markhofs, size L, drop me a line. They were just too small for me and I had to go XL. They're out of stock with Vallerret at the moment so if you want to do some winter photography this season I can warmly recommend them.

Afterword - If At First You Don't Succeed

A couple of the photography YouTube greats have recently released vlogs saying essentially the same thing. The one thing that will advance you as a photographer more than any other, the golden lesson of photography is... ...perseverance. I've had a couple of opportunities to practice this discipline over the last 12 months, whether the various attempts at astrophotography or trying again and again to get the right conditions on the covered bridge at Bad Hindelang, and every time it has paid off in spades. There were a couple of issues with the photos I took on Friday. I was especially unhappy with the photo of the jetty; the composition was off meaning that I had to heavily crop the image to get one that I was happy with and the aperture was so wide open that the depth of field was too narrow to catch the background ridge in focus (below). So tonight I returned, wife and girl-child in tow, to try and rectify my errors.

Reducing a picture to the essential elements

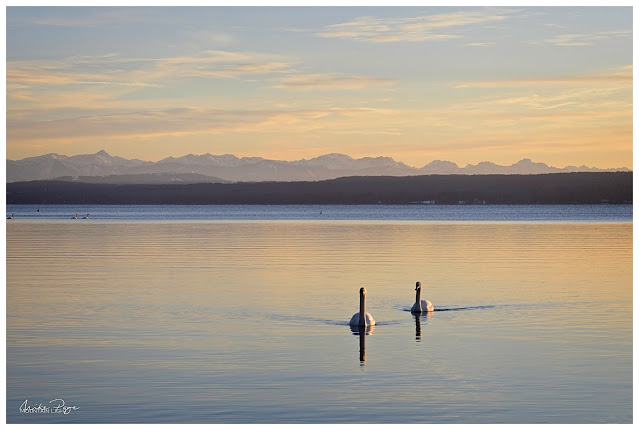
Valentine's Swans || Olympus 57 mm, f/8, 1/125 s, ISO 200
This time the view to the mountains was clear and there was some ice forming on the still water in front of the row of boathouses. On top of this, there were multiple pairs of swans on the water - how aposite for Valentine's day. I allowed myself to be distracted by both the birds and the boathouses before hurrying down to the jetty. I got a better crop, but the bitty ice detracts from the simplicity of the previous image and a lot of snow had gone from the jetty.

Boathouse Row III - HDR || Olympus 17 mm, f/8, 1/80 s, ISO 200 
This time I could get the composition and focus fixed on the jetty... ...but the ice is too gritty after kids were playing on it all day and the colours in the sky weren't quite as good. But hey, ho.

The Jetty II || Olympus 24 mm, f/8, 10 s, ISO 100
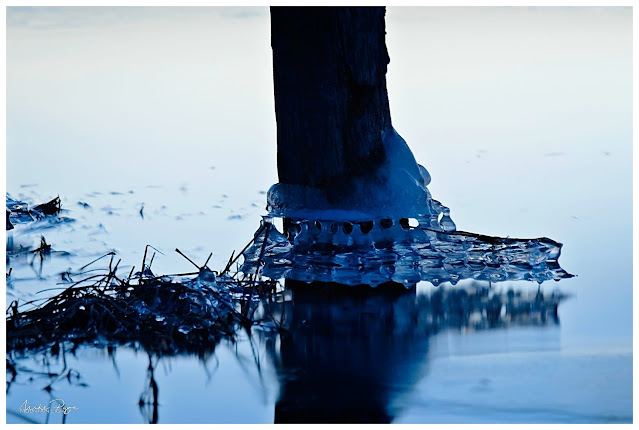
It's always a good idea to look around even when you've got a specific composition in mind. Ice had formed around the legs of the jetty and the water level had subsequently decreased, leaving these feet around the bottom. Against the light they formed an interesting sculpture.

Icy Foot || Olympus 86 mm, f/4, 50 s, ISO 100
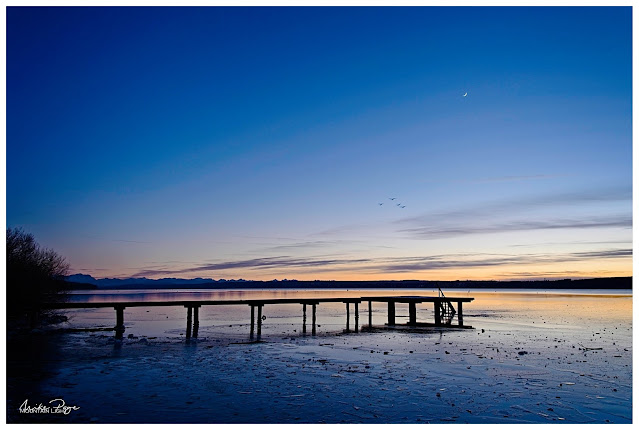
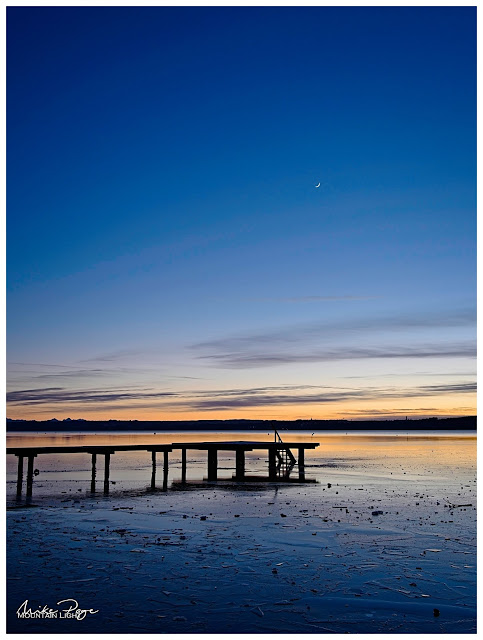
And then the new moon revealed itself in the southwestern sky, giving me a chance to try another composition with the jetty including the mountains in the background...

The Jetty III  with New Moon and Swans || Olympus 14 mm, f/8, 1/10 s, ISO 100

The Jetty IV || Olympus 17 mm, f/8, 5 s, ISO 100
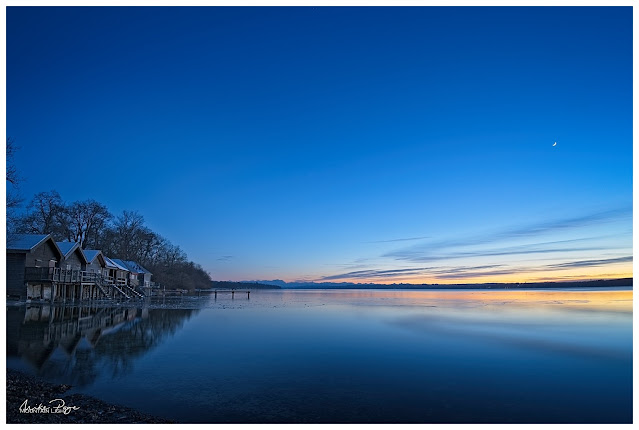
...and yet another with the boathouses before I was dragged back to the car by my half-frozen ladies. But I had promised them that we wouldn't stay too long and I was happy enough with the blue-hour photos from Friday. 

Boathouse Row IV || Olympus 8 mm, f/8, 5 s, ISO 100

Lessons Learned

Every time I go out I make mistakes. Every time I make mistakes I learn something. On Friday I learned about the best composition for the jetty. On Sunday I learned more about the Olympus high res mode and that patience is required when using it in conjunction with long exposures. A couple of times I thought it had crashed, when in fact it was just taking its time. Because I thought it had crashed I turned the camera off mid-processing, leading to me losing the first 2 or 3 high res shots. This mode is also too slow for lunar photography in combination with these long exposures - the moon simply moves too fast. Fewer mistakes to make next time.

Photography is like sailing or hiking. In fair weather it's easy. Mistakes are easily rectified, items are easy to find in rucksacks, etc. But the practice of doing those mundane things in straightforward conditions pays dividends when the going gets tough. When it's so cold that you can't think straight. When it's so dark that you can't remember where you put that filter. When the conditions are changing fast and you need to access a particular function on the camera, if you don't have the fair weather experience to fall back on, you'll just go home frustrated. If you want to be a good photographer, if you want to come home with the great photos taken in challenging conditions, practice all you can. You will be rewarded.

Tuesday 3 November 2020

Sunset From The 'High Ridge'

Matthias' message warning me that the forecast was set for sensational sunsets at the weekend reached me on Thursday evening. At the same time he informed me that he was waiting for confirmation that he hadn't been infected by a colleague and so we'd have to play it by ear. In the meantime: where to go to catch the spectacle? I immediately recalled a tour that we'd done as a family earlier in the year in the western Allgäu mountains and where we'd had an uninterrupted view towards the Säntis in the north-eastern corner of Switzerland.
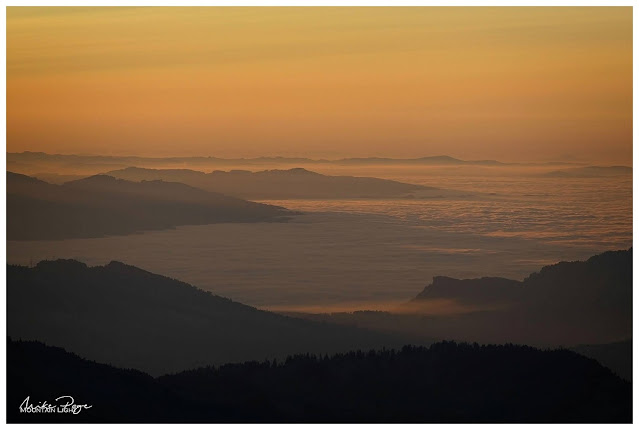
Cloud Inversion over Lake Constance || Olympus 100 mm, f/8, 1/100 s, ISO 200 
Looking through our hiking book for the Allgäu, Sharon found a suitable looking tour just north of our previous jaunt, involving the summit of the Hochgrat. Looking it up online, I noticed that they had a cable car up to a few meters below the summit with a mountain restaurant and that they were advertising late opening due to the full-moon. Slowly a plan was forming in my mind involving an epic sunset shoot followed by some cool blue-hour photos by moonlight.

By Saturday morning, Matthias still hadn't received the all-clear, so we reluctantly decided that we would be better off going our separate ways this time - a decision that I don't think either of us regret given the images we were able to capture. Given the fact that we were planning a relatively late shoot, we weren't in a hurry to leave on Saturday morning. 
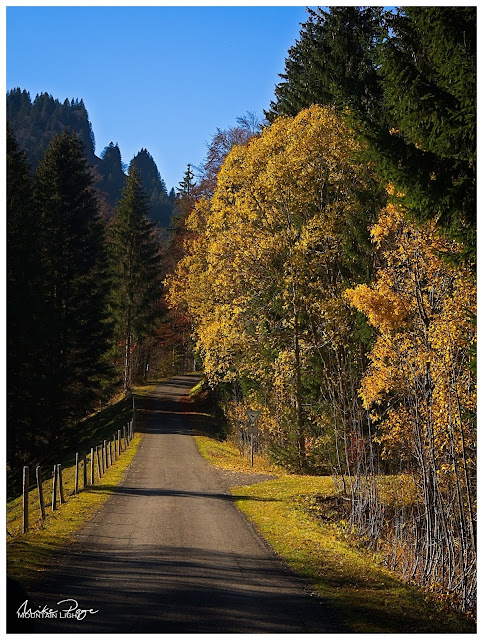
Into the Aubach Valley || Olympus 44 mm, f/8, 1/160 s, ISO 200
We'd planned to park well up the Aubach valley at the Alpe Scheidwang, but after having have to wait for a small herd of cows to be ushered down to their winter quarters (the Alpine 'Almabtrieb' tradition - usually quite a photogenic event) we drove up to the bottom of the toll road to find it closed for the winter already. This put 8 km (5 miles) onto both ends of the walk, but we weren't going to be put off so easily.

The Aubach valley is delightful and full of deciduous trees. Unfortunately we were a few weeks too late for the best colour ('peak fall'), but we were still treated to a few last silver birches glowing golden in the afternoon sun. The polarising filter really brought out the sky's colour, bringing the cirrus clouds drifting overhead into stark relief.
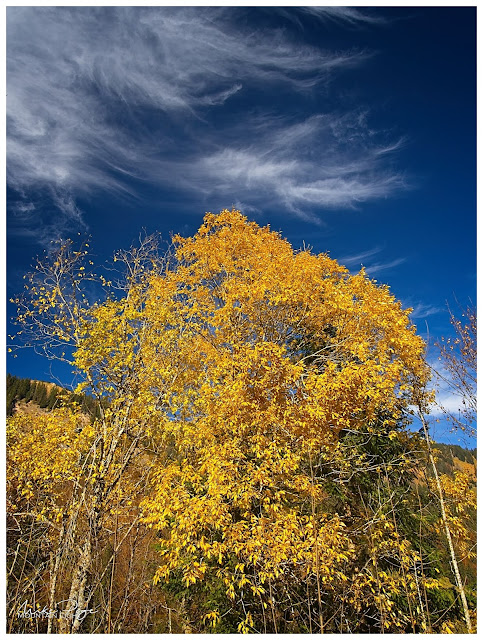
Golden Silver Birch || Olympus 12 mm, f/6.3, 1/125 s, ISO 200
The unexpected extra mileage meant that we didn't have much time to enjoy the valley, but there are a number of waterfalls left and right of the trail that would warrant a more leisurely investigation another time under the right conditions. The live ND function on the new Olympus makes shots like this child's play (if you can find them that it). The on-board computer can simulate a 5-stop light reduction.
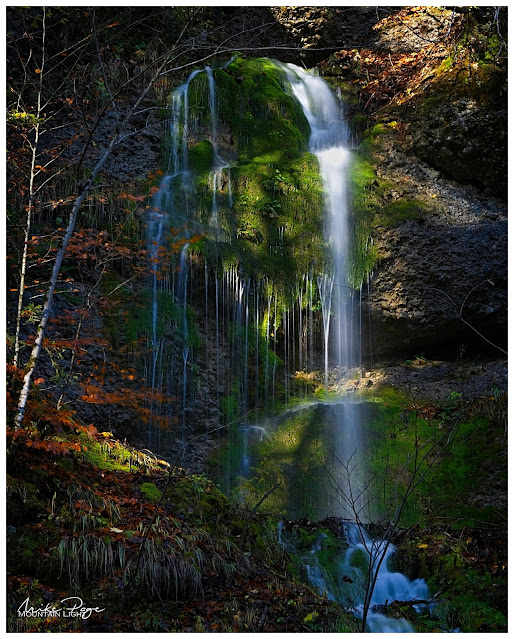
Roadside Waterfall || Olympus 61 mm, f/8, 1 s, ISO 200
One of the Olympus features that caught my attention and caused me to opt for this system over say those of Fuji, Sony, Canon or Nikon was the image stabilisation - an exceedingly clever system that compensates the movement of the photographer and enables you to still get remarkably sharp photos. The shot above, for example, is a 1 s exposure. As a rule of thumb, without any stabilisation (unless you have a really steady hand) is that the shutter speed shouldn't exceed 1/focal length (e.g. 1/50 s for a 50 mm lens). Being able to take shots like this hand-held is a huge advantage. Add to that the brand new in-camera ND filter (neutral density - a darkened filter that is pure grey) and you've got a winner. The Olympus E-M1X had this and so does the new E-M1 Mk III, of which I have been a very happy owner for about a month now.

Climbing out of the valley towards the ridge and our destination - the 1834 m high Hochgrat - the snowy tops of the inner-Alpine peaks began to show themselves. The previous morning there had been snow even on the northern edge of the Alps and there were signs of fresh snow, but they quickly disappeared over the course of the day. As we climbed out of the valley and could peer over the edge we could see that the main Alps hadn't shed their white blanket so easily.
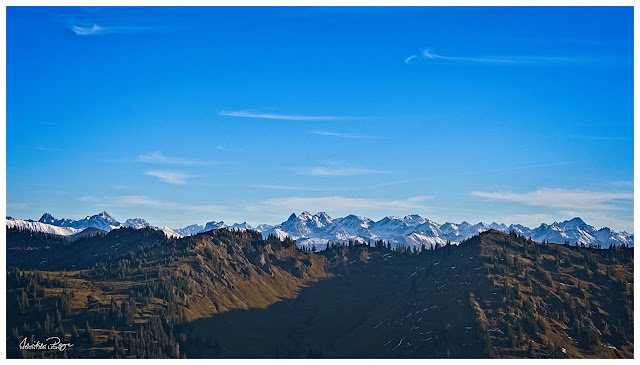
Peeking Over The Edge || Olympus
As we climbed towards the ridge, it wasn't only more mountains that we could see, but more people as well. There's a cable car that runs up to a point about 80 m below the summit starting near the town of Oberstaufen on the other side of the mountain to where we started from. Due to the full moon, the cable car was running until 21.00 and a lot of people were understandably making the most of the last Saturday before the renewed lockdown to tank up on fresh air.

Catching the Sunset

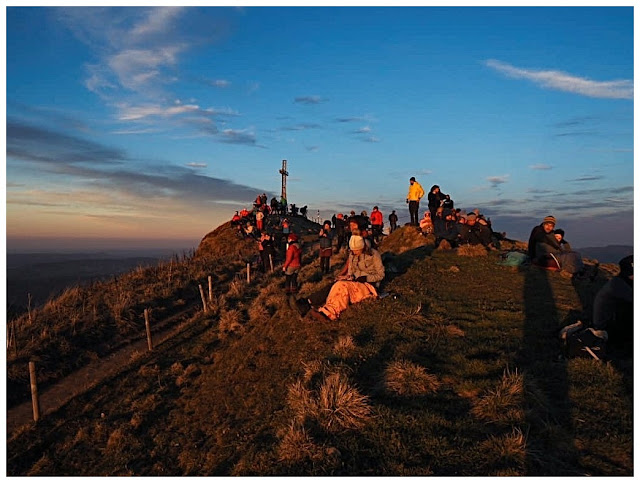
Despite the larg(ish) numbers of people, there was plenty of room on the summit to settle, grab a snack and wait for the ensuing spectacle. There wasn't as much high cloud as there had been the previous evening, but the remnants of cirrus clouds, particularly on the western horizon, gave us hope. Although I'd deliberately chosen a spot on the very edge of the summit and demonstrably got my tripod out and ready, it didn't stop another photographer from setting up between us and the sunset. To be fair, he probably hadn't noticed me - my tripod was out but not extended, but it still left me fuming at him (silently of course, I am British after all) and so I demonstrably set up just left of him as we waited for the show to start.
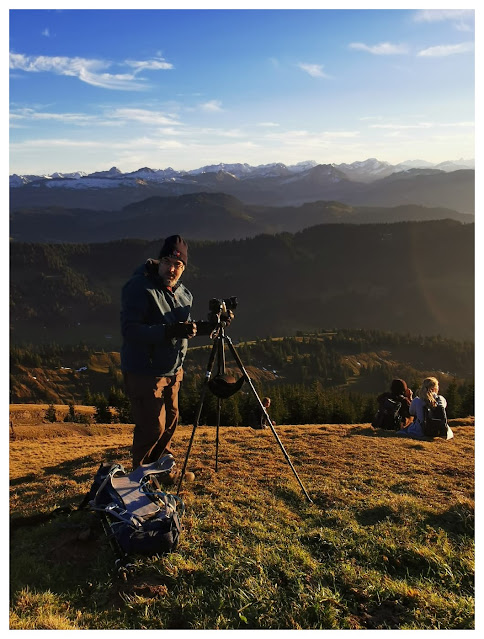
Waiting for Sunset || Credit: Sharon Page, Huawei p30 Pro
As well as the main view in front of us, the slowly setting sun was beginning to light up the bigger mountains of the Allgäu in a very alluring fashion. Taking panoramas like this I'm always torn between the bigger picture and detailed shots of individual mountains and larger panorama shots. I must have swapped between the 12-100 mm and 8-18 mm lenses half a dozen times as the evening progressed, depending on how the fancy took me.
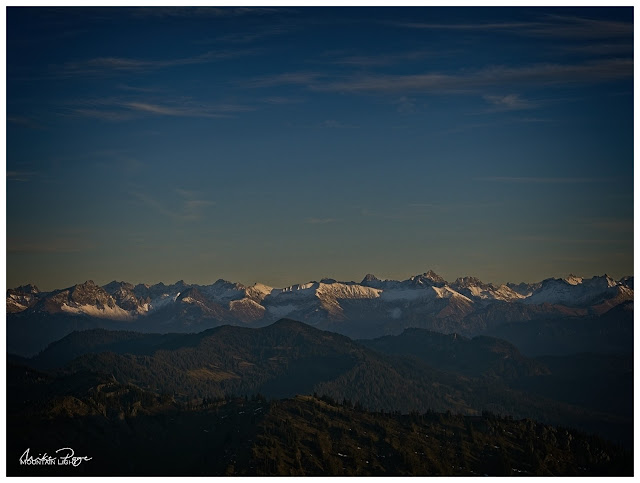
Alps at Sunset || Olympus 38 mm, f/8, 1/500 s, ISO 200 
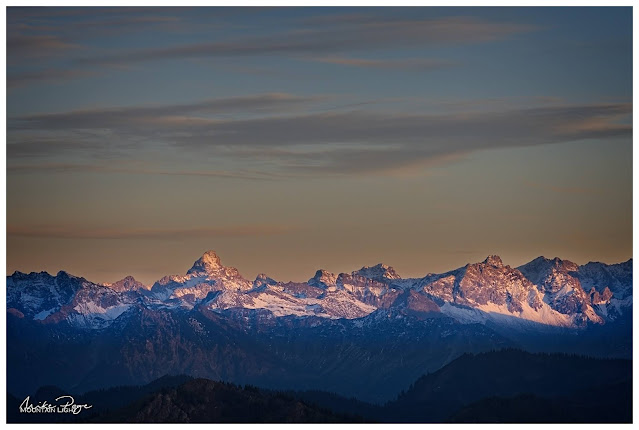
Hochvogel - Matterhorn of the Allgäu Mountains || Olympus 75 mm, f/8, 1/50 s, ISO 200
Then it was just a question of waiting. Exposing sunset photos is far from easy. Either you get a well-exposed foreground and a pale sky with a burnt-out spot where the sun should be, or a dark foreground and a brilliant sky. Working with a tripod it was relatively easy to take multiple exposures of each shot and put them together afterwards in ON1 Photo Raw. This is necessary because our cameras are not as good at resolving the range of bright to dark as the human eye is. Normally when I'm 'exposure bracketing', I'll set the camera to 1/4 and 4x the light (two stops under and two stops over), this time two stops wasn't going to do it and so I went to three (1/8 and 8x the light) and even then it was borderline shooting directly into the sun. 
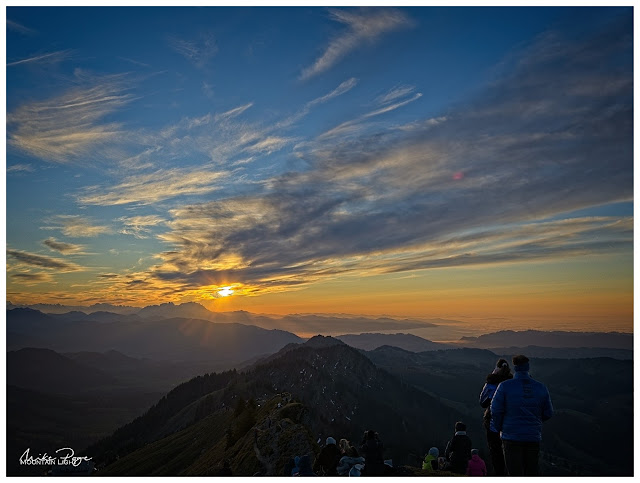
Sunset with the Crowds || Olympus 18 mm, f/8, 1/100 s, ISO 200
Even with these precautions, the sun was almost too bright for the camera as it dipped behind the Säntis. 
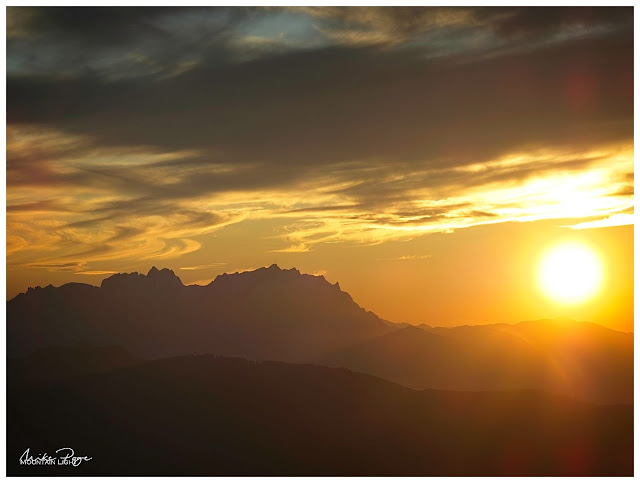
Sunset over the Säntis || Olympus 100 mm, f/8, 1/125 s, ISO 200

Hardly Alone || Credit: Sharon Page

Always Wait for the Encore

About 18 years ago, the band Blackmore's Night was playing one of the local concert venues. The eponymous Richie Blackmore was the one-time lead guitarist of two of our favourite bands (you may have heard of them; Deep Purple and Rainbow 😉). The newer music style of Blackmore's Night is a bit twee and wasn't really worth hanging around for the encore for, so in order to beet the rush for the car-park (and keep the babysitter's fee to a sensible level) I suggested that we cut out early. We were just walking across the road when I heard the opening chords of "Difficult to Cure" - Rainbow's rock adaptation of Beethoven's 9th and one of my favourite tracks of theirs. The hairs immediately stood up on the back of my neck and we did a volte face and marched back into the courtyard to enjoy a great rendition of this rock classic. Why am I telling you this? Well the moral of the story is that as with concerts, when photographing sunsets, you should always wait for the encore. Once the sun dips below the horizon, it lights up the clouds from below leaving you with the classic breath-taking oranges, reds and purples - and yes, sometimes even deep purples.
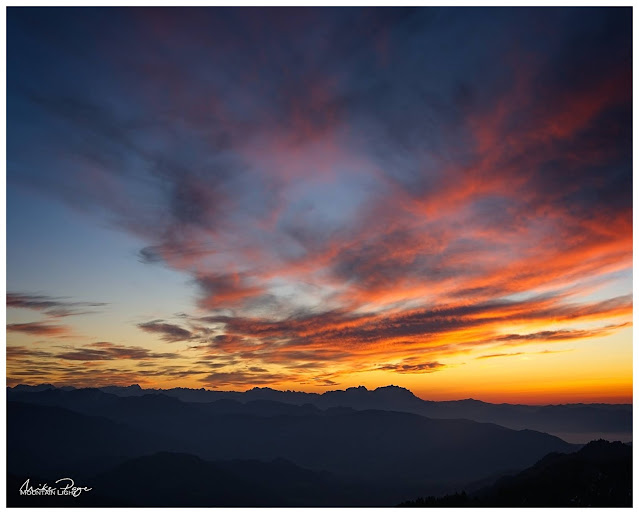
Always Wait for the Encore || Olympus 25 mm, f/8, 1/50 s, ISO 200
Another good tip for photography in general is that you should always look over your shoulder for the unexpected scene. Despite wanting to get to the restaurant before the crowds did - we knew that we were going to be around for a while yet for the blue-hour - we spent a couple of minutes scouting the area for some last shots before setting off down the path to the top of the cable car to grab some well-deserved chow. I've had better food in the mountains, but sitting outside on the terrace of the restaurant I don't think I've had many better locations.
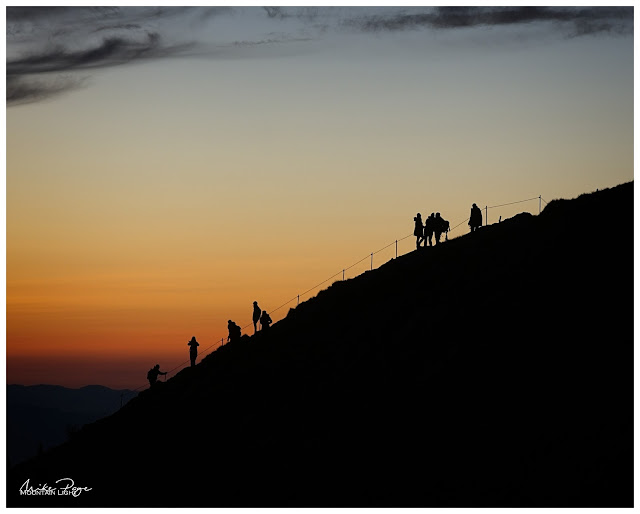
And Keep An Eye Over Your Shoulder || Olympus 75 mm, f/8, 1/50 s, ISO 200
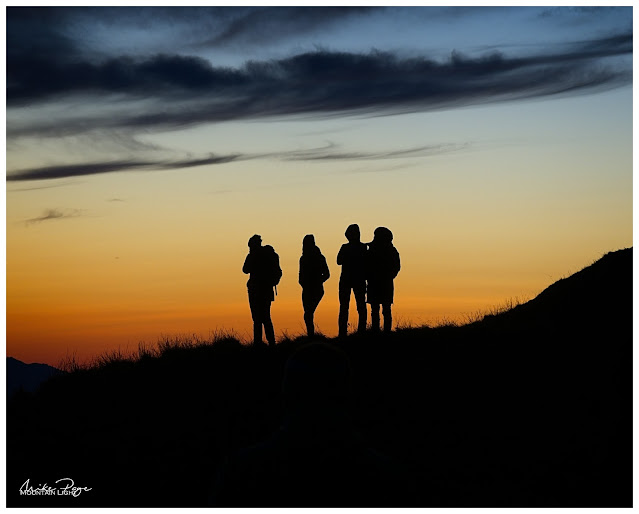
Friends || Olympus 75 mm, f/8, 1/30 s, ISO 200

On to the Blue Hour

As we polished off our venison goulash on the terrace overlooking the valley, or Käsespätzle in Rhi's case, the lights started to come on, both in the valley and above us. I absolutely love blue hour photography. Since my stint in the Allgäu shooting the Milky Way back in June, I've become an ardent fan of this time of day. Every photographer has their favourite light. For some it's the hour before sunrise, when lakes are still mirrors and mist hangs in the valleys, for others it's the golden hour, that time just after sunrise or just before sunset when the light turns that gorgeous colour, illuminating subjects gently from the side. Mine is the evening blue hour, catching the sky as it turns pastel shades of yellow to purple. If I'm in the mountains, and even better, if there's fresh snow on the peaks, then I'm in heaven. I was in heaven:
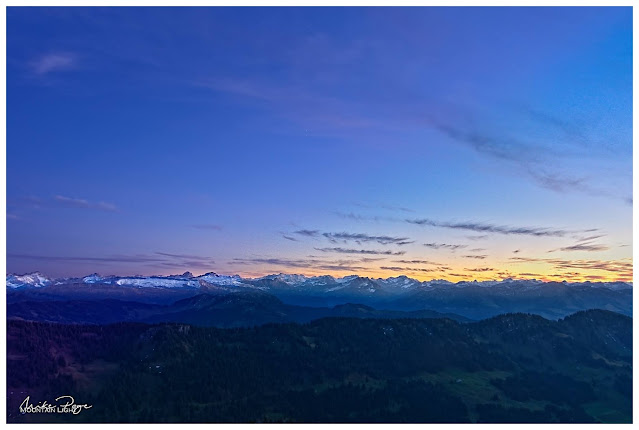
Photographer's Delight || Olympus 12 mm, f/8, 0.6 s, ISO 200
Not only was the view to the south hotting up (above), the lights were beginning to show in the valley. Dusk photography is always fun - you invariably end up getting details on the photos that the native eye didn't spot. Although the eye has a greater dynamic range than the camera sensor, the sensor is more sensitive to low levels of light, especially if you keep the shutter open for a few seconds as here. I never noticed The Plough when I was taking this photo, but it's staring you in the face here.
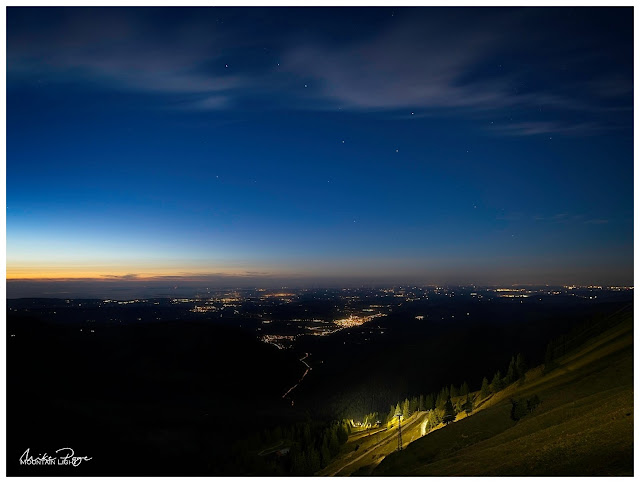
The Plough over Oberstaufen || Olympus 10 mm, f/3.1, 30 s, ISO 200
But the sunset wasn't the only heavenly spectacle that the evening had prepared for us, we still had the full moon to go. It was low on the eastern horizon as we started off on our three hour trek back to the car. I tried a couple of shots, but couldn't get the focus properly - always a problem with low light photography. Yes, yes, I know the Mk III has the super-duper star AF mode, but in my rush I completely forgot about that, and wouldn't have known where to find it in the dark even if I had. On top of several expertly exposed shots that would have looked brilliant if I'd got the focus right, I managed to squeeze this last shot off my focusing on Mars. 
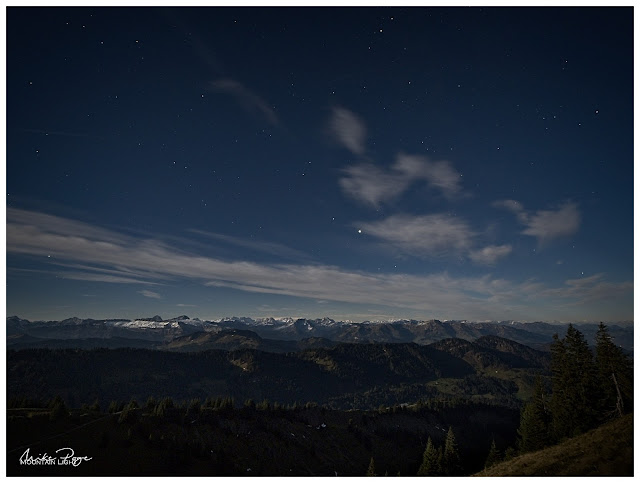
Allgäu by the Light of the Moon || Olympus 9 mm, f/3, 30 s, ISO 800
The moon was so bright that we didn't even need the head torches that we'd brought with us. The long yomp along the Aubach really dragged on the way back, leading Rhiannon (girl-child) to issue the warning "the photos better be worth it!". I'll leave you to be the judge.

Oh, and Matthias tested negative.

Sunday 30 August 2020

Tutorial: Exposure Bracketing and Photo Blending

One of the limitations of the digital camera vis a vis the human eye is it's inferior ability to discriminate between dark and light; the average human eye can distinguish approximately 2^20 - or approximately a 1,000,000x difference between darkest and lightest points. My high-end Olympus camera can only discriminate a 7,332x difference - 140-fold less. You've probably noticed when you take photos in high contrast light conditions such as a sunset or any scene where you have very bright parts and strong shadows that you either have a well exposed sky with extremely dark land or a well exposed land with a very pale sky. This lower discrimination power is why. But there are ways for overcoming this. In the days of analogue cameras, photographers would place a sheet of glass in front of the lens that was half smoky, half clear and use the smoky half to reduce the light in the sky. These days, most photographers achieve the same effect by taking multiple photos at different exposures (exposure bracketing) and then assemble them to a single image using software (photo blending). 

This is the final edit of one of my photos of the delightful Dolomitenhütte in the Lienzer Dolomiten that featured in my recent post Osttirol Revisited -  Part II.

The Dolomitenhütte at Sunset || Olympus 50 mm, f/5.6, 1/50 s, ISO 200


Exposure Bracketing

Some cameras, such as my Olympus OMD E-M1 Mk II, allow you to automatically take multiple exposures with varying levels of exposure compensation. One click of the button and the camera will rapidly take a series of three photos, one at the default setting, one with ¼ of the light ("2 stops under") and one with 4x the light ("2 stops over"; a "stop" in photographic terms is always half or double the light/exposure). If your camera doesn't offer this facility, you can almost certainly use exposure compensation (usually a dial labelled E.V. with a scale running from -3 to +3 in ⅓ steps). This is a magical dial that every photographer should be familiar with and using all the time, especially if you're shooting through an electronic viewfinder. Normally you need to do this with a tripod in order to be able to overlay the images 100%.

Exposure compensation scale (orange)


Photo Stacking/Blending

Most modern photo editing software allows you to compile multiple photos as layers and choose what parts of each layer should be visible in the final image. One prerequisite for the process is that the images be essentially compositionally identical, otherwise matching them up can be a pain. Like I say, normally this is assured by using a tripod to fix the camera in place, composing the photo carefully and then manually setting the focus. Normally. Unfortunately I tend to get a bit sloppy with these types of photo and shoot by hand and using auto-focus. 

The real art lies in blending the photos; defining which part of which photo is in the final image. Again, most modern programs offer the option of automated HDR image creation (HDR = high dynamic range, the art of compressing more levels of light into the final image than is possible with a single photo). Alternatively, the process can be done manually by opening multiple photos in layers. I prefer the latter process as it gives me a great deal more control over the final image. Here, the cleaner the edge defining the various layers the better, but invariably there are trees in the photo at the borders of the two layers and these are always a challenge to process. I've chosen a pretty straightforward image here that I manually masked for blending. I'll take you through the process as I do it in ON1 Photo Raw 2020, my photo editor of choice.

We'll start with the basic image, where you can see that the foreground is ok, if a bit dark, but the sky has no character whatsoever, a poor reflection of what we were seeing at the time. 

Native exposure - Olympus f/5.6, 1/15 s, ISO 200

The auto-bracketed shots are 2 stops under- and 2 stops over-exposed. In this example I didn't actually use the over-exposed image as it didn't fit the mood of the scene. As you can see from the under-exposed image, there's a lot more interesting stuff going on in the sky, but if you compare it to the final image, I've taken it even further. 

2 Stops Under Exposed - 1/60 s

2 Stops Over Exposed - 1/4 s

In the ON1 Photo Raw Browser module I select both images and then on the right click on the icon [Layers]. This generates a new image file in the Edit module where both images are simultaneously open. To start with you'll only see the top image, however, so don't be disconcerted. Any time you're working on the image from now on, you'll have to pay attention to which layer you're currently working on and you can click on them at the top of the right hand menu bar. The active layer has a turquoise highlight:

How the layers are displayed in ON1 Photo Raw, the blue circle indicates that the layer is selected (visible)


Masking

So how do you define which bit of which photo appears in the final image? Through an arcane process called masking. Masking defines which parts of a layer are visible (white in our case) and which parts of a layer are invisible (black). But the mask isn't limited to just black and just white, it can also be shades of grey, allowing nuances of layers.

So who tells the program which bits of each layer I want in the final image? Well, you do using masking brushes and gradients. You paint in (or out) the bits of the layers that you want. Clicking on the icon to the right of the layer thumbnail opens a panel giving you access to the masking tools. When you first open it, this panel will be completely white, indicating that all of this layer is visible.

Accessing the various Masking options

There are multiple ways to create a mask from the simple gradient tools, the brush as well as luminosity and colour range masks. Looking at the layer mask that I created for this image, I used the Masking Brush combined with the Perfect Brush option to get a hard edge on the hut itself, together with a slightly softer brush towards the bottom right corner:

Mask for the final image; the Native exposure image is on top, this black and white mask defines which parts of that image are visible over the darker underexposed layer

Ok, so apply that, and what do we get? Certainly a lot more appealing than either of the originals, but still a long way from the final image:

First Blend

So what else do we need to do to get from this to the final? There are a number of steps that I applied to each of the layers in order to really bring this image to life. In ON1 Photo Raw it generally doesn't matter what order you apply the steps in (there are exceptions, but they are too complex for this post. OK, I admit it. I don't know what they are, I just remember watching a YouTube video once where a bloke tried adding the effects in different orders and got different results. There. Happy now?). I don't generally adjust too much in the develop tab at the moment, concentrating almost exclusively on local adjustments

Background Layer (sky and left-hand foreground):
  1. Cropped the image to give a more pleasing cut
  2. Globally added the Effect Filter: Color Enhancer - Increase Color
  3. Locally added a -1 EV Darken adjustment to the sky (gradient mask)
  4. Removed the stray branch top left using the Retouch tool
Foreground Layer (cabin):
  1. Locally added a +1 EV Lighten adjustment with +20 to the shadows and +30 Color Temperature to the area around the cabin lights
These I combined to form a New Stamped Layer (a new layer combining all of the visible parts of the image; right-click in one of the layers and choose this option).

Stamped Layer:
  1. Globally added the Effect Filter: Vignette - Big Softy 50%
  2. Globally added the Effect Filter: Color Enhancer - Warmer 50%
  3. Locally added the Effect Filter: Tone Enhancer - Clarity on the cabin
  4. Locally added the Effect Filter: Tone Enhancer - Tonal Contrast to the forest bottom left
  5. Locally added a Vibrance adjustment to the sky
  6. Other minor dodge and burn (local brightening and darkening) adjustments
And that was it. The first Color Enhancer added a touch of colour to the sky, amplified by the Darken adjustment. The Lighten adjustment with the colour warming added a pleasing glow to the lights in the cabin, even spilling over to the rocks outside. The Vignette focuses the viewer's vision on the central part of the image - I do this to almost all my images - it's part of my personal preset. The Clarity enhancer on the cabin brings out the texture of the wooden slats of the cabin and the Tonal Contrast enhancer brings a bit of definition to the dark forest bottom left - making it a bit less 'mushy'.

And that's it. A lot more editing that I'd normally employ, and certainly a lot more 'dodging and burning', but I think it's worth the effort. End-of-day photos are always a little more challenging due to the lighting conditions. If you have any thoughts or questions on the editing process, do leave them below.

- Dolomitenhütte at Sunset -