Showing posts with label ON1. Show all posts

Sunday 30 August 2020

Tutorial: Exposure Bracketing and Photo Blending

One of the limitations of the digital camera vis a vis the human eye is it's inferior ability to discriminate between dark and light; the average human eye can distinguish approximately 2^20 - or approximately a 1,000,000x difference between darkest and lightest points. My high-end Olympus camera can only discriminate a 7,332x difference - 140-fold less. You've probably noticed when you take photos in high contrast light conditions such as a sunset or any scene where you have very bright parts and strong shadows that you either have a well exposed sky with extremely dark land or a well exposed land with a very pale sky. This lower discrimination power is why. But there are ways for overcoming this. In the days of analogue cameras, photographers would place a sheet of glass in front of the lens that was half smoky, half clear and use the smoky half to reduce the light in the sky. These days, most photographers achieve the same effect by taking multiple photos at different exposures (exposure bracketing) and then assemble them to a single image using software (photo blending). 

This is the final edit of one of my photos of the delightful Dolomitenhütte in the Lienzer Dolomiten that featured in my recent post Osttirol Revisited -  Part II.

The Dolomitenhütte at Sunset || Olympus 50 mm, f/5.6, 1/50 s, ISO 200


Exposure Bracketing

Some cameras, such as my Olympus OMD E-M1 Mk II, allow you to automatically take multiple exposures with varying levels of exposure compensation. One click of the button and the camera will rapidly take a series of three photos, one at the default setting, one with ¼ of the light ("2 stops under") and one with 4x the light ("2 stops over"; a "stop" in photographic terms is always half or double the light/exposure). If your camera doesn't offer this facility, you can almost certainly use exposure compensation (usually a dial labelled E.V. with a scale running from -3 to +3 in ⅓ steps). This is a magical dial that every photographer should be familiar with and using all the time, especially if you're shooting through an electronic viewfinder. Normally you need to do this with a tripod in order to be able to overlay the images 100%.

Exposure compensation scale (orange)


Photo Stacking/Blending

Most modern photo editing software allows you to compile multiple photos as layers and choose what parts of each layer should be visible in the final image. One prerequisite for the process is that the images be essentially compositionally identical, otherwise matching them up can be a pain. Like I say, normally this is assured by using a tripod to fix the camera in place, composing the photo carefully and then manually setting the focus. Normally. Unfortunately I tend to get a bit sloppy with these types of photo and shoot by hand and using auto-focus. 

The real art lies in blending the photos; defining which part of which photo is in the final image. Again, most modern programs offer the option of automated HDR image creation (HDR = high dynamic range, the art of compressing more levels of light into the final image than is possible with a single photo). Alternatively, the process can be done manually by opening multiple photos in layers. I prefer the latter process as it gives me a great deal more control over the final image. Here, the cleaner the edge defining the various layers the better, but invariably there are trees in the photo at the borders of the two layers and these are always a challenge to process. I've chosen a pretty straightforward image here that I manually masked for blending. I'll take you through the process as I do it in ON1 Photo Raw 2020, my photo editor of choice.

We'll start with the basic image, where you can see that the foreground is ok, if a bit dark, but the sky has no character whatsoever, a poor reflection of what we were seeing at the time. 

Native exposure - Olympus f/5.6, 1/15 s, ISO 200

The auto-bracketed shots are 2 stops under- and 2 stops over-exposed. In this example I didn't actually use the over-exposed image as it didn't fit the mood of the scene. As you can see from the under-exposed image, there's a lot more interesting stuff going on in the sky, but if you compare it to the final image, I've taken it even further. 

2 Stops Under Exposed - 1/60 s

2 Stops Over Exposed - 1/4 s

In the ON1 Photo Raw Browser module I select both images and then on the right click on the icon [Layers]. This generates a new image file in the Edit module where both images are simultaneously open. To start with you'll only see the top image, however, so don't be disconcerted. Any time you're working on the image from now on, you'll have to pay attention to which layer you're currently working on and you can click on them at the top of the right hand menu bar. The active layer has a turquoise highlight:

How the layers are displayed in ON1 Photo Raw, the blue circle indicates that the layer is selected (visible)


Masking

So how do you define which bit of which photo appears in the final image? Through an arcane process called masking. Masking defines which parts of a layer are visible (white in our case) and which parts of a layer are invisible (black). But the mask isn't limited to just black and just white, it can also be shades of grey, allowing nuances of layers.

So who tells the program which bits of each layer I want in the final image? Well, you do using masking brushes and gradients. You paint in (or out) the bits of the layers that you want. Clicking on the icon to the right of the layer thumbnail opens a panel giving you access to the masking tools. When you first open it, this panel will be completely white, indicating that all of this layer is visible.

Accessing the various Masking options

There are multiple ways to create a mask from the simple gradient tools, the brush as well as luminosity and colour range masks. Looking at the layer mask that I created for this image, I used the Masking Brush combined with the Perfect Brush option to get a hard edge on the hut itself, together with a slightly softer brush towards the bottom right corner:

Mask for the final image; the Native exposure image is on top, this black and white mask defines which parts of that image are visible over the darker underexposed layer

Ok, so apply that, and what do we get? Certainly a lot more appealing than either of the originals, but still a long way from the final image:

First Blend

So what else do we need to do to get from this to the final? There are a number of steps that I applied to each of the layers in order to really bring this image to life. In ON1 Photo Raw it generally doesn't matter what order you apply the steps in (there are exceptions, but they are too complex for this post. OK, I admit it. I don't know what they are, I just remember watching a YouTube video once where a bloke tried adding the effects in different orders and got different results. There. Happy now?). I don't generally adjust too much in the develop tab at the moment, concentrating almost exclusively on local adjustments

Background Layer (sky and left-hand foreground):
  1. Cropped the image to give a more pleasing cut
  2. Globally added the Effect Filter: Color Enhancer - Increase Color
  3. Locally added a -1 EV Darken adjustment to the sky (gradient mask)
  4. Removed the stray branch top left using the Retouch tool
Foreground Layer (cabin):
  1. Locally added a +1 EV Lighten adjustment with +20 to the shadows and +30 Color Temperature to the area around the cabin lights
These I combined to form a New Stamped Layer (a new layer combining all of the visible parts of the image; right-click in one of the layers and choose this option).

Stamped Layer:
  1. Globally added the Effect Filter: Vignette - Big Softy 50%
  2. Globally added the Effect Filter: Color Enhancer - Warmer 50%
  3. Locally added the Effect Filter: Tone Enhancer - Clarity on the cabin
  4. Locally added the Effect Filter: Tone Enhancer - Tonal Contrast to the forest bottom left
  5. Locally added a Vibrance adjustment to the sky
  6. Other minor dodge and burn (local brightening and darkening) adjustments
And that was it. The first Color Enhancer added a touch of colour to the sky, amplified by the Darken adjustment. The Lighten adjustment with the colour warming added a pleasing glow to the lights in the cabin, even spilling over to the rocks outside. The Vignette focuses the viewer's vision on the central part of the image - I do this to almost all my images - it's part of my personal preset. The Clarity enhancer on the cabin brings out the texture of the wooden slats of the cabin and the Tonal Contrast enhancer brings a bit of definition to the dark forest bottom left - making it a bit less 'mushy'.

And that's it. A lot more editing that I'd normally employ, and certainly a lot more 'dodging and burning', but I think it's worth the effort. End-of-day photos are always a little more challenging due to the lighting conditions. If you have any thoughts or questions on the editing process, do leave them below.

- Dolomitenhütte at Sunset -


Tuesday 25 August 2020

Osttirol Revisited - Part I

Back in July we decided that we needed a break; our May vacation plans had fallen flat and we'd been working solidly since our ski trip to Norway in February. After debating where to go, we finally decided that we'd return to Lienz in East Tyrol on the Austrian/Italian border. We'd camped there for 10 days in 2017 and felt that it warranted a second visit, particularly as the area is a very strong contender for us to settle down in in the future. Stuck between the main alpine chain and the Dolomites, this little corner of Austria is charming, a little off the beaten track and very competitively priced.

Old Lienz, the heart of East Tyrol or Osttirol || Olympus 12 mm, f/8, 1/100 s, ISO 200

The campsite was adamant that it wasn't necessary (or even possible) to make a reservation, but we were optimistic that there would be enough space for our six-person tent on the meadow next to the Tristacher See. We needn't have worried; when we arrived on the Thursday afternoon there couldn't have been more than about 20 tents and vans scattered at responsible distances over the large field. Although the campsite restaurant and bar were closed, there were plenty of places open in Lienz itself and the forecast was looking great for at least the next week.

The Region of East Tyrol

The week started off a little overcast as we revisited the hills above Sillian in the Pustertal. What did blow us away was the abundance of wild flowers, especially the alpine roses (actually a misnomer; they're azaleas). Being a little higher than the mountains than are our normal stomping ground in the northern Alps, everything was significantly further behind. They say that the temperature decreases by one degree Celsius per 100 m ascent and the extra 500+ m of elevation on the hills meant that everything was significantly behind Bavaria.

Alpine Roses above Sillian || Olympus 12 mm, f/8, 1/100 s, ISO 200

As well as revisiting some old haunts we used the week to look at some further corners of this remote region that we hadn't seen before, such as the Gailtal, which is pretty, but we were able to rule it off the list of places that we might consider for retirement - despite being very modestly priced, the corridor between Sillian and Kötschach-Mauthen is just too remote.

In the hills above Obertilliach || Olympus 15 mm, f/11, 1/100 s, ISO 200

At the Golzentipp || Olympus 7.5 mm,  f/16, 1/1250 s, ISO 200

The campsite is a couple of hundred meters above Lienz at a sheltered lake called the Tristacher See, great for a swim at the end of a hot day's hiking and free to campsite users. The walk round the lake only takes about 30 min. At the far end is a swanky hotel that didn't look like we would fit in, especially not in our outdoor camping gear.

Evening Mood at the Tristacher Lake || Olympus 20 mm, f/5.6, 1/8 s, ISO 200

The Defereggental is similarly stunning, but a tad too far from the madding crowd as well as being exceedingly steep sided - you'd hardly see the sun in the winter in this deeply cleft east-west running valley. One of the unique features of the area is that in many places, where there's no cable car it's possible to drive really high into the mountains before starting to hike. The Defereggental is one of those places and we were able to drive up to 2,000 m along a very rough logging track before abandoning the car at a small car park before heading into the mountains.

The Majestic Defereggental || Olympus 24 mm, f/5.6, 1/1250 s, ISO 200

Our hike up the strangely-named Speikboden was rewarded with a view of the Groß Venediger, one of Austria's most prominent peaks, together with a field of the eponymous violet flowers and a couple of marmots scuttling across a late snow field. One delight on the way down was a patch of wayside wild lupins at a bend in the road. This was an opportunity to put my new manual 7.5 mm 7Artisans fish-eye lens to the test. Originally bought so that I could cram more sky into my astrophotography, I've taken to using it instead for floral shots like this. You can get within a few centimeters of the flowers, allowing them to take a significant part of the picture, whilst retaining depth of field to the background setting.

Speikboden and the Großer Venediger || Olympus 7.5 mm,  f/16, 1/640 s, ISO 200

Wayside Lupins || Olympus 29 mm, f/4, 1/1250 s, ISO 200

Just outside Lienz is a gorge - the Galitzenklamm - with a number of fixed climbing routes (via ferrata or Klettersteig). After tackling one of the easier routes, the kids decided they wanted to take a crack at "Adrenalin", one of the more challenging routes. Too challenging it turned out, and so Joshua did a solo  on the route next to the water, taking time to pose for a short long-exposure shot.

The Galitzenklamm Klettersteig || Olympus 28 mm, f/13, 1 s, ISO 64

Water in the Gorge || Olympus 86 mm, f/9, 1/5 s, ISO 64

The nice thing about the gorge is that you can spend the morning there and still take in the alpine zoo at Assling, a lovely little village in the Hochpustertal and one that's definitely on our radar for later. On top of the chamoix, ibex and marmots, there's a wonderful lynx enclosure that lets you look in from above without fences as well as some delightful snowy owls.

I was sleeping!  || Olympus 300 mm, f/5.6, 1/100 s, ISO 64


Note to self: When switching from long-exposure shots in the gorge to long focal length shots of animals, it can be helpful to set the ISO back to 200, duh!

Snowy Owl || Olympus 100 mm, f/4, 1/125 s, ISO 200

Still to come: sundowner at the picturesque Dolomitenhütte, a sunny day in Matrei and a close encounter with a kestrel.


Sunday 28 June 2020

In Seach of the Milky Way - From Dusk 'Til Dawn in the Allgäu

At the end of May I scouted a possible location for an astro shoot in the Allgäu mountains come next new moon. A good milky way photos lives and dies by the foreground and I wanted somewhere with a good view over the alps. The middle of June arrived and the forecast for Friday and Saturday was awful; clouds, rain, the lot. Nothing doing. The next weather window was going to be Tuesday night. To make matters worse, the initiator of the whole idea - my friend Matthias - couldn't make it as he was stuck up at work in northern Bavaria. But an old school friend who happens to live in Munich was interested enough to bite when I announced my intentions on Facebook and so Martin and I ended up heading down to Fischen im Allgäu early Tuesday evening to see what we could see. Meteorologically we were on a rising tide - there were still some clouds around but the weather was definitely clearing from the north and so we were optimistic.

The Shoot
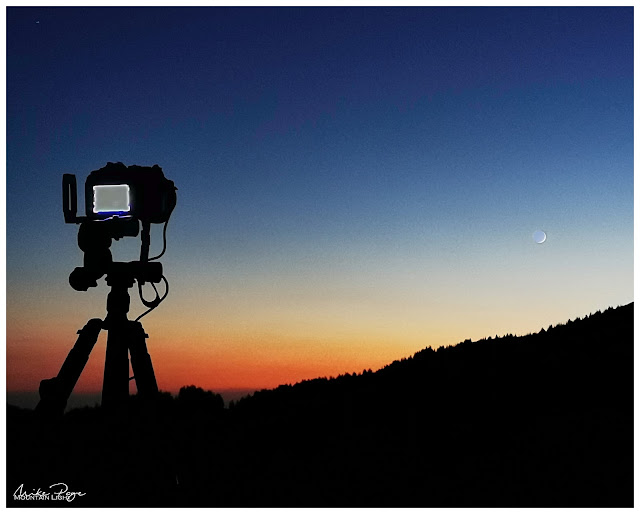

Waiting For The Moon To Set || Huawei P30 Pro


Dusk

Driving down there were still cloud remnants lurking in all the wrong places, but the northerly wind was driving them deeper into the alps and so we weren't too concerned. We set off from the car-park in the early evening light. Normally, like most people, I spend most of my time in the mountains during the day. Unless I'm staying in one of the mountain huts, I'm generally back down in the valley for dinner. This evening's experience may get me to revisit that schedule. There's a good reason why landscape photographers choose to shoot at the ends of the day; the light quality is very different. It's softer, gentler and less blue. Watching the pastel colours changing on the Vorarlberg mountains in the gathering dusk made me start rethinking how I plan my days in the Alps.
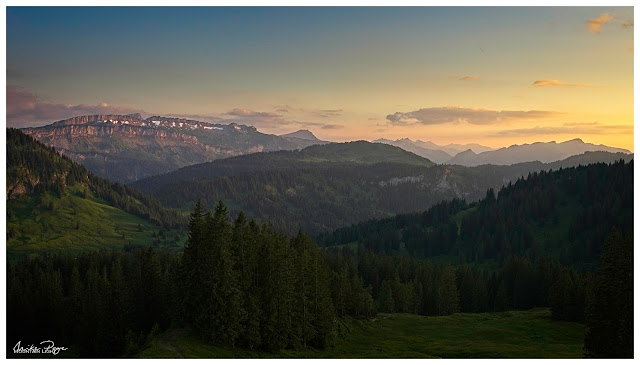
As the Sun Goes Down || Olympus f/7.1, 1/80 s, ISO 200

It was great to see that not all of the snow had disappeared in the intervening weeks; I find the last snowfields really make a photo like this and I don't shy back from exaggerating them in post-processing like  here (above).
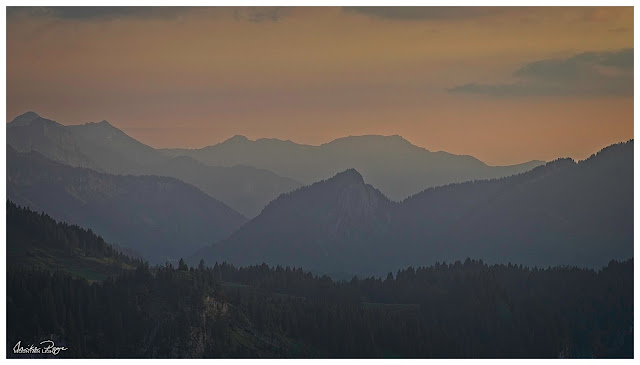
The Pastel Colours of Evening || Olympus f/7.1, 1/160 s, ISO 200

All the Layers || Olympus f/7.1, 1/30 s, ISO 200


Moonset

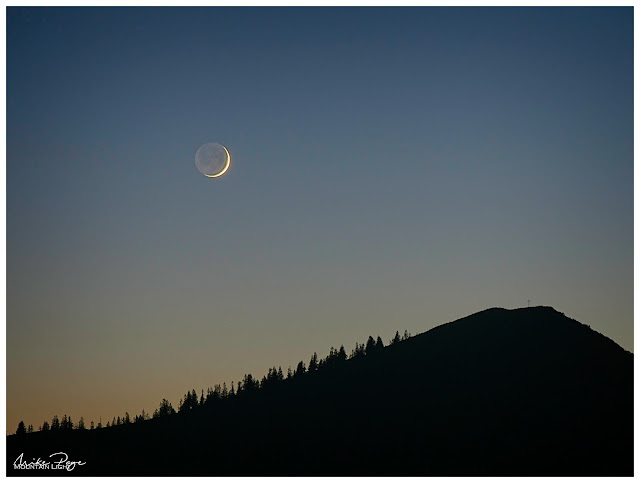
I'd promised my school chum a relatively easy hike up to the first mountain top that I'd identified. Unfortunately we didn't make it all the way and ended up about 100 m below the summit on a slight shoulder. The location was optimal for the first spectacle of the evening - the fresh new moon was due to set behind the peak above us and our location appeared to be optimal for that. My smartphone app (Sky View) was showing me where the moon should be in the sky, but for the life of me I couldn't find it. I was beginning to fret that either (a) the app was playing up, or (b) there wasn't going to be enough moon to see. As the sky darkened and I still couldn't see it Martin spotted it - why we hadn't seen it before was a complete mystery as it was so clear at this point.
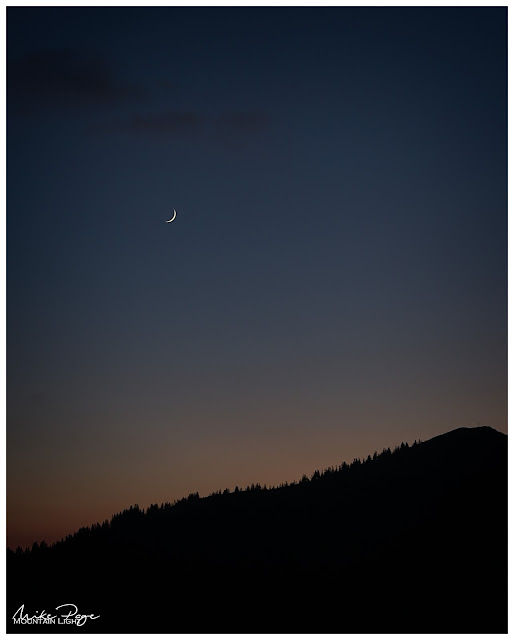
Well It's Obvious Now! || Olympus f/8, 1/5 s, ISO 200


Setting Moon || Olympus 100 mm f/5.6, 0.6 s, ISO 400

Before we turned our attention to the stars that were beginning to appear in twos and threes there was one more dusk photo to grab before the technical stuff began:
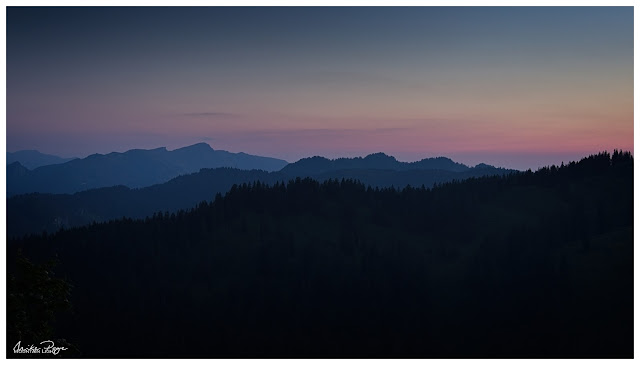
When Purple Comes Out To Play || Olympus f/5.6, 40 s, ISO 200

As fun as it was to shoot the setting moon, it cost me my first milky way shots as I wasn't set up to get a good foreground photo during the blue hour that I could use to blend into the final image in post. The shot I ended up getting was ok, probably one of my better photos of the Milky Way per se, but the foreground is lacklustre. I don't know whether it would have been any better 100 m higher up either, but the lesson is that you need to be in position early, you need to get your foreground shots in in good time and you can only recon on about two good astro shots per night, one after the sun goes down and one before it rises, unless you're shooting with multiple cameras.
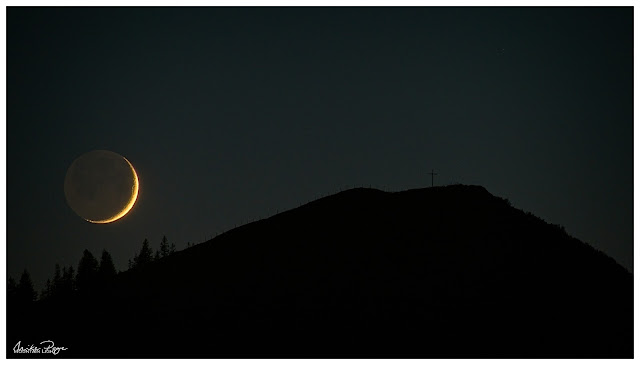
Collision Imminent || Olympus 300 mm f/5.6, 0.6 s, ISO 1600, Composite Image

Milky Way

The challenge with astrophography is the low light levels. You need an open aperture and relatively high ISO with a wide angle lens to get enough light to the sensor before the earth's rotation turns the star points into lines - the so-called star trails. As a rule of thumb, the maximum exposure time before this happens is 500/focal length* (400 if you're being conservative). So for my 16 mm equivalent wide angle lens, I can shoot for 25 s. In order to further increase light-sensitivity, we need to increase the ISO. Small sensor cameras (I shoot with an Olympus micro four-thirds crop sensor, technically a small sensor camera) are notorious for being sensitive to high ISO, the images tend to have a lot of unsightly noise - a random phenomenon that causes an unsightly buzz in the image. But being random, there's a solution: If you take multiple shots and then take the average of those shots, the noise is diminished. The challenge is that the software performing the calculations needs to take into account the fact that the stars are moving - if it didn't you'd end up with the trails again. All in all quite a technical feat, especially when there's a foreground involved. Fortunately the free Windows software Sequator can do all of this - it's what it was written for. It's not the most user-friendly app, but if you know what you're doing (or in my case if you know someone who knows what they're doing), it's extremely powerful. The trick seems to be not using too many of the features, but more of that below.
*25 mm equivalent, so with my micro four-thirds sensor I need to double my focal length
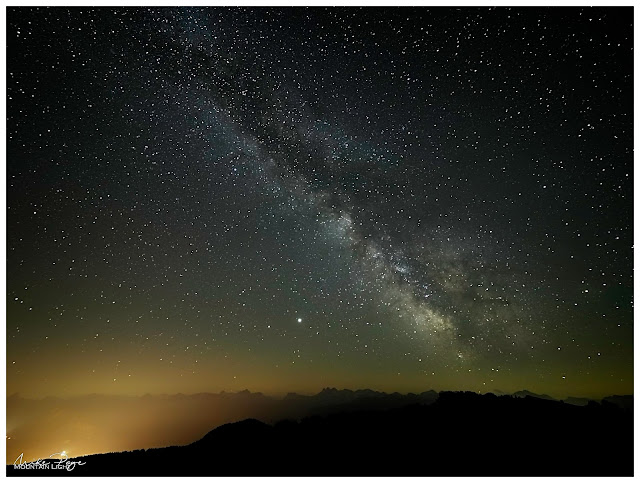
First Starlight - Stacked but Unprocessed || Olympus 8 mm, f/2.8, 25 s, ISO 6400, Stacked

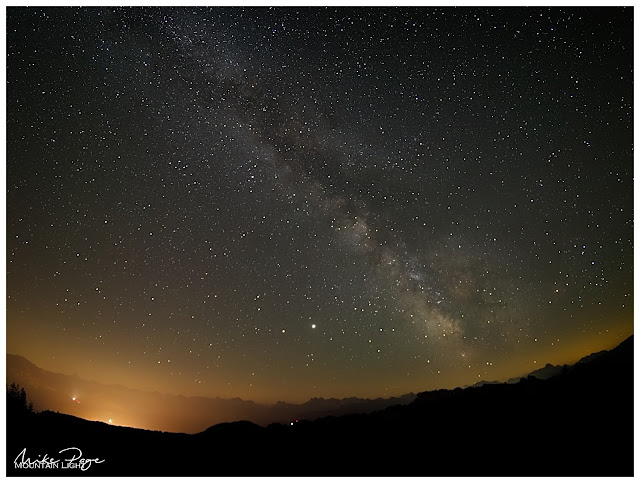
We could just about make out the trail of the Milky Way in the Allgäu sky. From our vantage point I tried several series of shots, with and without my Haida Clear Light filter and Tiffen Fog filter and with the new 7Artisans 7.5 mm fish-eye. In the end I liked the unfiltered images through the Panasonic Leica 8-18 mm the best. The above image is stacked to reduce noise but otherwise unprocessed. The sheer clarity of the image just blows me away. The detail in the Milky Way is amazing. But I don't think this is a good Milky Way photo. It's a good photo of the Milky Way, but like I said earlier, a good Milky Way photo stands or falls by the foreground and I wasn't satisfied with what I was getting here, so after a cup of tea  and a pasty (thanks Martin, those were life-savers) I lay down for a 45 min shut-eye before heading up to the ridge, where I knew just the spot.
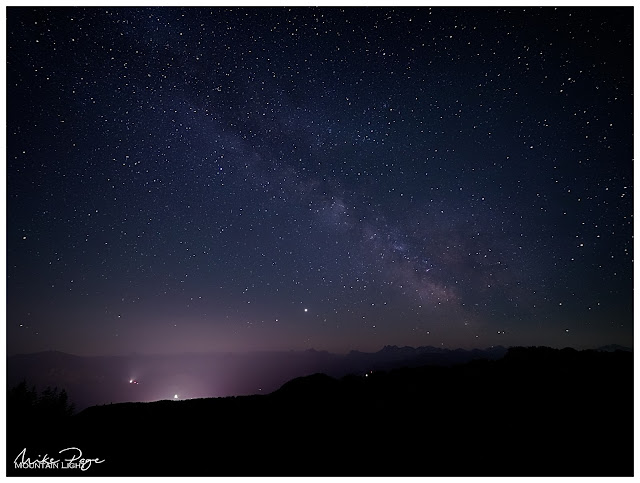
With Haido Clear Sky Filter, Unprocessed

7Artisans 7.5 mm Fish-eye Lens, Unprocessed

One of the greatest challenges with astro photography is finding infinity on the focus dial. Looking through the viewfinder you're confronted with an almost completely black image - finding something to focus on can be extremely difficult. If there's a bright light a couple of miles off this works relatively well, as at this distance there's effectively no focal change between 2 miles and infinity. It was quite a challenge in the dark though, and I had to hunt through the magnified viewfinder on the Olympus to locate Jupiter (bright spot in the middle of the images above) and twiddle the focus ring of the lens to render the tiny fuzzy light as tight and small as possible. Then it's shoot and hope. You can examine the images on the camera display, but you're never entirely sure whether your photo is sharp or not until you get the image on the computer screen.

Despite being pitch dark, it was easy enough to find my way by the light of my head-torch, having scouted the area less than a month before. I located the second spot relatively easily and set up the tripod again. A few ultra-high-ISO shots helped me frame the photo correctly. I also tried some low ISO long exposures with a bit of light painting so that I would have a foreground to go with it. This is a separate image that is blended with the processed astro image in post processing (see last image). This final photo here has to be my favourite image of the year so far. I didn't get a huge number of finished shots that I was happy with, but at the end of the day, if you come away with at least one, that's a win.
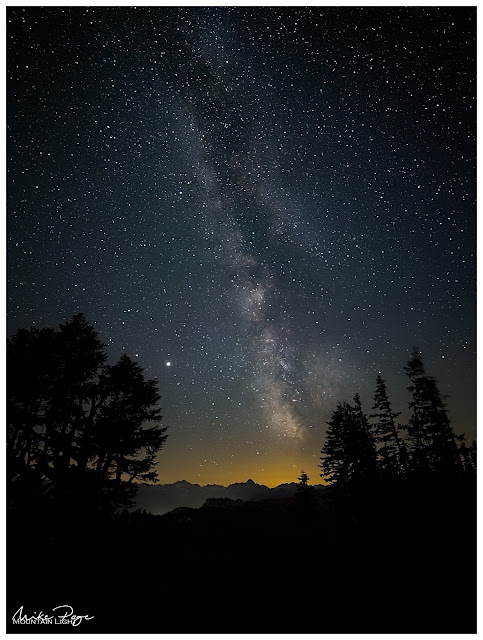
Milky Way Over The Allgäu || Olympus 8 mm, f/2.8, 25 s ISO 6400, Stacked

I carried on shooting for a while after this into the blue light of pre-dawn before giving up and catching a few more minutes sleep lent against my rucksack. It was a mild night with little wind and the ground was comfortable and dry beneath me, not a sound to be heard.

Birdsong and a yipping fox in the valley below alerted me to the coming dawn. By the light of the red band of cloud to the east I could just make out a small peat pond nearby that I'd just avoided in the dark. In retrospect I should have taken a lower vantage point for this shot. This is two images blended in ON1 Photo Raw, one for the sky, one for the foreground. I took the liberty of brightening the tufts of cotton grass to emphasise them in the pre-dawn light.
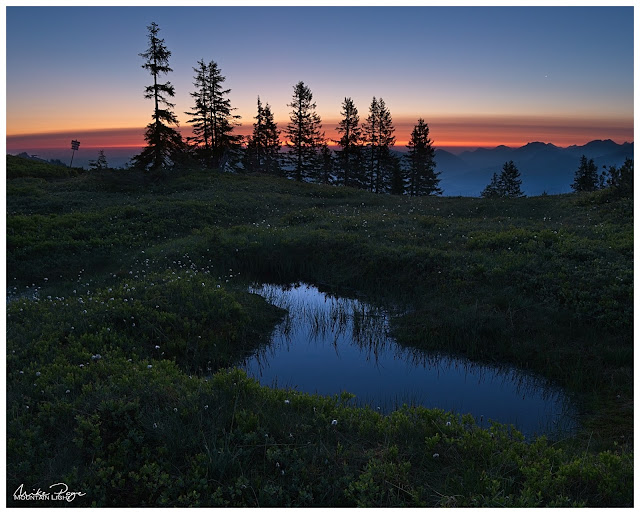
Mountain Tarn at Dawn || Olympus f/5.6, 1/6 s, ISO 200

Then it was down to find Martin and head down to the car. I found him warming himself over his camping stove and ready to return to the valley. As I waited for him to pack his things there was time for one last shot of the sun rising on the mountain escarpment opposite us. 
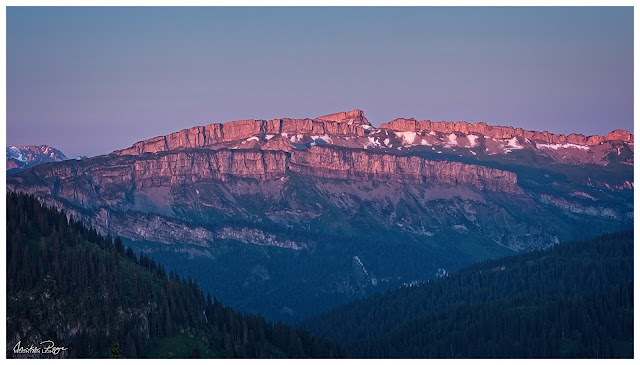
The Red Light Of Dawn || Olympus f/5.6, 1/30 s, ISO 200

Processing the Images

If you're not interested in the nitty-gritty of processing astro photography you can probably stop reading here and scan to the last images. It's very easy to over-process Milky Way photos: I spent two evenings working on this last shot only to have Sharon (correctly) tell me that it was too speckled and she didn't like the foreground. I've left this technical bit to the end for my techie friends who'll be interested in this stuff (hi Matthias!). 

Before the images can be 'stacked' (averaged), they need to be in tiff format. ON1 Photo Raw, my post-processing software can export tiffs, but they're the wrong format for my stacking software, Sequator. The images have to be opened in Olympus Workspace and exported as tiffs from there. For each image I used 10 star images and two control images with the lens cap on (lights and darks respectively).
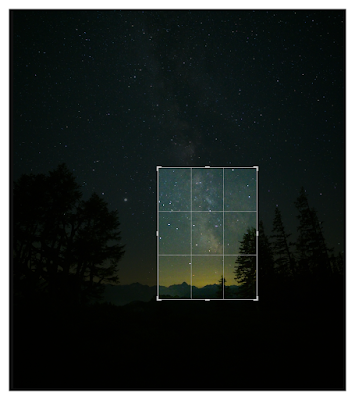
Crop of main image


Unprocessed image OOCStacked in Sequator
10 Star images, 2 Noise images (with lens cap on), Align stars, Freeze ground, Sky region: Partial, otherwise all default settings
Processed in ON1 Photo Raw 2020
Develop:
Contrast +24, Highlights +18, Midtones +15, Shadows -20, Whites +45, Temperature +40, Tint -3
Effects:
Sharpening, Noise Reduction (Moderate), Tone Enhancer (Shadows Lighter on foreground; Midtone Contrast Boost, 50%), LUTs (1983, 35%), Sunshine (Sunglow, 50%), Curves (mild S-curve), Dynamic contrast on Milky Way


I also tried a blend of my favourite image with the light-painted foreground in ON1 Photo Raw. It's not perfect as I seem to have adjusted the camera between frames and had to stretch the resulting images to fit. I'd be interested to hear which image you prefer, this one with more detail in the foreground trees, or the original "Milky Way Over The Allgäu" above. My jury is still out on this one.
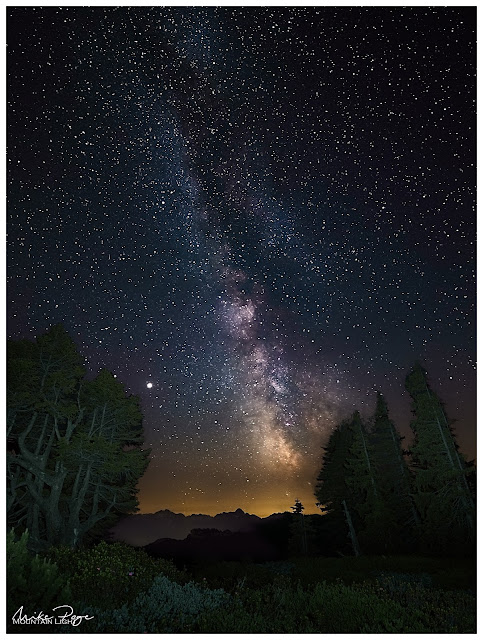
Milky Way Over The Allgäu II || Olympus 8 mm, f/2.8, 25 s ISO 6400, Stacked and Blended

Friday 5 June 2020

Moonshots - Getting the Shot and Post-Processing

Who doesn't want to take cracking images of the moon, our closest celestial object? We've all seen startlingly bright photos of the craters and then perhaps gone out to try to make our own and come back disappointed with black photos containing a bright, blurry smear in the middle. With a little bit of know-how and a decent-length lens it's not too difficult to get images that will stun our friends. There are two important steps: getting the images in the camera and then processing the pictures on the PC. 

Moonrise over the Allgäu || Olympus f/8, 1/1250 s, ISO 200


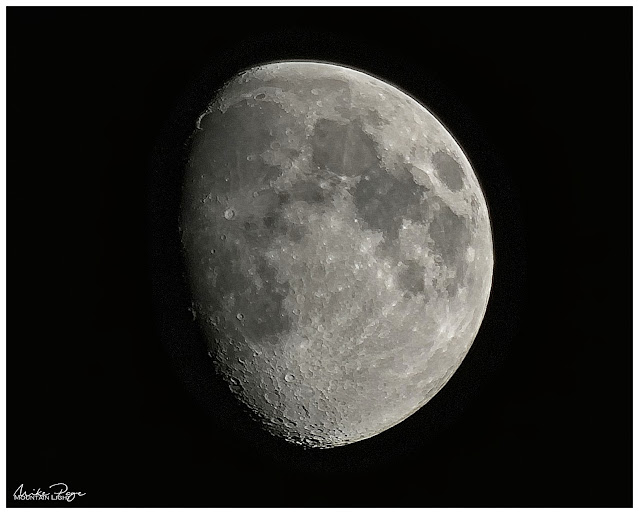
Some phases of the moon are definitely more photogenic than others. When the sun hits the moon obliquely, like here at just after half moon, the shadows on the craters are longer and stand out more. At full moon the sun is full-on and the shadows shrink. This was one of those 'oh wow' moments that I knew I had to capitalise on. We were sitting outside at a restaurant in the mountains when one of the kids noticed the moon rising over the hillside. I had to dash to the car to grab my telephoto lens and was able to capture this image before the moon became too high above the hillside.

Getting the Images

All the images in this article were taken using my Panasonic Lumix 100-300 mm lens at the long end on my Olympus E-M1 Mk II, a micro four thirds camera, making this equivalent to a 200-600 mm lens in 35 mm terms. Without image stabilisation we need to watch out for the shutter speed / focal length rule (maximum shutter speed = 1/ focal length; for a 500 mm lens, for example, the max shutter speed should be 1/500 s). 

The next challenge is getting the exposure right. Most cameras are set to evaluate the exposure over the whole image, combine this with some intelligent guess-work and provide you with what your camera thinks is a suitably exposed image. So for an image of the moon your camera sees a bright spot - even at 600 mm FF equivalent we're talking about an area that probably takes up less than 5% of the image - against a dark background and will try to provide you with an images that balances the light and dark.

Exposure

So we have to trick the camera or even go to manual. If you know how to adjust your exposure with exposure value (EV) adjustment - experience tells me that setting your camera to -3 EV should give you a decently lit image. Alternatively, you can go manual. The night images were taken at 1/640 s at f/5.6 and ISO 200 on my Olympus. You could try starting from there and adjusting the exposure as needed.

Even though you can hand-hold these shots, there is one significant advantage to sticking your camera on a tripod; aligning your images in post will be much easier.

Focus

Sticking your camera on a tripod also makes focusing your shot easier, and I really would recommend slipping into manual focus for this to be on the safe side. If your camera allows you to magnify around the focus point then use this, in fact use every trick you can to get the image as sharp as you possibly can. Don't leave anything to chance. What you'll notice is that the moon won't stay still on your camera display. Don't worry, your camera isn't slipping on the tripod mount (well, it might be, but not necessarily). What you're seeing is the moon moving in relation to the earth.

Multiple Exposures

Why images and why align them? Because a single image isn't going to give you much of an picture. In fact, you're going to want to grab at least about 50 images. This will give you enough to generate a mean image in post (colloquially and mathematically) reducing noise and sharpening the image. The atmosphere is full of convection currents, particularly in the summer, which will muddy your image.

Processing the Images

Ok, so the fun part is over, now the work begins. First we need to do a little bit of basic editing in your post-processing software of choice. I make no apologies for using a slightly obscure programme for mine; ON1 Photo Raw 2020 instead of Lightroom or Photoshop for the same reason I make no apologies for shooting with an Olympus rather than Canon, Nikon or Sony. They're informed decisions that I made and stand by - I've never been afraid of going down the road less travelled.

Initial Processing

Import your RAW images into your processor of choice and select the images from your series. Most image processing programmes allow you to apply the settings you apply to one photo to a series of photos, so you can hopefully just edit one and cascade to the other images. Crop your image to the final size you want for the image, allowing room around the edges for a final crop. You may want to increase the basic exposure and clarity, but don't over-do it and leave the noise reduction for now, we'll get back to that later.  Apply the crop and adjustments across the whole series and export them all to tiff or jpeg files in a dedicated folder for stacking.

Image Stacking

You will probably have noticed that your photos are a little muddy, a little unclear. That's perfectly allowable; your subject is at least 384,000 km away and you're shooting through 480+ km of air. That air is seldom clean and often full of convection currents, making matters worse. Stacking your images will give you a mathematical mean image, reducing image noise and sharpening the details.

The software I use is a free programme called RegiStax 6 and can be downloaded from the website here. The programme will first align the various images - like I said, the moon will be in a slightly different place each time due to the relative motion of the earth and its satellite. Before the images can be averaged, they need to be lined up. After that, you can select what percentage of the base images you want to use for the averaging before stacking.

Rather than list the specific steps I used and palm them off as my own, I'll point you to the Sarah and Colins Astro YouTube video that I followed verbatim. After aligning the images, there will still not be much difference from the original until you adjust what the programme calls 'wavelets'. Then the magic happens and the crisp image begins to reveal itself. 

I had problems using tiffs; firstly the tiffs I generated from ON1 weren't recognised by RegiStax. The tiffs from Olympus Workspace were recognised, but the resulting image had a lot of digital noise. My best results were from Olympus RAW files exported to jpeg in ON1 Photo Raw. The output from RegiStax can be saved in any of the usual formats, though if you've used jpeg as the starting point for stacking, you possibly won't gain anything by saving the output in any of the information richer formats.

Final Processing

Now it's time for the last polish. Re-open the image in your image processing software. It's likely to have quite a bit of noise in the smoother parts of the image and it's now time to deal with that and any other adjustments you might care to make.

In ON1 I dealt with noise using Luminance 2020 Noise reduction, setting Luminance to 30 and Detail to 5. Your mileage will of course differ. I loose a little bit of detail like this, but it's a sacrifice I'm prepared to make to get rid of the unsightly noise.

Watch the craters at the bottom of the moon as well as the noise in the Sea of Tranquillity (the darker patch towards the top).


Starting Image


After Stacking


After Noise Reduction


Layers

As a last step, you may want to assemble the final image(s) in layers. This will let you plant your final moonshot back in its environment as with my Moonrise over the Allgäu shot at the beginning of this article. I used this process to slightly magnify the moon in this scene to emphasise it. 

What Next?

If you found this tutorial useful, link to your final image(s) below, it would be great to see them. 

If you're still looking for a challenge? Go and take a look at Alyn Wallace's YouTube tutorial on taking gorgeous HDR images of the half moon.

I'll close with two more before and after pics taken later that evening from home to emphasise how much detail can be wrung out of these images. I had to add a gaussian blur to the background on the stacked image due to an ugly moire pattern, but that's trivial.


Later the Same Night: Before || Olympus f/5.6, 1/320 s, ISO 200

Later the Same Night: After || Olympus f/5.6, 1/320 s, ISO 200

Sunday 31 May 2020

Location Scouting for Astrophotography

A couple of weeks ago, one of my photography pals texted me asking me if I wanted to join him on a Milky Way hunt some time since his summer plans had been scratched due to Corona (Matthias, you really need to set up a website so I can link to your photos!). He mentioned a couple of possible locations, which got me thinking; where would _I_ shoot the Milky Way from. I came up with an idea (that I won't share here yet, I haven't seen any other astro shots from here and I'd like to have a crack at it before someone else gets in first, so if you recognise any of the spots in this post, plesase keep them to yourself for now - hopefully in a month or so we'll be able to pull this off). I knew that I wanted to include some 'civilisation glow' in the shot if possible - the night glow from a human habitation and I opened up Google Earth to look for a possible mountainside that would give me the angle that I wanted.

Watching the Sun Go Down || Olympus f/16, 1/60, ISO 1250

It's not as easy as I'd thought to find a deforested slope facing the right direction in the lower alps. Despite my local knowledge, it took quite a bit of playing around before I found a peak that would work, and even then it was only on paper. At the end of May I headed down there for an evening to catch the sunset and the blue hour to see whether the angles matched up. Even a couple of days beforehand I wasn't too sure about the trip, no-one wanted to join me and I was a little wary of being on my own in the mountains at night - even in familiar territory there are plenty of things that can go wrong. And the forecast wasn't playing ball. Until Friday morning that is. All of a sudden the evening forecast was opening up - a green light.

It's a Sign! || Olympus f/8, 1/80 s, ISO 200

With sunset projected to be 21.05, I set off from home just after 18.00 to allow myself enough time to get down there, get up onto the ridge and find a couple of spots whilst the light was still good. Climbing up from the car park the light was gorgeous. A few high clouds might have been nice to complete the scene, but I wasn't going to complain. The few people still on the hills but coming down gave me some strange looks and I had a quick chat with one bloke who was interested to know what I was doing going up at that time of day before he got pulled to heal by his wife. And then I was on the ridge.

At the Ridge || Olympus f/8, 1/500 s, ISO 200

The views were beautiful, clear air with some mountain cloud hanging around the peaks. It was all I had hoped for from my virtual tour planning and more. There is some lovely rock around, and the peaks still have significant patches of snow on them despite the non-winter of 2019/20. From the ridge its a broad path leading to one of the peaks that had looked promising and so after taking a couple of smartphone shots I headed out, warm setting sun on my left, valley on my right. The light was catching the fir trees along the ridge, especially the skeletal branches of dead trees that had long since lost their bark to the elements. The orange light picked out the highlights nicely.

Catching the Last Rays || Olympus f/8, 1/80 s, ISO 250

Just before the potential spot that I'd looked out there's a broad shoulder that looked promising, the spot itself had a lot more trees and was a lot narrower than it had looked on the computer, pretty much ruling it out. By this time, the sky was beginning to turn orange in the west and I was desperate to find an open piece of hillside facing westwards. East wasn't a problem, I could get to a treeless spot there any time, but the other side was light forest. In the end I had to settle for a gap between the trees. I say settle, I think the silhouettes work quite nicely, but it wasn't the picture I had first envisioned. Dropping the aperture to f/16 helped with the sunburst.

And Down She Goes || Olympus f/16, 1/100 s, ISO 200

In the immediate aftermath of the sunset I headed back along the ridge to where I had first hit it to wait for the first stars. The path back offered a couple of nice shots too, and I particularly like this one with the roots on the path. This is a composite of two exposures, one for the foreground and one for the background. After mixed experience with ON1 Photo Raw's HDR assembling, I've gone over to using layers to assemble these shots, it gives me a deal more flexibility when I can control precisely which elements of the photo I use from each exposure. I'll write a separate blog entry on this some time.


The Path Goes On || Olympus f/6.3, 1/50 s, ISO 1600


Up until this point I'd had my go-to lens on the camera, the Zuiko f4 12-100 mm, getting back to the top of the ridge it was time to get the wide-angle zoom out, the Leica f2.8 8-18 mm. The wider aperture and wider field of view make this a great astro-landscape lens, although I wouldn't complain if there was a convenient lens with an even wider aperture for night shots. The optical quality is second to none though, provided I can focus it properly. During the daytime this isn't an issue, I just leave it on autofocus normally, but focusing on pin-pricks of light at night to get the infinity focus right is tricky, even with glasses.

Golden to Blue || Olympus f/4, 1/60 s, ISO 500

I set up the tripod with my Benro Geared Head to allow me good control over the level and direction and started shooting the blue hour. When hiking, I rarely wear more than t-shirt and shorts, but even setting out from the car I was wearing long sleeves and trousers. Despite my soft-shell jacket it was beginning to get quite cool in the late evening breeze. Wooly hat and gloves time, though putting the gloves on and off was a pain. I was glad of the tripod net that I'd bought for the occasion to store bits of camera in the low light, it made keeping kit under control in the dark a lot easier. 

Waiting for the Stars || Olympus f/2.8, 1/6 s, ISO 200

And so I sat and waited for the first stars to appear, the half-moon high in the sky away to my right, the dew beginning to fall. Taking a shot every five minutes or so, exposure bracketing just to be on the safe side. I was watching the clock too, I didn't want to be out too late on my own - there was still a trek down to the car in the dark. Even with the half-moon and my head-torch, stumbling around in the dark in the mountains shouldn't be taken lightly. And then there was the 90 min drive home.

Gibbous Moon over the Allgäu || Olympus f/3.3, 10 sec, ISO 200

The descent proved easier than I had feared and I was soon back on the tarmac. Definitely worth the evening's trek. Oh, and remember the SD card that went through the washing machine? It seems to have finally given up the ghost. Fortunately after I transferred the photos to the PC and not before. Sometimes you've gotta have a bit of luck!

End of the Day || Olympus f/4, 0.8 s, ISO 800