I have the enormous privilege of living about a 10 min car ride from one of Bavaria's most picturesque lakes, the Ammersee. We've seen it in all conditions, from balmy sunny evenings, after torrential rain with mosquito plagues, autumn storms with huge waves and speeding kite surfers to completely frozen over in 2006. Working from home it's really easy to get there for a quick excursion. Although it's really chilly here at the moment - we're talking negative double digit Celsius - I was really surprised not to find more ice when I took off after work on Friday afternoon to check it out. Dawn that day had been really pretty and I had high hopes for the sunset despite the lack of significant cloud.
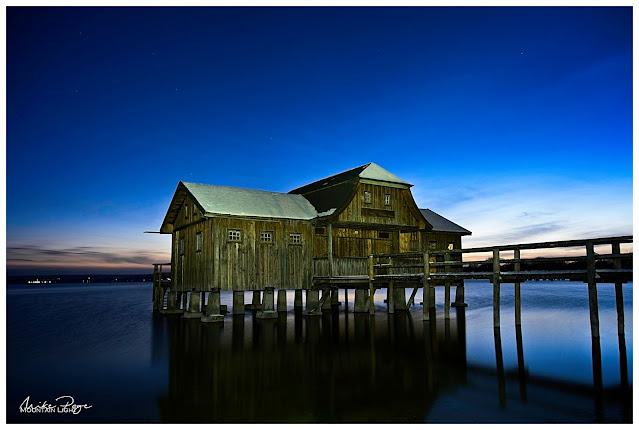 |
| The Boathouse at Stegen I || Olympus 12 mm, f/4, 15 s, ISO 200 |
Dressing up warm is critical in conditions like this. I knew I was going to be spending quite a while outside and so I put on downhill ski trousers over my jeans, heavy mountain boots with a second pair of socks, a windproof jacket, scarf, woolly hat and my latest acquisition, my Vallerret Markhof Pro 2.0 photography gloves. These are great thick gloves with foldable tips on the index fingers and thumbs allowing you to access all the necessary dials and buttons on the camera without exposing your whole hand. The finger tips fold back on strong magnets hidden unobtrusively within the fabric to keep out of the way.
I've included a screenshot of a Google map of Stegen (am Ammersee) detailing where each shot was taken in case you're interested. For more original ideas and inspiration regarding where to shoot at the Ammersee, Google images of the Ammersee or check out some of the local photo websites, such as Werner's Fototräume (also great for other photo spots in the vicinity). | 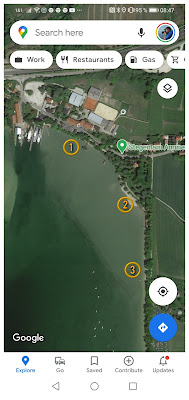 | | Photo Locations from this Blog |
|
The Solitary Boathouse at Stegen (1)
Arriving at the car park as most people were beginning to leave - not that the car park was very full anyway (had I mentioned how nippy it was?) - I was at first disappointed at the lack of ice, but I'd had the foresight to bring my neutral density filters and was confidant that I'd be able to get a few decent images out of the evening.
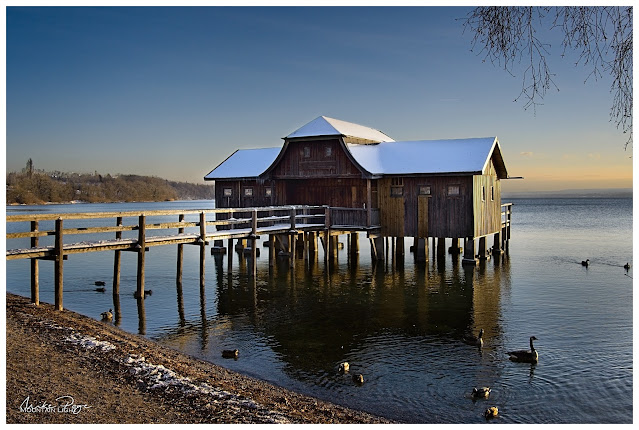 |
| The Boathouse at Stegen II || Olympus 16 mm, f/8, 1/50 s, ISO 200 |
Once you get past the restaurants, the first landmark is the boathouse next to the beer garden. Always a thankful motive in the evening sun. The light was quite challenging so I slipped the Olympus into exposure bracketing mode and hand-took this image. It's not an HDR, but it is an exposure blend, with the sky, water and boathouse are all taken from separate images and assembled in ON1 Photo Raw - though any decent processing software will do the trick.
Boathouse Row at Stegen (2)
The second landmark is the row of boathouses with the Wasserwacht or lifeguard station. Again, sunset is always kind to these huts as you can see here. Whether or not you use the shoreline as a curved leading line is entirely up to you. On a clear day, the Alps form a pleasing backdrop to the right inviting you to taking a wider panorama. This time I had to be content with a pleasant orange glow on the horizon, which also works. The way the trees echo the line of the houses and the reflection all emphasise the structures in the scene.
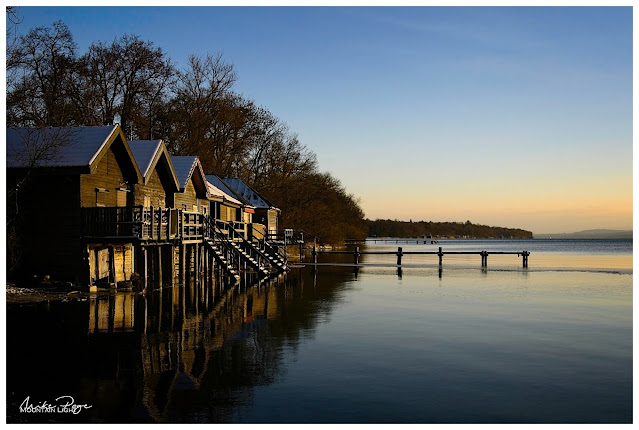 |
| Boathouse Row I || Olympus 23 mm, f/8, 1/125 s, ISO 200 |
The Jetty at Stegen (3)
The third stop and my actual destination was the background jetty in the photo here. The jetty leading from the beach huts doesn't work as there are no crosspieces down at the moment and looking along it you just get a wooden skeleton. I took my time setting up for this shot. At other times of the year you can line up the jetty pointing at the sun, but in February that's just not going to work. In order to bring a connection between the elements I elected for this 'compromise', placing the setting sun just over the end of the jetty. Tripod out, filters out. Assemble everything together, careful not to zoom out too far as my filters tend to vignette below about 14 mm. It was here that I noticed that the L-bracket had come loose. The clever people at Vallerret had anticipated this eventuality though. The back of each glove has a little pocket that you can stuff things like lens cloths in. The left pocket comes with a tripod key on a lengthy lanyard and so instead of having to fumble around in the fading light for the necessary tool, it was literally to hand.
You can see from the previous shot of the huts that the although the water near the shore was protected and relatively flat, further out the wind was ruffling the surface. In order to reduce the impact of the phenomenon it was time for the Big Stopper, an almost opaque piece of glass that goes in front of lens to reduce light, turning a 1/60 s exposure into a 20 s exposure, the minimum that was needed to iron out those waves. The almost direct sun was a bit of a problem so the next tool in the bag was the graduated filter. This is less dark than the Big Stopper but is gradated, one half being clear and the other darker for bringing down dark skies.
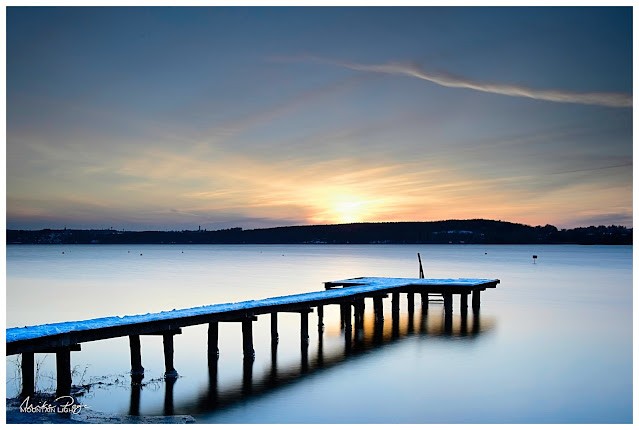 |
| The Jetty I || Olympus 16 mm, f/5.6, 20 s, ISO 200 |
Processing-wise there wasn't a lot to do here. I've further darkened the sky and actually de-saturated it a bit to make the colours more pastel. I've done my usual trick of actually brightening the snow on the jetty to emphasise the line. As long as you don't blow the exposure, this is a really great technique to make an image stand out that I discovered when astro-shooting in the Alps in the early summer and revisited in my
November edit of an image of the first snow of the season. They say that a good photo has rhythm - a difficult thing to define. One of the things I like about this photo is the repeating structures of the lines which are nicely parallel, from the jetty to the clouds and contrails (remember them?).
I shot quite a few of this scene as the sun sank below the horizon, but I think this one was the best of the set. There are always going to be shots that are blurred due to slight movements of the tripod, so shoot a few and sort out the best when you get back to the warm.
Back to Boathouse Row (2)
With the sun well and truly set it was time to start walking back to the car. A couple more 'togs were lingering around the boathouses and so I stopped to scout around to see what the fuss was about. I found this tiny inlet in the shore that caught my interest. Not a classical leading line, but it still takes the viewer's eye in the right direction. I went as wide as I could, having put the Panasonic Leica 8-18 mm on the camera for this shot. The tripod was set low to the ground too.
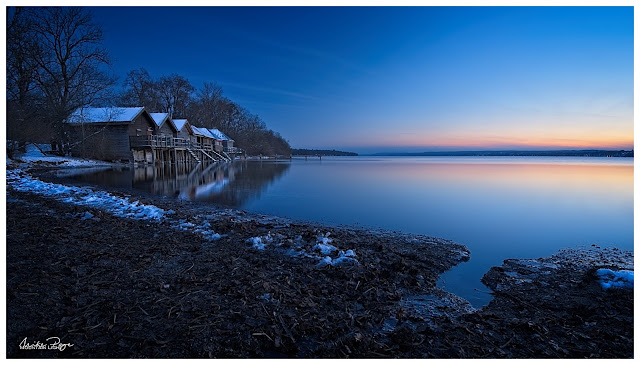 |
| Boathouse Row II || Olympus 8 mm, f/4.5, 5 s, ISO 64 |
Satisfied that I'd got the best out of the boathouses for the day I combed the beach back towards the restaurants. The sky still had a lot of interesting colour in it and it looked beautiful above the docked pleasure steamers at Stegen. Unfortunately, looking beautiful doesn't always translate to a great photo. I took a few, but none made the cut.
The Solitary Boathouse Revisited (1)
The last port of call was the original boathouse. By now, even though there was still a bit of colour in the sky, it was getting quite dark. But I'd come prepared with both my LumeCube panel and a head torch. The panel didn't like the cold very much. Even though I'd charged it completely before coming out it was only showing 30% power, plus it wasn't really cutting through the dark as I'd hoped. It wasn't the light source for the job. Fortunately the head torch was. My first image was from the east looking towards the sunset (first photo above). You can imagine from the photo why a little extra illumination was necessary. The light beam from the torch was quite narrow and so I waved my head back and forth over the wooden structure over the whole 15 s exposure. If you look carefully you can see the first stars beginning to appear in the sky. This for me is the magic window of light for photography - enough ambient light to be able to see features on the ground, the first stars visible and with a bit of colour in the sky from the setting sun. As you can imagine, it's a very narrow window, but if you get it right you can get some stunning images.
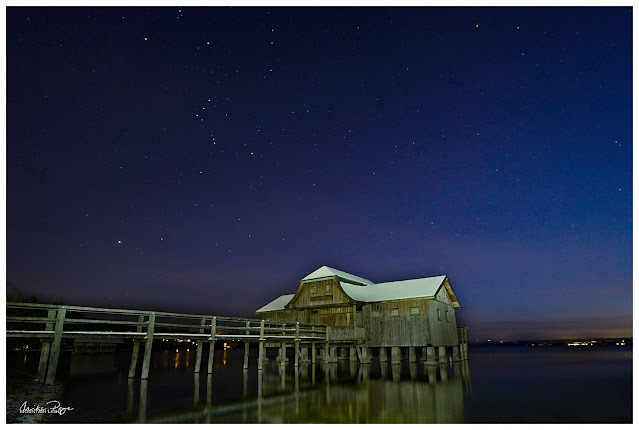 |
| The Boathouse at Stegen III || Olympus 12 mm, f/4, 20 s, ISO 400 |
This last image is from the other side of the boathouse as the light was really fading. Again the boathouse was lit by my head torch. By playing around I found that if I illuminated for 10 s out of a 20 s exposure the light on the house was about right, though I did adjust it a bit in post - it's always difficult to accurately assess exposure in the dark as the camera screen always looks comparatively bright unless you dim it down. Keeping an eye on the histogram can certainly help, but here it was tricky to judge exactly how much light to add. I was certainly glad of the Vallerrets at this point. I really didn't want to have to be taking gloves on and off to fiddle with the settings in those temperatures.
I love how prominent Orion's Belt is in the winter sky here. Given the wide aperture I was surprised that the stars were as sharp as they have turned out here. That's micro four thirds cameras for you.
If you're local to us in Bavaria and are interested in a pair of Vallerret Markhofs, size L, drop me a line. They were just too small for me and I had to go XL. They're out of stock with Vallerret at the moment so if you want to do some winter photography this season I can warmly recommend them.
Afterword - If At First You Don't Succeed
A couple of the photography YouTube greats have recently released vlogs saying essentially the same thing. The one thing that will advance you as a photographer more than any other, the golden lesson of photography is... ...perseverance. I've had a couple of opportunities to practice this discipline over the last 12 months, whether the various attempts at astrophotography or trying again and again to get the right conditions on the covered bridge at Bad Hindelang, and every time it has paid off in spades. There were a couple of issues with the photos I took on Friday. I was especially unhappy with the photo of the jetty; the composition was off meaning that I had to heavily crop the image to get one that I was happy with and the aperture was so wide open that the depth of field was too narrow to catch the background ridge in focus (below). So tonight I returned, wife and girl-child in tow, to try and rectify my errors.
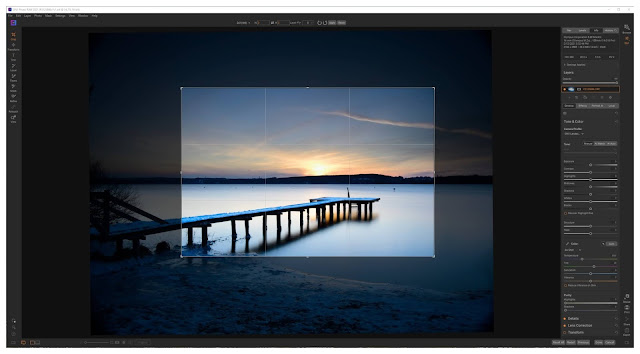 |
| Reducing a picture to the essential elements |
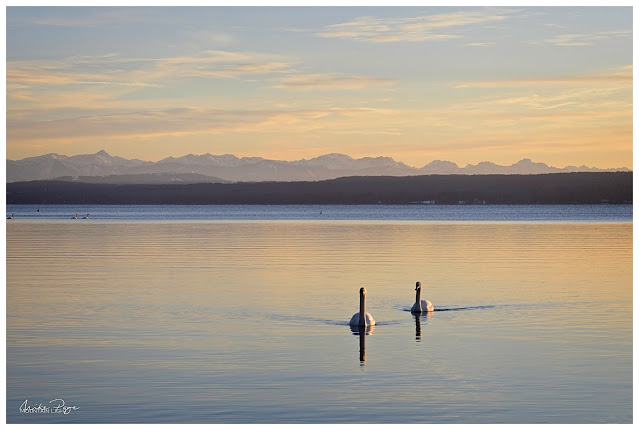 |
| Valentine's Swans || Olympus 57 mm, f/8, 1/125 s, ISO 200 |
This time the view to the mountains was clear and there was some ice forming on the still water in front of the row of boathouses. On top of this, there were multiple pairs of swans on the water - how aposite for Valentine's day. I allowed myself to be distracted by both the birds and the boathouses before hurrying down to the jetty. I got a better crop, but the bitty ice detracts from the simplicity of the previous image and a lot of snow had gone from the jetty.
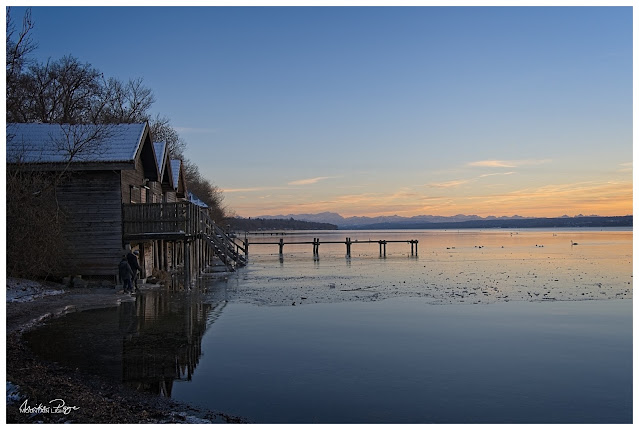 |
| Boathouse Row III - HDR || Olympus 17 mm, f/8, 1/80 s, ISO 200 |
This time I could get the composition and focus fixed on the jetty... ...but the ice is too gritty after kids were playing on it all day and the colours in the sky weren't quite as good. But hey, ho.
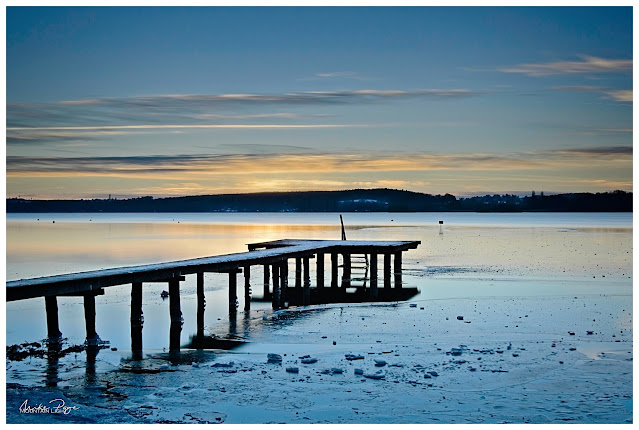 |
| The Jetty II || Olympus 24 mm, f/8, 10 s, ISO 100 |
It's always a good idea to look around even when you've got a specific composition in mind. Ice had formed around the legs of the jetty and the water level had subsequently decreased, leaving these feet around the bottom. Against the light they formed an interesting sculpture.
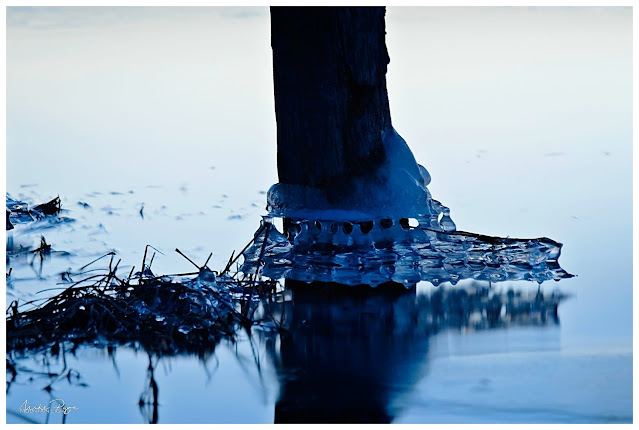 |
| Icy Foot || Olympus 86 mm, f/4, 50 s, ISO 100 |
And then the new moon revealed itself in the southwestern sky, giving me a chance to try another composition with the jetty including the mountains in the background...
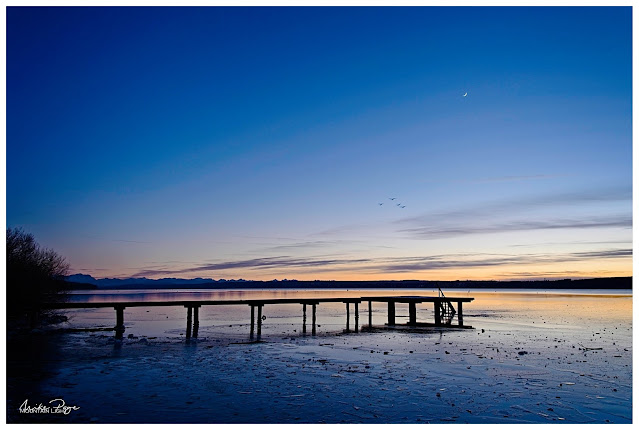 |
| The Jetty III with New Moon and Swans || Olympus 14 mm, f/8, 1/10 s, ISO 100 |
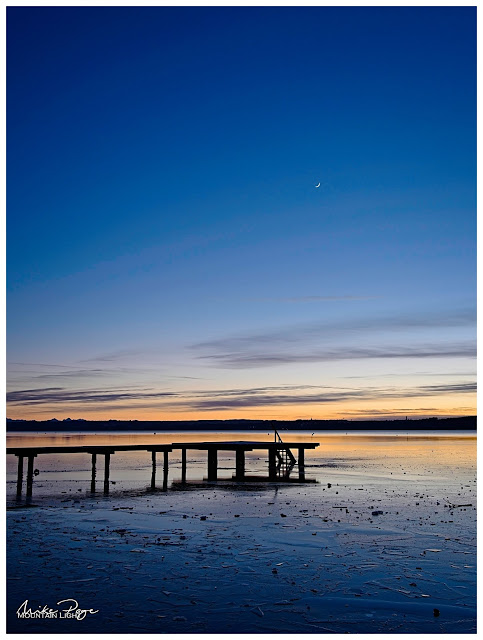 |
| The Jetty IV || Olympus 17 mm, f/8, 5 s, ISO 100 |
...and yet another with the boathouses before I was dragged back to the car by my half-frozen ladies. But I had promised them that we wouldn't stay too long and I was happy enough with the blue-hour photos from Friday.
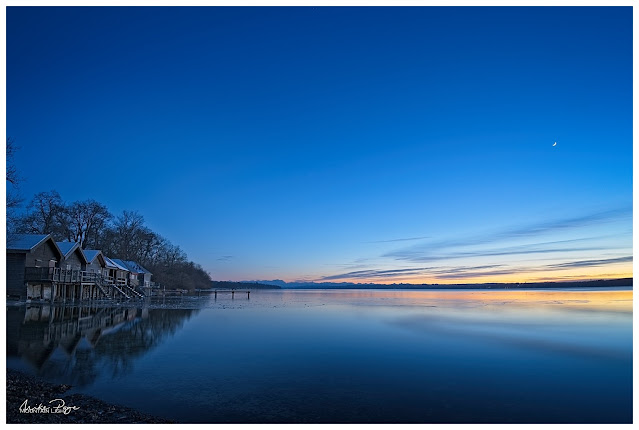 |
| Boathouse Row IV || Olympus 8 mm, f/8, 5 s, ISO 100 |
Lessons Learned
Every time I go out I make mistakes. Every time I make mistakes I learn something. On Friday I learned about the best composition for the jetty. On Sunday I learned more about the Olympus high res mode and that patience is required when using it in conjunction with long exposures. A couple of times I thought it had crashed, when in fact it was just taking its time. Because I thought it had crashed I turned the camera off mid-processing, leading to me losing the first 2 or 3 high res shots. This mode is also too slow for lunar photography in combination with these long exposures - the moon simply moves too fast. Fewer mistakes to make next time.
Photography is like sailing or hiking. In fair weather it's easy. Mistakes are easily rectified, items are easy to find in rucksacks, etc. But the practice of doing those mundane things in straightforward conditions pays dividends when the going gets tough. When it's so cold that you can't think straight. When it's so dark that you can't remember where you put that filter. When the conditions are changing fast and you need to access a particular function on the camera, if you don't have the fair weather experience to fall back on, you'll just go home frustrated. If you want to be a good photographer, if you want to come home with the great photos taken in challenging conditions, practice all you can. You will be rewarded.
