Showing posts with label macro. Show all posts

Sunday, 25 April 2021

Getting the Most out of Spring Flowers

"Spring is sprung, the grass is ris, I wonder where the birdies is!" 

In other words, spring is here and the floral season is upon us. This blog post is about getting the most out of spring flowers looking at equipment, subject and composition. Close-up or macro photography is a fascinating sub-genre of nature photography that can give a lot of bang for the buck - you don't have to invest tons of money in expensive equipment to get some cracking results.
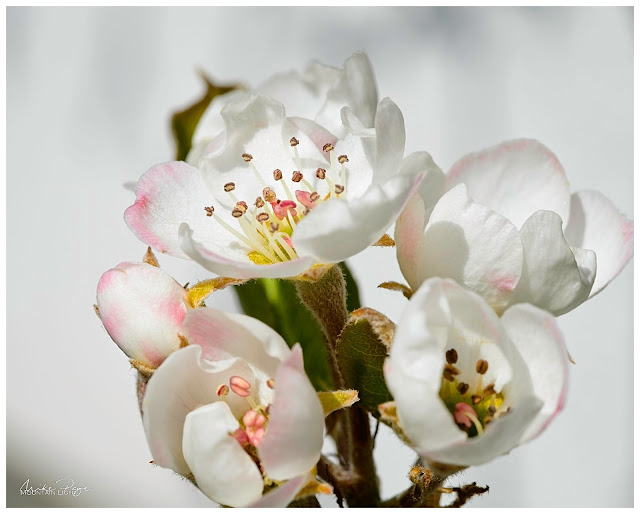
Pear Blossom in my Garden || Olympus 60 mm, f/8, 1/400 s, ISO 200
I'm not going to go into complicated things like focus stacking or special lighting here, this post is going to be directed at beginners and enthusiasts - how to get stunning close-ups of flowers in the spring. For those interested in the technical background, the official definition of a macro photograph is one where the subject takes up the same amount of space on the camera sensor as in real life; this is a 1:1 representation of the subject. Anything lower than this is simply a close-up, from around the 5:1 level we're into microscopic photography.

The Equipment

Every lens has a minimal focus distance - the closest distance at which you can focus on an object. On a normal lens this will be somewhere between 20-50 cm, which is too far to get great shots of small subjects. But there are a couple of relatively inexpensive ways of reducing this, allowing you to get closer to your subject and allowing you to fill your frame with the beauty that nature provides. No-one is going to be interested in a shot of flower blossoms that fill 2% of your photo. The aim here is to get up close and personal with nature.
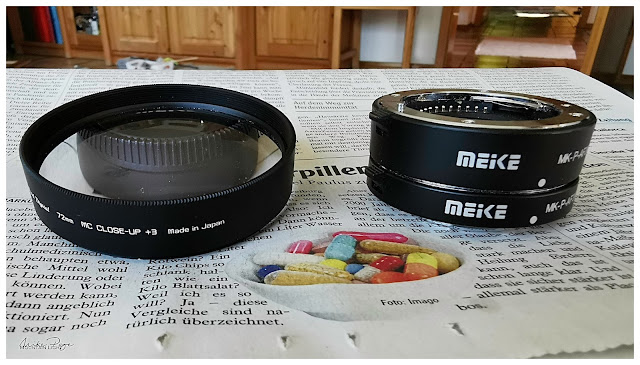
Close-up Filter (l) and Extension Tubes
The first tool I bought for close-up photography was a +3 diopter close-up filter for my standard M. Zuiko 12-100 mm lens that I use on my Olympus camera. This effectively functions as a magnifying glass screwed onto the front of your lens and allowing you to reduce the minimal focal distance. Plus 3 diopter allows you to get significantly closer, but be prepared to dig a little into your pocket for this. I just looked up how much this filter costs on the Big River website and was shocked to see that you'll need to spend around € 100 for one of these attachments at the moment. I'm sure I didn't spend that much when I bought mine, but for a number of years, this was my go-to tool, always in my camera bag in the mountains.

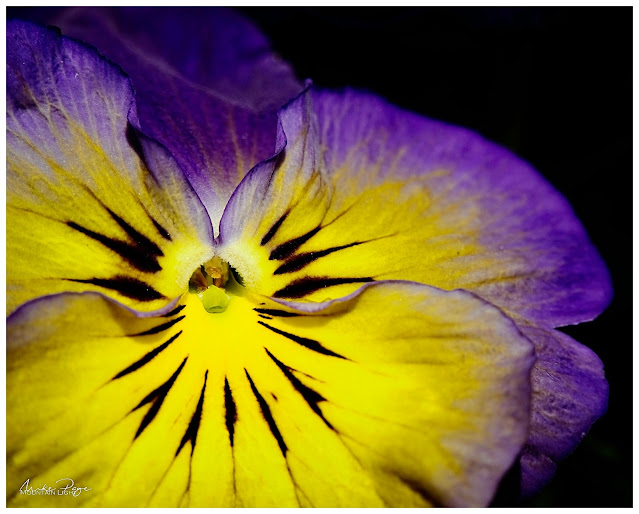
Fill that Frame! Pansy close-up
The next tool I bought was a set of extension tubes. These are essentially hollow tubes that are inserted between the lens and the camera. They don't contain any glass and so won't affect the quality of your photo in any way. Often they will provide connectors that allow your camera to continue to communicate with the lens for purposes of setting the aperture and focus. The tubes also allow you to get much closer to your subject as above. A set of tubes will set you back about € 30 (+/-). The length of the tubes shouldn't be longer than the focal length of your lens, otherwise you won't be able to focus.

If you're really serious about close-up photography you might want to consider investing in a dedicated macro lens. I recently bought the Olympus f/2.8 60 mm macro lens. It's so small that I can take it with me everywhere. 

Normally, a tripod isn't necessary and a lot of macro photographers actually prefer not to use them. For standard shots I don't bother with one, only if I'm focus stacking or dealing with really small subjects.
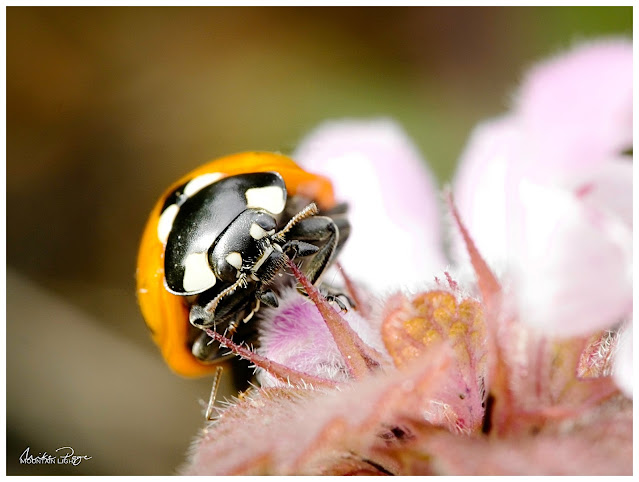
Ladybird on Nettle Flower || Olympus 60 mm, f/8, 1/50 s, ISO 400 
All of the above can also be combined and I've already used the extension tubes to great effect with my macro lens allowing me to get some really close up shots of garden insects such as the ladybird above.

The Subject

Not every flower works well close-up. Some look better as a group from a distance, get too close and they can be boring. Complex flowers like dandelions and daisies can look fantastic close up. Others can look just bleurgh... Trial and error is the best approach here. Blossom is nearly always good close up, as are catkins and pussy willow. Experiment and you'll find what works best for you.
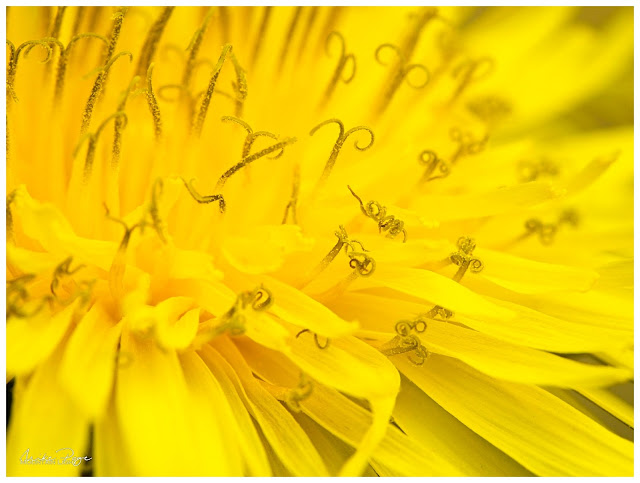
Dandelion Detail || Olympus 60 mm, f/8, 1/100 s, ISO 400
One of the beauties of macro photography is that you don't need to go far to find your subject. If you have a garden or even just a balcony, you more than have plenty of subjects to hand. Otherwise, head out to a local park, or even better a botanical garden.

One of the things to bear in mind with close-up photography is that the depth of field gets shallower the closer you are to a subject. This can be both a boon and a bane. It can really isolate the subject matter using sharp focus on your subject whilst throwing the background (and foreground) pleasingly out of focus, but if the depth of focus is too tight you'll struggle to get all of you subject in focus.

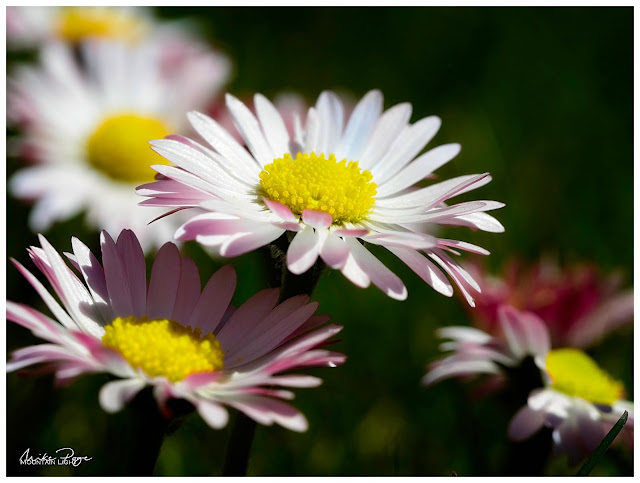
Down among the Daisies || Olympus 60 mm, f/5.6, 1/1250 s, ISO 200 
The depth of field (or depth of focus) describes the distance before and after the focal point that is acceptably in focus to the native eye. At it's shallowest, the subject is is in focus and the foreground and background are blurred. At it's broadest, focus will extend for most of the scene. In the shot of the daisies above, the depth of focus is restricted to the plane encompassing the yellow stamen of the central daisy flower. Everything in front of that and everything behind is out of focus.

Just like the exposure triangle (ISO/Shutter Speed/Aperture), there's a depth of field triangle:
Aperture - Focal Distance - Focal Length

The wider the aperture, the shorter the distance from the lens and the longer the lens, the shallower the depth of field:


Shallower DoF

Wider DoF

Aperture

Wider (lower number)

Narrower (higher number)

Focal Distance

Closer

Further away

Focal Length

Longer

Shorter


The Composition

One of the great things about macro photography is it gives you to present your viewers with details that they perhaps hadn't consciously seen before giving rise to that cherished 'oh wow!' reaction. There are a couple of simple tricks to getting a cool close-up photo of flowers:

One of my favourites is to get low down to the flower, on your stomach in the grass if needs be (taking care not to squash other flowers and don't forget to check for ticks afterwards). This gives a much more interesting angle and view than looking straight down on the flowers, catching your shoes in frame. For greatest effect you need to be just above or below 90° - above allows a glimpse into the flower, below can be really effective against the light.
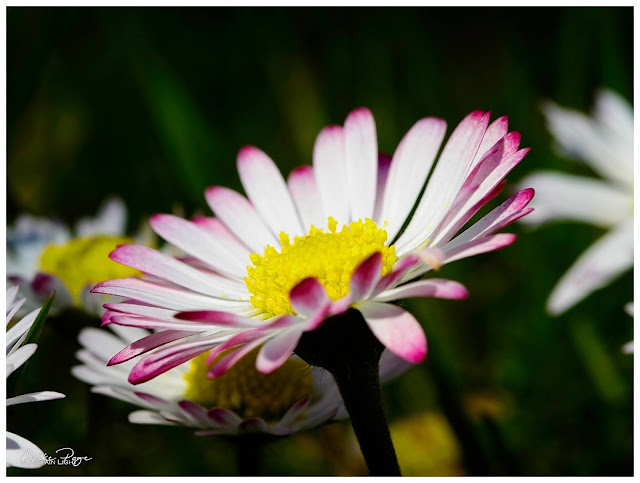
Down at Daisy Level || Olympus 60 mm, f/8, 1/200 s, ISO 200

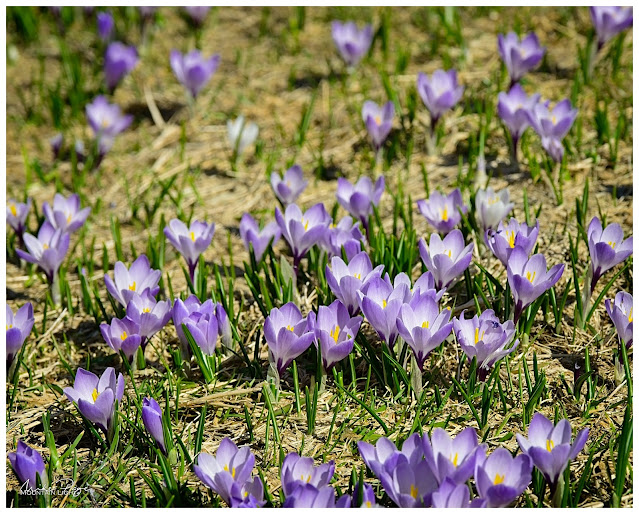
Another thing that's cool to do is to put the flowers in their context. The shot here of the crocuses isn't a close-up, but it puts them nicely in their context in the AllgÀu mountains. The best way of doing this is with a wide angle lens, making sure to get close to your subject matter so it takes up a significant part of the frame whilst allowing the background to play a supporting role.
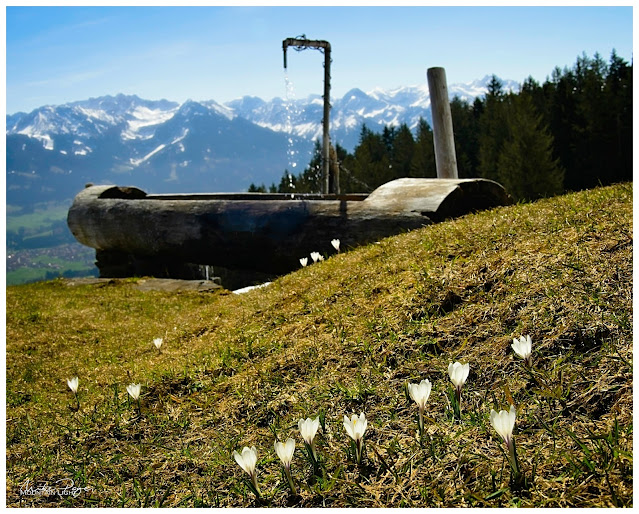
Mountain Crocuses in Context || Olympus 18 mm, f/8, 1/320 s, ISO 200
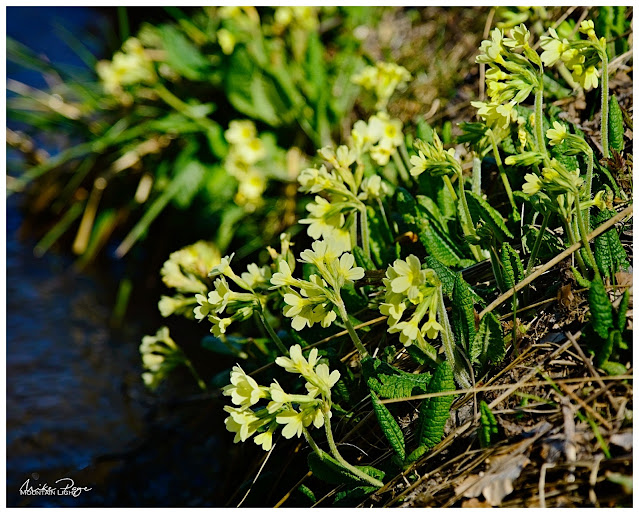
With these primulas I included a bit of the stream to anchor them in their environment. Opening the aperture helped me to isolate the flowers and give the viewer a hint where they're supposed to look, important here given the lack of colour contrast between the flowers and the background.

Primulas at the Stream || Olympus 100 mm, f/4, 1/50 s, ISO 200
Where the flowers aren't necessarily very strong individually, back up a little and take them as a group - there's strength in numbers.

Crocus Field || Olympus 80 mm, f/8, 1/320 s, ISO 400
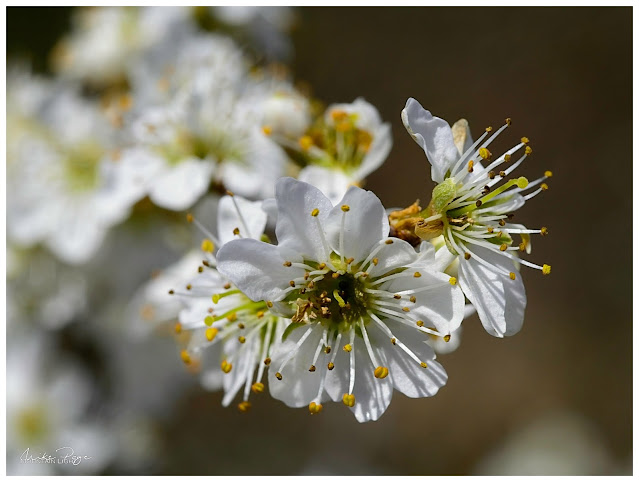
When shooting tree blossom, diagonal branches can support the composition. Watch out for distracting elements in the background and try to get your focus on the closest part of the blossom for the biggest impact.

Spring Blossom || Olympus 60 mm, f/8, 1/400 s, ISO 200
So, what's stopping you? Get out there, take some stunning spring photos and share them online!

Addendum: Light

I've just been out working in the garden and realised that I'd forgotten one of the most important aspects of photography: Light. Most of the time our instinct is (hopefully) to shoot with the light behind us or to the side. If we shoot into the light, often our subject will be a dark splodge and the background a washed-out blur. It hurts when I see people taking photos like this because I know they're going to turn out badly. Always know where the light's coming from and take it into account when you're taking photos.

The wonderful thing about flowers though is that they're often translucent - they let a certain amount of light through - as illustrated by this lovely photo by my friend Emma Marra. It also shows nicely the principle of shooting from slightly below the flowers and up towards the light. All the better if you can place something dark behind the flowers as here to let them really shine.
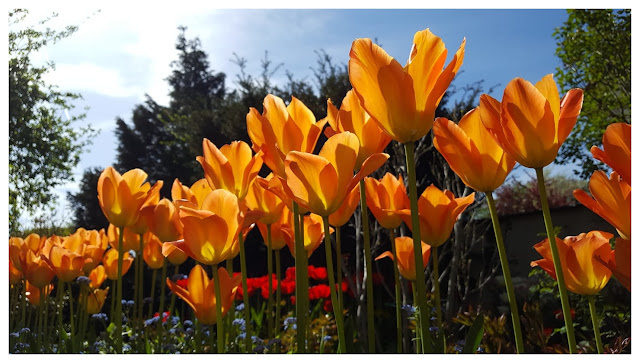
Emma's Tulips. Down low and against the light.


Saturday, 17 October 2020

If You Go Down To The Woods Today...

...you're sure of a big surprise! Mushroom season is upon us and some great photo opportunities if you know how to make the best of them. When Matthias came down to visit and shoot last weekend (mate, you've got to get a webpage up so that I can link to your great images), one of the things I was excited about was getting round to a good mushroom shoot. There's a really easy trick-shot with mushrooms if you know what you're doing. Matthias was complaining about the lack of suitable woodland where he lives in the north east of Bavaria near the Czech border and I blindly boasted that we had a great little woodland at the bottom of the village that was sure to have a great supply. Fortunately my woods didn't let me down, quite the reverse, they did me proud.

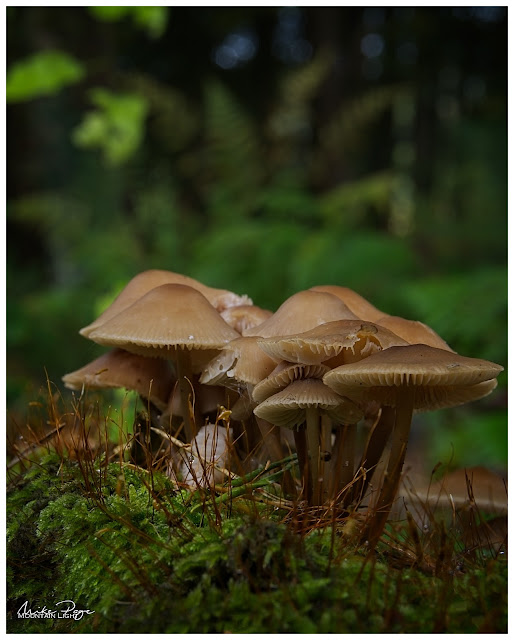
Lantern Mushrooms || Olympus 47 mm, f/11, 1 s, ISO 200 

I'll share at the bottom the technical details of how to pull off a shot like this - it sounds more complicated than it is, honest!

In the meantime I'll just dump a number of the other photos from our session here without much explanation in between. My go-to aperture with my Olympus Zuiko 12-100 zoom is f/8 - it's a great compromise between image quality and depth of field. Because a lot of these images were taken at relatively short distances, where depth of field shrinks to virtually nothing, I stopped down to f/11 in the hope of increasing the amount of each photo that was in focus.

It's Not Just Mushrooms || Olympus 92 mm, f/8, 1/2 s, ISO 400
All the Delicate Stuff || Olympus 12 mm, f/5, 1/4 s, ISO 200
Huddled Close || Olympus 47 mm, f/11, 1 s, ISO 200
The Little Things I || Olympus 47 mm, f/11, 1 s, ISO 200 
The Little Things II || Olympus 47 mm, f/11, 1/2 s, ISO 200

The mushrooms in the above two images were so small that I wouldn't have spotted then if hadn't been for Matthias' eagle eyes. The tops couldn't have been more than 5 mm across. To be able to get close enough I had to screw the +3 diopter magnifying filter on to the front of the lens and lie down on the moss.

Narrow Focal Plane is a Challenge || Olympus 41 mm, f/11, 1/5 s, ISO 200
Another Composite Shot || Olympus 28 mm, f/11, 0.6 s, ISO 200
And Without Illumination || Olympus 28 mm, f/11, 1/4 s, ISO 200
Olympus 66 mm, f/11, 30 s, ISO 200
Twin Caps || Olympus 31 mm, f/11, 10 s, ISO 200
Twin Caps II || Olympus 31 mm, f/11, 2.5 s, ISO 200
I was really proud of this image, showed it to my wife Sharon and she just burst out laughing. Piqued, I asked her what was so funny, and then she pointed out the googly eyes above the left mushroom. Fair point.

Where the Fairies Live I || Olympus 44 mm, f/11, 4 s, ISO 200
Where the Fairies Live II || Olympus 92 mm, f/11, 3.2 s, ISO 200
All in a Row || Olympus 92 mm, f/11, 3.2 s, ISO 200
Cluster || Olympus 100 mm, f/11, 3.2 s, ISO 200
B-Shot || Olympus 100 mm, f/11, 2 s, ISO 200
Just to show that it doesn't all go right. Sometimes the depth of field is too shallow for a decent shot...

How It's Done

These illuminated mushroom shots are super impressive and quite easy to do with minimal equipment. All you need is:
  • a suitably patient patch of mushrooms
  • a camera - preferably one with a manual mode
  • a tripod or other means of keeping the camera absolutely still for two shots (though as Matthias shows below, putting the camera on the ground is enough too, you just need to be absolutely sure it doesn' move between the two shots)
  • a light source (torch, smartphone or in our case Lume Cubes)
  • software that can deal with layering two photos over each other
Setting up the shot

The procedure in the field (forest?) is relatively simple: set up the scene, making sure you get low enough - you're going to get dirty knees whatever, so you may as well get used to that - the angle has to be below the gills so you may have to find some mushrooms on a log. Watch out for the background - it's easy to focus so intensely on the thing in front of you that you blend out horrible stuff in the back.

Set the camera in manual mode, you'll want a relatively low aperture - say around f/11 - unless you focus-stack depth of field is going to be a challenge because we're dealing with close-up photography and then set up the shutter speed - it doesn't have to be fast because the camera is fixed. Your camera should show you what is a good shutter speed, though at this stage it doesn't hurt if you deliberately underexpose by  anything up to a stop - generally shown as EV setting at the bottom of the display. If you have the option and feel confidant about doing it, I would strongly recommend that you focus manually too; the scene in front of the camera is likely to be very 'busy' and the camera can't read your mind - it doesn't know exactly which aspect of the scene you want to have in clear focus.

Take the starting shot, preferably either with a remote or a 2 s timer so you don't introduce unnecessary camera shake. 

Then take your light source, hold it over the mushrooms and take your second shot. The brightness and distance are both matters for experimentation. Thicker mushrooms will require you holding the light closer so that you can see the light shining through the mushroom gills. Check your second exposure that it's not over-exposed and if it is, repeat with the light dimmer or higher up. Rinse and repeat as necessary.

Now you should have two shots which are properly exposed, properly focused and identical except for the light. Now comes the software bit. 

Base exposure, illuminated exposure and final blended image

Exactly how you blend the images will depend on your software. I use a processing program called ON1 Photo Raw that lets me layer the photos and then determine which parts of which photo appear in the final image. This can be a bit fiddly but is worth spending time on to get it right. Defining which parts of which photo shows uses a mask - a black/white/grey layer that dictates which part of an image show and which are concealed. In this case I had the lighter image as the top layer and used the mask you can see below:

The mask, I've elected to completely mask out the tops of the caps and then have a gradient of light bleeding off into the darker image
The resulting compound image
The rest is increasing the colours and getting the shading right.

Sunday, 17 May 2020

Waterfalls and Wildflowers - The Power of Separation

It won't come as a surprise to some of you to know that our medium-term plan is to up-roots here in Bavaria and settle in Austria. The intention is to semi-retire, earning a little bit on the side with photo safaris and workshops in the border area between Lienz and Cortina d'Ampezzo, between the main chain of the Alps and the majestic Dolomites. I've been working on my photography a lot over the last 18 months. I've come a long way in that time. I still have a way to go, but if I review my photos of the last few years, I can see definite progress. The Mike of 18 months ago would have a lot to learn from the Mike of now. I know that I've still got a ways to go, but in the near future I hope to start offering tuition on a 1:1 or 1:2 basis. The tuition can be in English or German, though preferably not both in the same session.

After the Rain || Olympus f4.5, 1/160 s, ISO 200

This won't be on a monetary basis, which doesn't mean the tuition will be free. Instead of remuneration, I will be asking for detailed feedback from you in order that I can hone my skills as an instructor. So, if you're in the Munich area and find yourself looking at my photos and saying "Wow, I wish I could take photos like that!", get in touch and we'll see what we can work out.

It would be useful for me to understand a bit about your current level of expertise as well as your aspirations before we start out so that I don't end up boring you with stuff you already know and so that I can plan the excursion to give you a chance of learning what you want to learn.

Dewy Needles || Olympus f6.3, 1/200, ISO 1600

Unless you have a specific plan in mind, my recommendation would be that we head down to the mountains to somewhere like Hinterstein here and simply head up the trail. Tuition would involve a whole day spent in the wilds, so you'll need to be at least a little bit fit, though we will be stopping regularly for photos. Rather than classroom tuition, it will all be out in the field (or forest😉) showing you optimal camera settings as we go for the compositions as we find them. We'll discuss what makes good photos, what constitutes good and bad lighting (and why bright sunlight isn't always the best), how to separate subject matter from its environment to draw the viewer's eye to where you want it and how to use lines in a photo to do the same.

Zipfelsbach Waterfall || Olympus f22, 1/2 s, ISO 125

One of the first compositions on this particular tour, for example, is the Zipflesbach waterfall, where we could play with how the exposure time affects the appearance of the water and how to convey a sense of motion through slow shutter speeds. A tripod is a must for such shots on most cameras, and a neutral density (ND) filter can be very helpful to prevent over-exposure. At the very least, a variable ND filter, with two layered polarising filters that can be twisted independently in order to adjust how much you decrease the amount of light hitting the lens. Professional photographers frown on them because they can cause unsightly patterns on plain subjects such as the sky, but they're great on waterfalls. There are several schools of thought - or preference - concerning the optimal exposure time for moving water, varying from about 1/5 s, enough to convey a sense of movement without overdoing it, to 2 s for that real silky motion. Personally, I like the effect that can be obtained with a 1/2 s exposure, though I have been known to go to as long as 10 s for some of my shots of the Stuiben Falls and Pöllat Gorge.

Alpine forests are a treasure-trove of wild flowers in early summer (and mushrooms in the autumn if it hasn't been too dry), and there would be plenty of time to get up close and personal with orchids, wolfsbane and the like. Early summer is also great for fresh pine growth, which traps dew-drops and rain-drops beautifully. 

Fresh Pine Growth || Olympus f11, 1/60 s, ISO 1600

Wolfsbane (German: Arnika) presents a great object lesson on how to photograph flowers with a little bit of imagination. There's a temptation to simply shoot flowers from head height - in my opinion, one of the worst perspectives to shoot from. It can work if done well, but it rarely has real impact. Get down low for a more oblique angle. In steep woodland it's relatively easy to get this sort of angle without breaking your back, it's common that plants are at waist height on the uphill side. 

 
Top Down || Olympus f4, 1/400 ISO 200
 
Classical Aspect || Olympus f4, 1/200, ISO 200

Here I took the spontaneous decision to take the unusual side-on shot. Depth of field is always a consideration for shots like these, you want it to be shallow enough to isolate the flower from the background without making the focal plane so narrow that virtually nothing is in focus. I got away with f4 here, though in retrospect I should have gone for a smaller aperture to get more of the flower head in focus. I'm still learning too.

Wolfsbane, Side On || Olympus f4, 1/250, ISO 200

Above the tree-line there are more wild flowers to be had and maybe even some bona fide landscapes. We were stunned by the number of wild gentians growing as we left the forest, together with marsh marigolds (a challenge for any camera due to the intensity of the yellow) and oxslips. Focus isn't the only way to get separation on subject matter, here I used light. With the sun shining on the pale yellow flowers it wasn't difficult to set the exposure so that they were well lit whilst the shadowy stream behind them was almost completely black. 

 
Oxslip || Olympus f5,6, 1/250 s, ISO 200


Electric-blue Gentians || Olympus f11, 1/80 s, ISO 640
 

The Zipfelsbach Alm has a small alpinarium with a lovely variety of mountain flowers including perennial cornflowers amongst others.

Perennial Cornflower || Olympus f13, 1/125, ISO 1600


The path back down from the Alm follows the Zipfelsbach over a series of small falls before the trail drops back into the forest and then down along the side of the high waterfalls. There are multiple opportunities to stop and shoot the upper falls on the way down.

Zipfelsbach || Olympus f22, 1/2 s, ISO 80


Interested? Drop me an email via the About Me at the bottom of the column to the right. Think I'm overstepping the mark and offering my services too soon? Let me know in the comments below.

Down the throat of a giant yellow gentian || Olympus, f13, 1/80 s, ISO 1600

Getting up-close and personal with a Burgundy Snail || Olympus f16, 1/60 s, ISO 1600

Trumpet Gentians || Olympus f13, 1/200 s, ISO 1600


QUICK SUMMARY
Best Conditions Early summer for the wild flowers, best early in the morning to avoid the crowds and catch the dew
Challenges Steep trek up to the Zipfelsalpe
Parking €4 at Parkplatz "Festhalle" just behind the church
Where to Stop Zipfelsalpe from June to October
Links Zipfelsalpe (German)

Sunday, 26 April 2020

An Homage to the Humble Dandelion

The Dandelion: the gardener's bane and the photographer's muse. A springtime delight turning green fields yellow and then grey. Some flowers are pretty but don't photograph particularly well. Others seem more mundane at first glance, maybe because we see them everywhere, but take a closer look and you'll see a different picture, whether flower or seed heads. 

A New Sun || Olympus f16, 1/1600 s, ISO 200

They inherently possess three elements that naturally make for strong images; both flower and seed head are complex yet repetitive. Repetitive patterns catch the eye and emphasise structures and light. The flowers are a cardinal colour, a bright solid yellow that stands out from any background - although they also lend themselves to monochrome conversion. Lastly, the seeds form a translucent globe that, from close and down low, give great pictures against the sky. 

Anthers || Olympus f10, 1/2000 s, ISO 800

Stripped of Colour || Olympus f10, 1/2000 s, ISO 800

Glowing Orb || f20, 1/500 s, ISO 200


Sometimes imperfection is also eye-catching, as with the half-finished dandelion clock. 

Perfect Imperfection || Olympus f16, 1/200 s, ISO500

Complex Perfection || Olympus f20, 1/160 s, ISO 640

Detail || Olympus f20, 1/100, ISO 1600
What looks like sepia conversions are in fact the natural colours straight out of the camera.

In a Field of their Own || Olympus f8, 1/1000 s, ISO 200

Globes || Olympus f16, 1/200 s, ISO 320

A lot of these images were taken lying prone in the field. For the real close-ups (I deliberately don't use the term "macro" as technically they're not) I used a +3 diopter magnifier screwed into the front of the Zuiko F4 12-100 mm, which even without help is a great near lens with a minimal focal distance of 7.5 cm. 

Against the Sun || Olympus f16, 1/100 s, ISO 200