"Apparently, if you try to cram two years of learning into 4-6 hour 1-2-1 workshop, the participants can find it a bit too much. Who knew?"
 |
| The Old Gypsum Mill || Olympus f/5.6, 1/125 s, ISO 1250 |
I’ve now run my first two workshops for volunteer guinea-pigs recruited from among my local friends on the understanding that they would give me in-depth feedback on the sessions in lieu of payment. We had two great afternoons, one hiking in the local mountains in less than perfect weather and one shooting flowers in a friend’s back garden. We had several “aha” moments as they learned things about their cameras that they didn’t know before and both have got some great shots out of the sessions. But what did I learn?
Over the last 18 months I’ve invested a lot of time in my photographic education. I’ve read books, I’ve watched a ton of videos and online courses on photography and post-processing and I’ve endeavoured to put a lot of it into practice in the field. I think that most people would agree with me when I say that I’ve come a long way photographically in that time. I’ve almost completely changed my approach to photographing and my philosophy of photography. A lot of things are now obvious that would have been a complete mystery to me even two years ago. I was an idiot to think that I could convey the significant parts of that learning in a single session, but that’s what I set out to do. Twice. In my defence, the second session was probably much better structured than the first. But I need to trim it down much further, or at least give the students more time to take each aspect of the teaching on board before progressing to the next.
Let’s take a look at the two sessions and try to assess what works and what doesn’t and look at how to build this into planning future workshops.
 |
| In the Pöllat River || Olympus f/11, 2 s, ISO 200 |
Session 1: In The Pöllat Gorge
The first session was held at one of my favourite local spots – the Pöllat gorge below the fabulous Neuschwanstein castle near Füssen. My student, a friend from the Munich choir that I sing with, had previously been a teacher – a huge plus for me, as this was someone who had first-hand experience of teaching methods and knew what he was talking about when it came to feedback. We’d had a chance to chat a little about photography on the way down in the car and I’d already sounded him out concerning what he wanted to learn.
The fun part about this session was that Andrew had a relatively clear idea of the images he wanted to get, but wasn’t always clear on how to achieve those images technically. This was definitely something I could help with.
Parking the car at the Tegelberg car park (much cheaper than parking in Hohenschwangau at the bottom of the castle), we trekked along the base of the mountain, the clouds lingering in the trees above us. Excellent opportunity for composition questions 1 and 2: (1) What catches your attention, and (2) what aspect of the subject do you want to emphasise or caricature? (thanks Joshua Cripps!)
 |
| Moody, Misty Forest || Olympus f/5, 1/200 s, ISO 500 |
Arriving at the bottom of the Pöllat gorge, I was dismayed to see that the gorgeous wooden mill race had been very badly damaged in the recent storms. I sincerely hope that they repair it using the original wood, since this has always been a complete eye-catcher and really strong element for photos here. As it was, the heavy flow was just gushing out of the broken end of the trellis into a mess of tree branches. Such a shame.
After we'd walked around the bottom of the gorge for a bit, scouting compositions, we went a few meters downstream where it was a little quieter so that we could chat about how to emphasise the water movement, leading into a discussion of long exposures and tripods. I'd established in advance that Andrew would be using the Nikon 18-55 mm kit lens and managed to source a cheap step-up ring of the right diameter so that he could use my filter system to create a series of shots with different exposures.
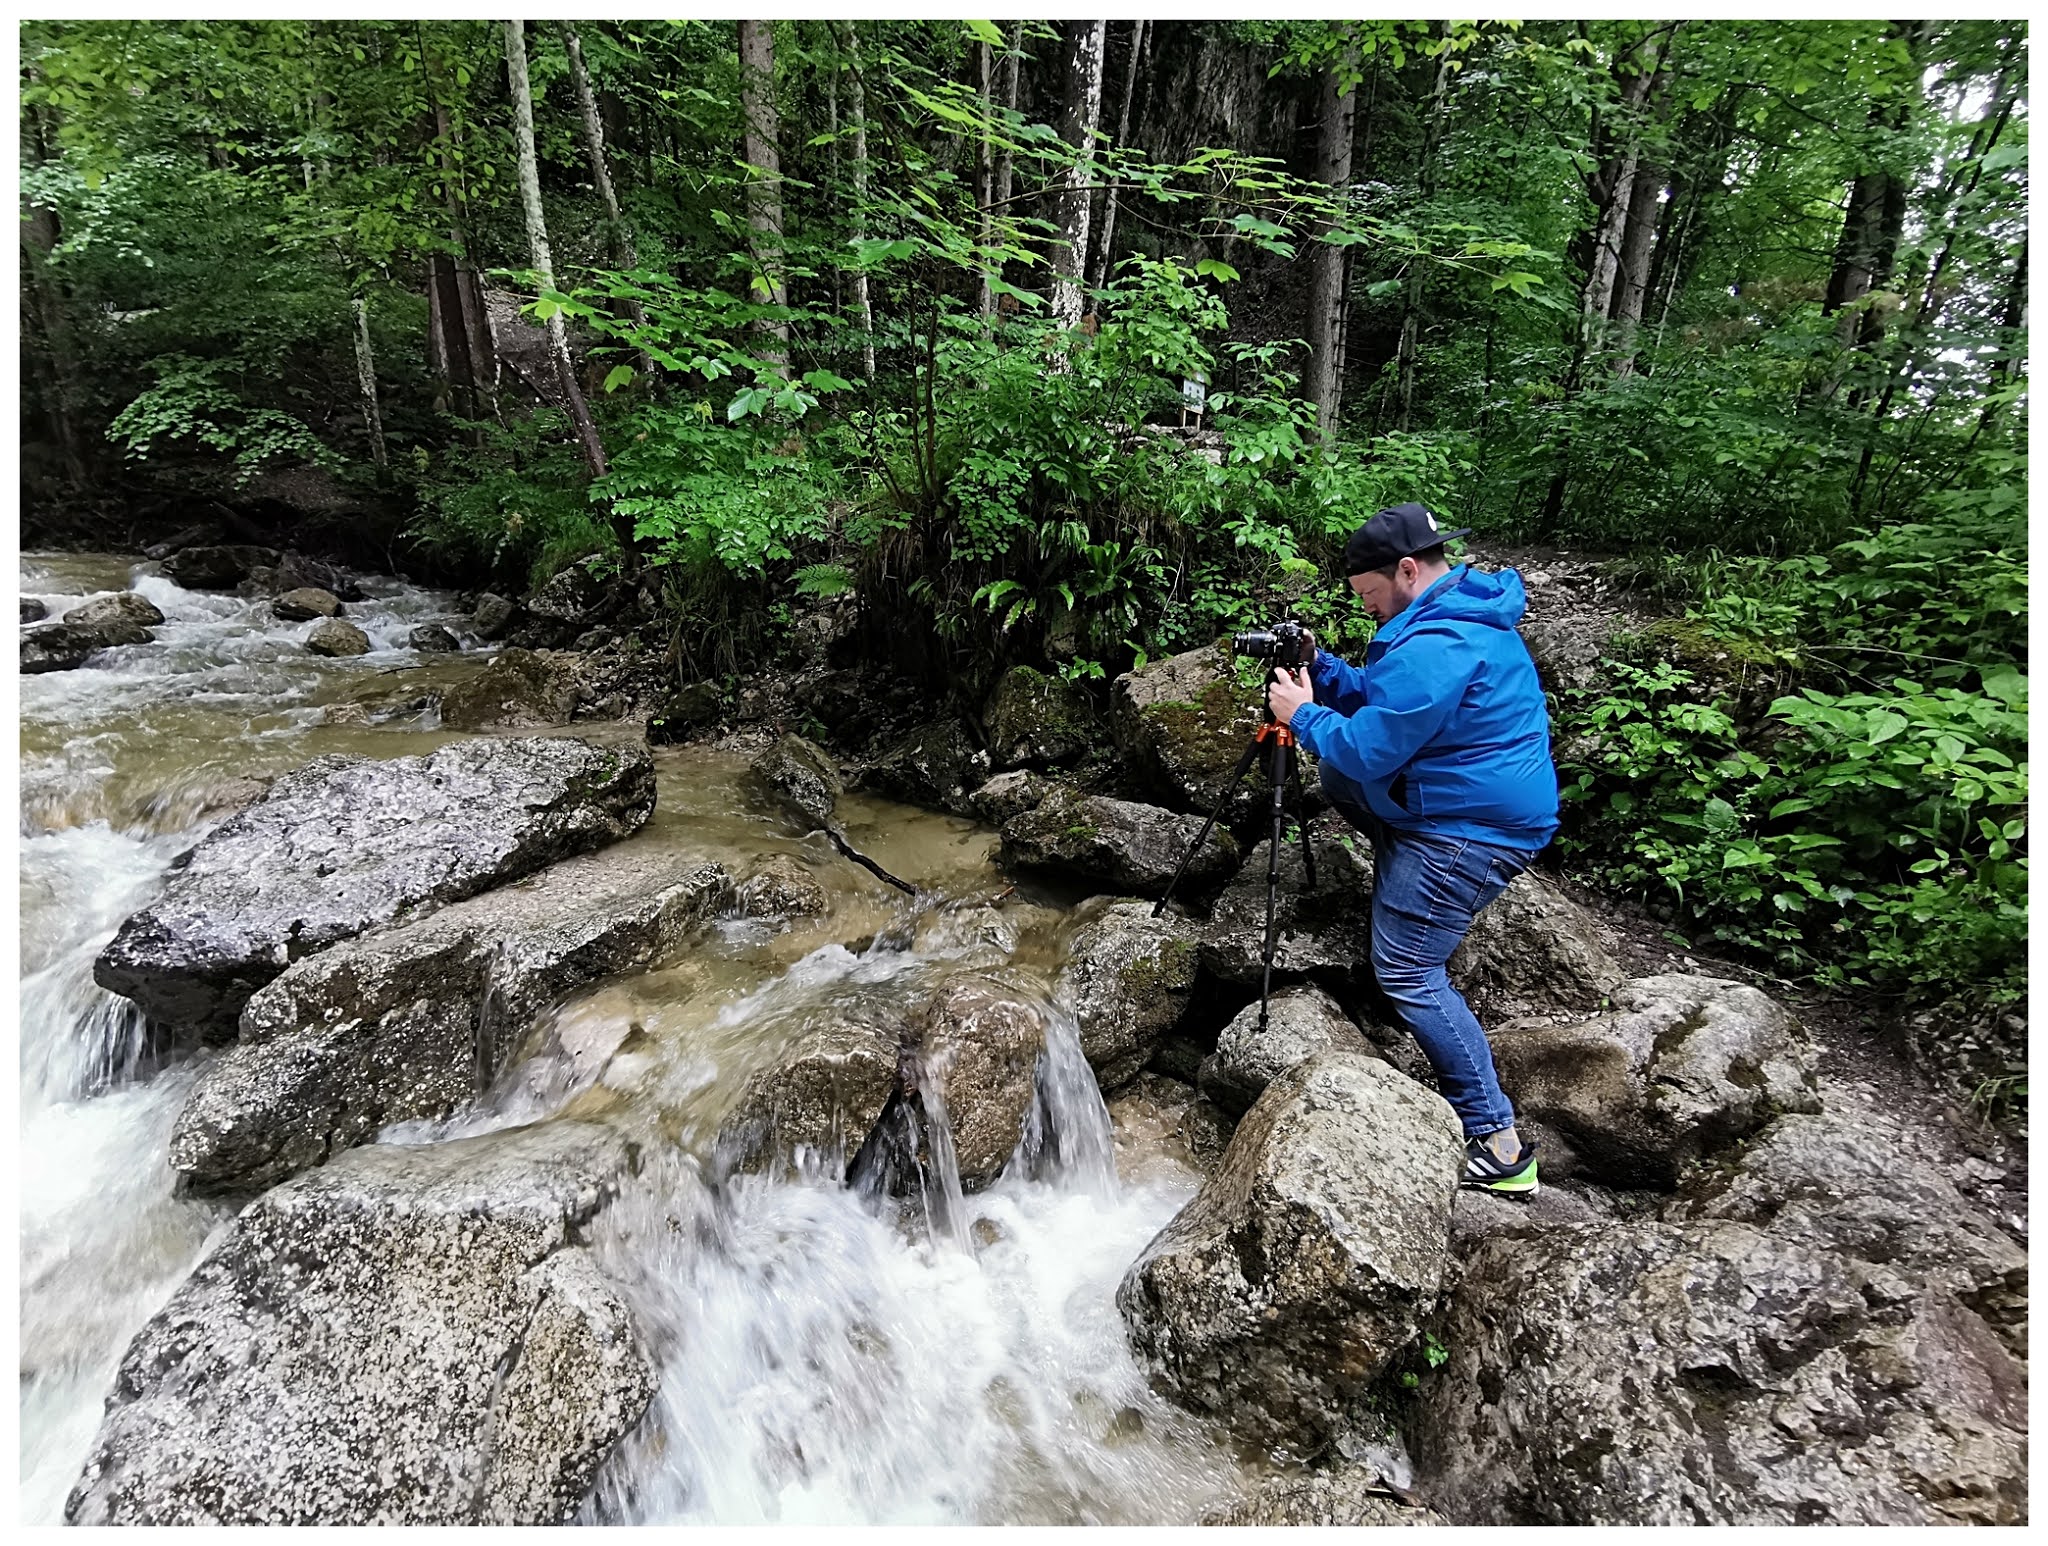 |
| Shooting in the Pöllat || Huawei P30 Pro |
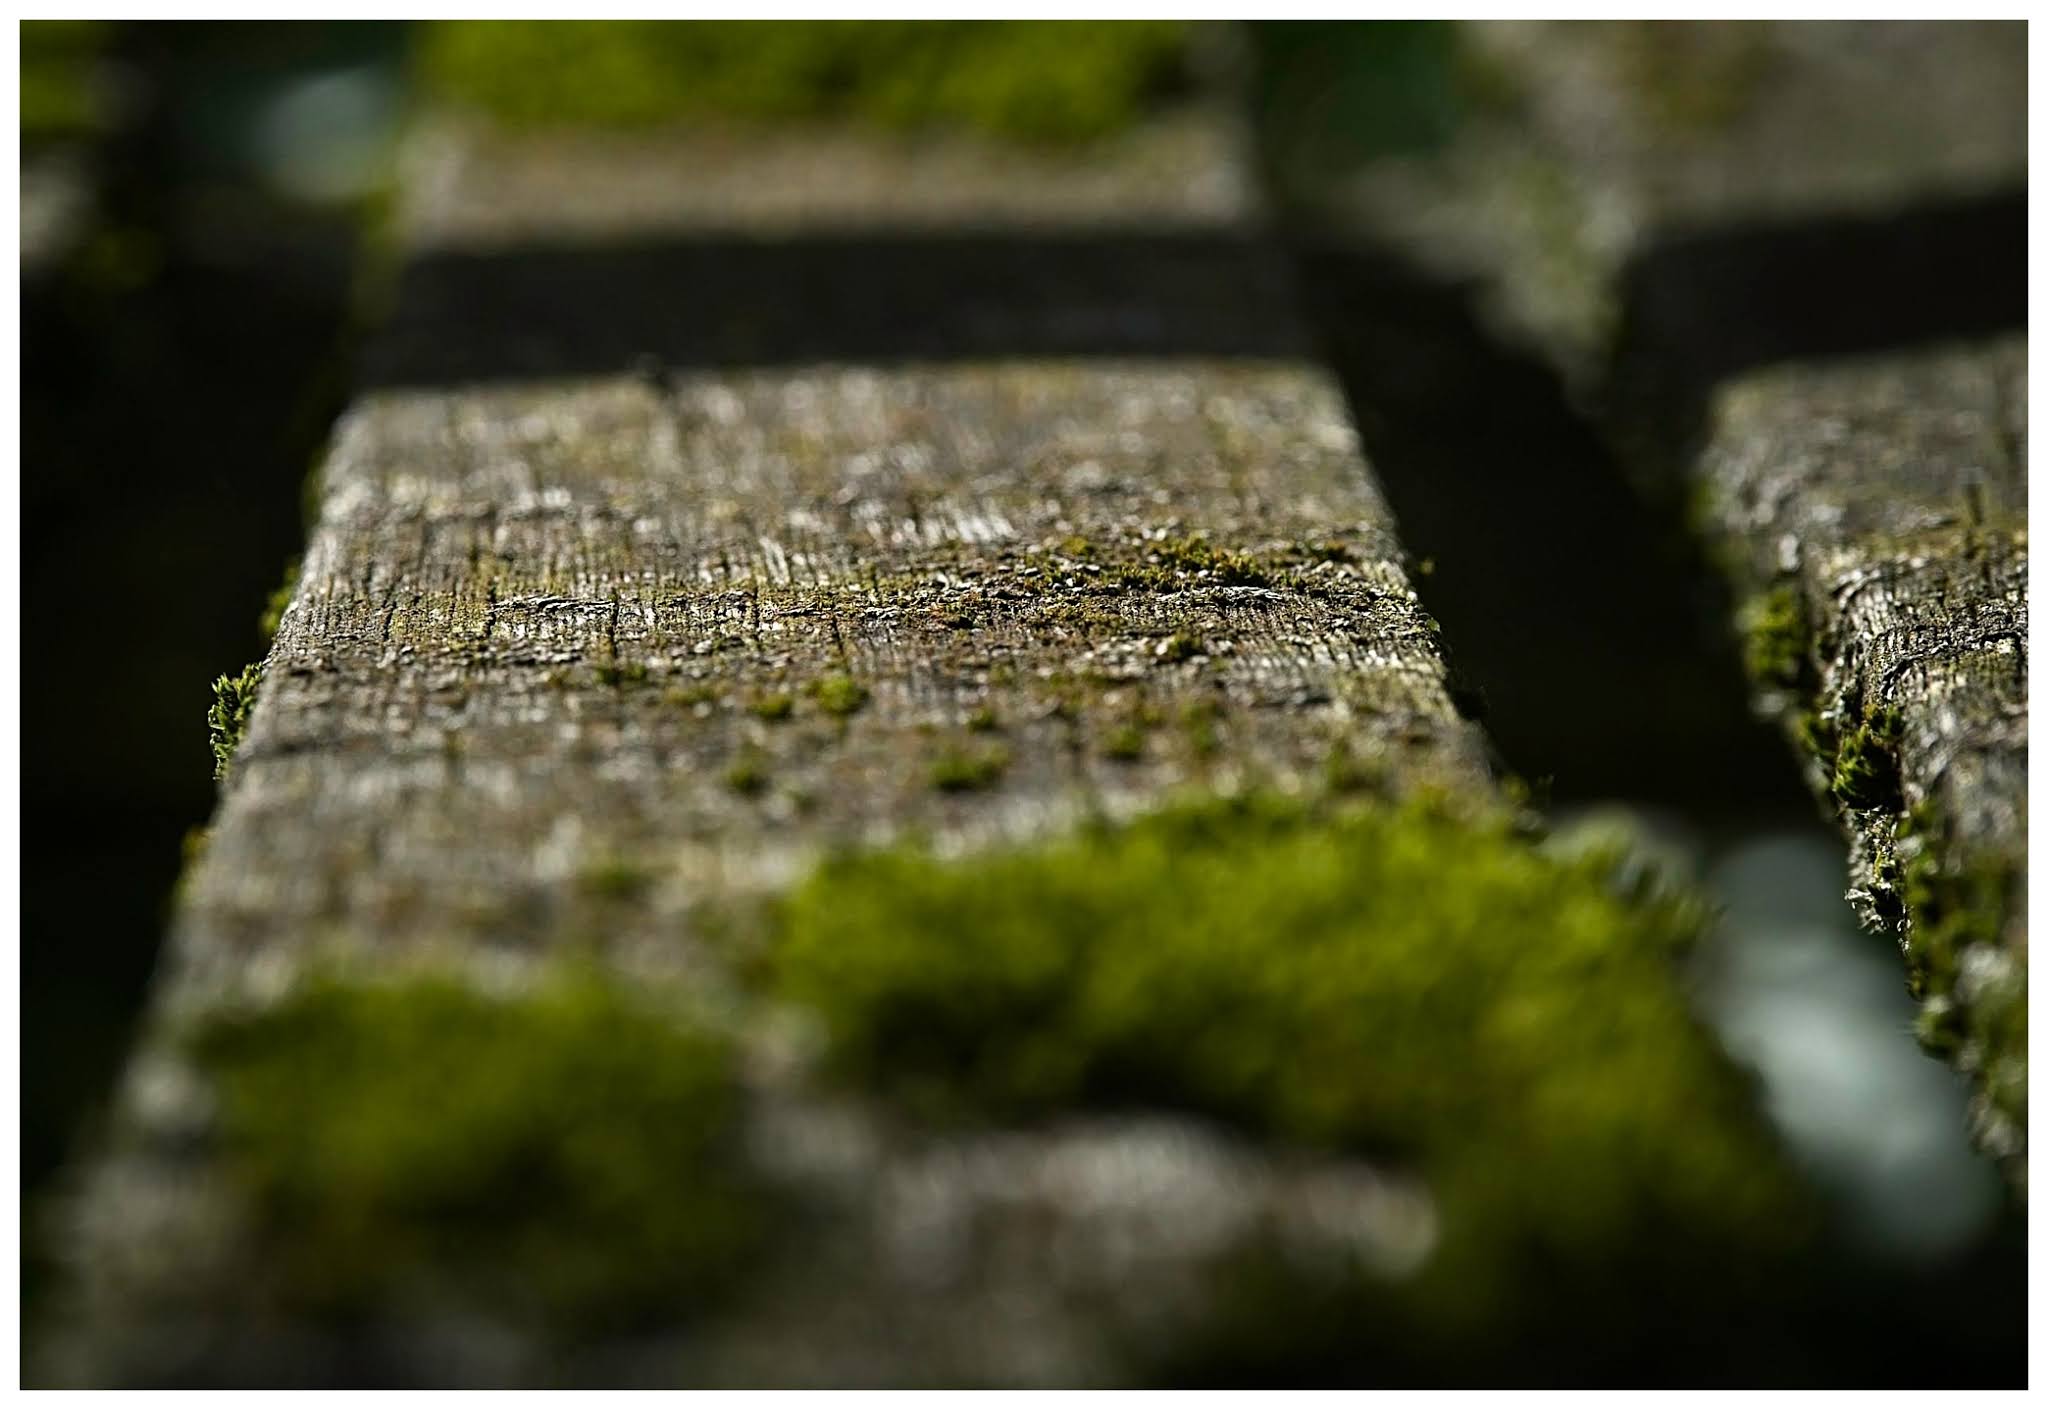
Having had a good long session at the bottom of the gorge, we walked up through the shady forest, looking for other compositions. There are some nice shots to be had of the falls as well as some nice intimate forest landscapes - what my father calls my signature shots. The moss was particularly appealing
 |
| Moss Micro Landscape || Olympus f/4, 1/8 s, ISO 200 |
At this point, I forgot a bit that I was supposed to be leading a workshop and got side-tracked by taking my own images - wrong of me I know, but too easy to do in the circumstances. In future, I'm really going to have to put my own shots in the background, unless they're to make a teaching point.
Carrying on up to the path between Neuschwanstein and the Marienbrücke, we were rewarded by a moody view over Hohenschwangau with the sun breaking through the clouds. An impossible shot for Andrew's camera, but no match for modern exposure bracketing. Once again, I was putting my own photos first. But come on, who would have said no to this:
 |
| God-Rays over Hohenschwangau || Olympus Exposure Bracketing |
After waiting a while in vain to see whether the weather would provide us with anything better, we headed on up to the Marienbrücke, the bridge overlooking Neuschwanstein, to see whether the light would allow us to catch any useful shots. Andrew took quite a few from the bridge and we toyed with the concept of including some foreground in a shot in order to establish a bit of 3-dimensionality to the scene.
It was quite late by the time we got back to the car and we were both starving, so we looked for a suitable hostelry. Waiting for food, I had a chance to go through my workshop cheat-sheets with him. In my mind I had planned to shoot and then go over the theory in the hope that he would be more receptive to the concepts - a teaching style that we often use at work. In reality, it would have been helpful to look at them beforehand and then try to put some of it into practice in the field.
Session 2: A Munich Garden
For the second session I visited my friend in her garden in Munich. Because one of her primary photographic interests was flowers and because they have a beautiful flower garden, this really worked out nicely. The weather was definitely playing ball this time as well, which really helped. It had rained just before I got there, but we had a great 4 h in the garden in lovely late afternoon light, shooting anything and everything in sight.
This time we were able to sit down before we started and look at some of the concepts that help me focus on what makes a good photo. I was delighted that my friend was able to make the intuitive jumps from the things I was pointing out (more here) to compositional consequences. Once we'd got some of the basics out of the way, we were able to knuckle down to the two issues that she had highlighted approaching the workshop; exposure and focus.
 |
| Reach for the Sky || Olympus f/8, 1/250 s, ISO 200 |
After explaining the various ways in which cameras measure exposure and the shortcomings of assuming that everything is 50% grey, we looked around for potential examples. She has a beautiful honeysuckle growing up the side of the garage. Against the sky, most cameras will underexpose the subject to avoid an overly-bright image, leaving the subject quite dull. Exposure compensation to the rescue (once we'd found out how to in the manual).
 |
| Essence of Hydrangea || Olympus f/8, 1/40 s, ISO 200 |
Looking back, we should have spent a little while at least concentrating on exposure, but I was so excited with the progress that I was all for moving swiftly on to the next issue; focus. Once we figured out how to give her back the control over what the camera was focusing on we even got a chance to look at the concept of depth of field before switching over to her macro lens and fiddling about with focus magnification in a foreign camera system.
 |
| Old Wooden Chair || Olympus f/8 |
All in all we had a great afternoon/evening working through various technical and compositional aspects before I was gently told to stop - I'd passed on enough information and time was required to process and practice.
Lessons Learned
What Went Well
Let's start with what went well:
- The second workshop was much better structured than the first, working through the teaching materials and having a chance to put it all into practice.
- Knowing both locations well before the shoots was essential. Even then there were surprises, like the demolished mill race at the Pöllat gorge.
- Both locations were good and had some 'gimme' images where you couldn't really go wrong, whether Schloss Neuschwanstein or my friends gorgeous garden.
- Having a few toys to hand to play with worked well, such as the ND filters for the gorge and my tiny fish-eye lens as a demonstration of how aperture works.
- Getting the students to fill out a self-assessment form (below) well in advance of the workshop so that I could prepare a session to fit their individual needs worked really well.
- The handouts I had prepared turned out to be really good teaching aids.
- After the first workshop we sat down and went through a handful of the best images, looking at technique and possible tips. The offer is still out on the second workshop, but, life!
Challenges
- One of the time-consuming aspects of both workshops was becoming familiar with other peoples’ cameras. After 18 months with my Olympus I can operate it pretty much blindfolded. Previously I’d been using a Panasonic bridge camera and so had at least a working knowledge of the menu structure. My students had Nikon and Cannon cameras respectively and finding functions in the various menus took time. If students aren’t familiar with their cameras, it’s essential that they bring the manual with them. It was also challenging switching between a mirrorless camera with all of the associated ease of use and the more flighty DSLRs.
- The weather and, more importantly, the light during the first workshop was extremely challenging. But that’s life sometimes.
- It’s important to establish ahead of time which lenses your students are bringing to the workshop. I’m used to the flexibility of being able to choose between ultra-wide angle, long telephoto and everything in between. Students aren’t always going to be able to bring that variety to the workshop and the location needs to be planned accordingly.
What Didn’t Go So Well
- Looking back, although the first workshop was fun, setting out without covering at least the basic theory was a mistake. I was all gung-ho for the location and thought I could explain as we went. I couldn’t.
- After the first few shots, I also assumed that the student was doing ok and didn’t need as much help or feedback. In future I’ll have to be more proactive in checking in with them.
Looking Forward
Looking forward, I think I will have to offer either one or the other; either a photo safari or a photography workshop. It’s much easier to concentrate on teaching skills in a calmer environment with few distractions, where we can sit down, talk about the principles and then put them into action.
On the other hand, once someone has mastered the basics, it will still be fun to head out to the hills to look at how to put those skills into practice.
 |
| Fairy-Tale Neuschwanstein || Olympus f/4.5, 1/8 s, ISO 800 |
My Questionnaires
I've created two questionnaires, one to give me a feel for the student's needs, one for them to give me feedback on the workshop so that I can continue to improve as an instructor. I'll reproduce them here for anyone wanting to use and adapt. I've created these using Google docs, and the answers flow directly into a table. I'm a huge fan of Google docs as they allow me to access the information on the go using a variety of platforms.
Student Assessment Form
I ask a lot about my students because I really want to understand their needs and offer a tailor-made session. It also helps them to assess where they are and think a bit about the issues involved. I also ask them either in advance of - or during the session how they would define a "good" photo. Although a straightforward question, it really helps focus on the issues.


Student Feedback Form
Feeback is critical to the process of becoming a better instructor - which is a huge part of the process for me. Here's my Student Feedback Form


