Showing posts with label Olympus. Show all posts

Monday 10 May 2021

Move Shoot Move and Olympus E-M1 Mk III

Milky Way season is upon us and so last weekend I headed out to the hills with fellow photographer Matthias Tannert to try to grab some astro shots in the mountains above Mittenwald, Bavaria. I had some new equipment that I was keen to put through its paces and an ambitious photograph that I was keen to pull off: a panorama of the whole visible Milky Way in the night sky.

The best I could make of it. My first Milky Way panorama

The trip was a mixed success, I got some cracking shots of the evening and early morning on the Kranzberg, but unfortunately the astro session was not as successful. There was a lot more cloud around as well as a lot more wind than was forecast and it was bitingly cold, leading me to give up my attempts at photography not long after midnight and seek shelter in the summit refuge.

I'll make the presentable shots the subject of another post, this one is going to be all about the technology, so if you're interested in the Move Shoot Move star tracker or astrophotography using the Olympus E-M1 Mk III, stick around. If not, I suggest you check back later in the week to see the other shots.

Setting up the MSM - Preparation

I spent a lot of time preparing for the trip last week, trying to get as much information as I could about setting up the MSM and establishing the best settings for the camera. Fortunately a lot of this information can be found in the same place as the American photographer Alex McGregor has an excellent YouTube channel (and website) called Chasing Luminance

One of the videos deals with calibrating the laser to make sure it's pointing straight. It's just as well I did this as my first attempts over a distance of about 2.5 m gave me a spread of around 10 cm top to bottom and left to right as I span the laser in its dedicated holder. Part of the problem is that there seems to be quite a bit of play room at the back of the laser and each time I tightened the locking screw the sighting seemed to shift a little. I've tried to partially overcome this by lining the back end of the laser holder with some thin card and there's now significantly less wiggle-room.

I ended up shrinking my target of error from about 10 cm to around 2.5 cm (4" to 1" if you haven't joined the 21st century yet 😉). There was a recent post in the MSM Facebook group from Andrew Larkin detailing how important getting the accuracy was in terms of length of exposure, varying from about a minute if you're 10° out up to 4 minutes at 2.5° or even 20 minutes at 0.5°, so setting up the laser is important. My university-aged kids assure me that a 10 cm spread over 2.5 m is approximately 2.5° - so we're already in a reasonably good place. A 2.5 cm spread is already 0.6°. Actually both of those should be half that since 10 cm and 2.5 cm were the diameter of the error field rather than the radius. So even better.

Setting up the MSM - In the Field

I have a relatively sturdy Tiltall carbon fibre tripod that I set up relatively low on the mountainside so that I could operate the camera whilst seated on the ground. I paid attention to making sure that the top of the tripod was horizontal before attaching my geared head. The MSM was attached to this and the camera to the MSM via the original Tiltall ball-head. 

I would really recommend doing a dry run at home to make sure all the knobs and levers are in the right positions before you head out to the field. Once you've established your spot, set up early if you can. If you take foreground images in the blue hour like we did, you're not going to be able to get too many compositions from just the one tripod spot, so be warned.

Setting up the MSM with my Olympus
If you're going to shoot panoramas, slipping a V- or Z-plate between the MSM and the top ball-head will add a ton of flexibility, in fact mine's in the post. This will mean that I can put the assembly on the ball-head and elevate the geared-head to the top layer for better panorama assembly. If I'd assembled it with the geared head on top, the gears would not be in a position to allow horizontal and vertical adjustment.

Sighting on Polaris was gratifyingly easy. I'd already set the elevation to about 47.5° (approx. 1° per ° of latitude) and pointed it north, I wanted to have that laser on for the shortest possible time. Then it was a case of twiddling the geared head so that the tracker was pointing absolutely dead on. The laser is really very visible to the naked eye.

Waiting for night to fall and the clouds to bugger off
Once it got dark and the worst of the cloud had gone I managed to fire off a couple of test shots simply to test trailing. My standard astro exposure with the Olympus using my Panasonic Leica f/2.8 8-18 mm is 25 s, f/2.8 ISO 6400, 8 mm (that's 16 mm to you full-frame types). I tried my first test-shot for 60 s using ISO 3200. 

8 mm (m43), 60 s,  ISO 3200 
Then I dropped to ISO 1600 and went up to 120 s.

8 mm (m43), 120 s,  ISO 1600
And lastly ISO 800 and 240 s.

8 mm (m43), 240 s,  ISO 800
It was quite windy, so there may have been a little blur due to tripod, but I find these images to have a perfectly acceptable level of star trailing. I have not stacked the images or performed any noise reduction on these images, they are single images processed in ON1 Photo Raw 2021 where I have simply tweaked the contrast up 13 points after applying the lens profile. The crops are of the area around Antares (?) top left - approximately 1/3 of the full screen in each dimension.

Olympus E-M1 Mk III

I want to start by pointing out that the images presented here are for technical purposes only. I have not done any significant editing and they're not images I'd want to be judged by. I started my astrophotography path in 2020 using my E-M1 Mk II. This time I was eager to take the Mk III for a test drive with all its astrophotography bells and whistles.

Starry Sky AF

First up is the star focus function on the Mk III. This is a game-changer for me as my manual focus can be a bit hit and miss, even with focus magnification at max. My eyesight is no longer 20/20 and getting those fuzzy little balls of fire as tight as possible with atmospheric movement and camera movement due to fiddling with the focus ring was always a trial of patience. And don't even talk to me about accidentally hitting the ring in the dark when you move the camera. All those frustrations are a thing of the past. Select accuracy (menu A4) and then Starry Sky AF under the focus options and hit the AEL/AEF button on the back of the camera. Works!

HHHR

The E-M1 Mk III has a magic high-res mode that can generate a 50 (or even 80) MP image using a 20 MP sensor. You can choose to do this hand held (HHHR) or in tripod mode. The former samples 16 images which it interpolates in camera, the latter 8 images. According to McGregor, it should be possible to use the HHHR mode to shoot stars and the THR mode to shoot foregrounds (video 1 and 2). There are two theoretical advantages to shooting in high res mode, you get a bigger image (duh!) and the camera performs about 2 stops of ISO-related noise reduction when it interpolates the images. But it does require a tracker.

There are some limits, maximum photo length is 60 s (giving a 16 minute exposure + processing time) and the maximum ISO in THR is 1600.

Tracked HHR for the Stars
This is my attempt at track in HHHR. Something has gone wrong here. Although Antares only appears once, the smaller stars all appear as dotted tracks. Alex, if you happen to read this, what did I do wrong here? You can still see the beginning of the Milky Way bottom left over the mountains, but this isn't an image that I can use. Maybe there's too much ground in the picture for the Olympus to process the stars properly, but the bigger stars have no trails.

MSM-Tracked, HHHR image 8 mm (m43) 60 s, f/2.8, ISO 3200, 50 MP 

Stationary HHHR for the foreground
I turned the tracker off and switched into THR, reduced the ISO and tried a couple of foreground shots. This works really well, but has left me with some unsightly pixel artefacts. Cloning them out will be straightforward, but they're there. The image quality is perfectly acceptable for the foreground image though. I know it doesn't look too hot in the blown-up parts of the image, but a lot of that can be rescued, if by nothing else than reducing the resolution of the image to a useable level.

Untracked, THR image 8 mm (m43) 60 s, f/2.8, ISO 400, 50 MP 

Untracked, THR image 8 mm (m43) 20 s, f/2.8, ISO 400, 50 MP


Lessons Learned

  • Don't go on a 5 h hike with the missus on a day you plan to do astrophotography - it saps necessary energy
  • The MSM is a game changer for Milky Way photography. Although I didn't show any shots without it here, anything that lets me reduce ISO and achieve the low noise levels I have here is a great advantage.
  • I need a wedge for the MSM
  • Starry Sky AF is a huge win for astro with the Olympus
  • High res mode needs further investigation in both hand-held and tripod modes
Thanks for dropping by.

Saturday 27 February 2021

A Walk In The Park With The Olympus M. Zuiko 100-400 f/5-6.3

I was talking to a colleague on Wednesday when she let it drop that her husband, a good friend of mine, was in one of the parks in Munich photographing tawny owls with their son. I'd known about at least one of the owls - the infamous Kazimir - from another photographer's Facebook posts, but when I learned that there were four of five of them, that they were in relatively predictable positions, that the best time of year to shoot them is when there are no leaves on the trees and that the weather for the following day was going to be great, well I had to go, didn't I? Plus I have such a backlog of leave from last year that I really need to start using up and so early Thursday morning I set off in the car to drive into the centre of Munich.

Schloß Nymphenburg || Olympus 12 mm, f/8, 1/500 s, ISO 200
We've been having some spectacular sunrises at the moment due to Sahara sand in the air and Thursday morning was no exception. Driving down to the motorway I was greeted by the most amazing sight; a perfect disc of yellow rising behind some naked trees with a misty foreground. One of those once in a lifetime shots and I had a car full of camera gear. But also a date with some owls. It'll have to be one of those that got away...

Kanali Catching the Rays || Olympus 400 mm, 1/125 s, f/6.3, ISO 200
Finding my friend in the park wasn't difficult, the first known roost tree is just behind Nymphenburg palace by the canal (I don't think I'm giving any secrets away here), and so there I was before 8 am setting up my tripod in the park, getting out my new mega zoom and trying to find a position through the twigs and branches. The photos make it look easier than it was. Getting the right angle was not straightforward and emphasised the need to be shooting these beautiful birds now rather than in a month's time, when the trees will be shooting bright green new leaves.

Hi-Res Kanali || Olympus 400 mm, 1/125 s, f/6.3, ISO 200
This was one of the first photos I took of the bird who has affectionately been named "Kanali" due to his proximity to the canal (yeah, the Germans can be really imaginative). Remarkably, the bird was sitting still enough for me to engage one of the Olympus camera's super-powers; the high res mode. Using some technical jiggery-pokery, the camera moves the sensor by a few microns in each direction over multiple shots, creating an 80 MP shot using a 20 MP sensor. I never imagined I'd be using this magic on wildlife, but I didn't have anything to lose and am really happy with the way it turned out. If you look at the branches above the owl you can see some artefacts generated by the breeze moving the twigs between the individual shots, but I'm really pleased with how this turned out and could easily imaging this hanging on my wall.

Canada Goose || Olympus 400 mm, 1/160 s, f/6.3, ISO 200

Classical Swan || Olympus 400 mm, 1/160 s, f/13, ISO 200
Of course there aren't only owls in the park. There are more lesser spotted woodpeckers than you can shake a stick at, plenty of tits and nuthatches. An ornithologist friend who was out with us was able to point out the song of some wallcreepers and of course with all the open water there is also an abundance of ducks, geese and swans. On another day I'd have had an eye out for the swans in flight, landing on the water and taking off, but today was all about the owls. I did allow myself to be distracted for a couple of minutes to take this canadian goose resting between the frost-crested mole hills and a classical swan shot. Nothing to write home about, but nice portraits nevertheless. I particularly like the repeating patterns of the molehills with the goose - a nice bit of tessellation with a difference.

Light Through the Palace || Olympus 342 mm, f/11, 1/200 s, ISO 200
After spending an hour or so admiring Kanali we headed north to the Pagoda and the Kleiner See - the little lake. There's another owl roost east of the lake, but be warned that the park rangers don't look kindly on people walking on the grass here.

Tawny Owl || Olympus 400 mm, 1/160 s, f/6.3, ISO 200
Our third owl was in the woods north of the lake, set well back from the path with a poor line of sight. This one is very shy and we had to wait a while for him to show even this much above the lip of his hole.

Shy Owl || Olympus 400 mm, 1/100 s, f/6.3, ISO 200
When shooting birds like this, don't be afraid to fill up your memory cards. Some of the owl shots were taken with manual focus, some with auto focus. Not even the pros get 100% focus lock and so really can be a case of 'spray and pray', sorting out the very best shots afterwards on the PC. You're looking at my pick from 150 photos here, a much lower keeper rate than I'm used to from my landscape and macro photos, but this is a different game and different rules apply.

Back to Kanali || Olympus 400 mm, 1/200 s, f/6.3, ISO 200
You will need a good length lens to get decent shots though. Most of these shots are cropped at least a little bit to focus in on the birds. I was mostly shooting at the long end of the 100-400 mm - that's 200-800 mm in full format terms and I think the tripod was necessary. With more megapixels you could probably get away with a shorter lens, but it would be a compromise.

Leaving the park I was struck by the clumps of snowdrops and crocuses lining the paths and so I dropped back to my trusty 12-100 mm for a few close ups before heading hope for lunch.

Snowdrops || Olympus 54 mm, f/5.6, 1/1000 s, ISO 200

Crocus || Olympus 100 mm, f/8, 1/200 s, ISO 200
Incidentally, if you're interested in getting together to shoot some time, we've now created a Facebook group: Munich Expats Photo Group. If you on Facebook, get in touch, otherwise drop me a line using the contact information on the right here. I'm always looking for partners in crime!

Saturday 7 November 2020

HDR Edit in ON1 Photo Raw 2021

I thought it was time to do another edit run-through, in case anyone's interested in that sort of thing. I do 99% of my post-processing using an all-in-one editor called ON1 Photo Raw 2021, it's a great programme that covers a lot of the functionality of Lightroom and Photoshop in one package.

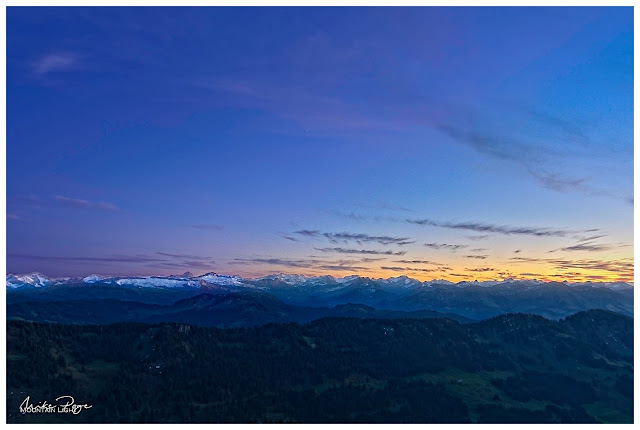
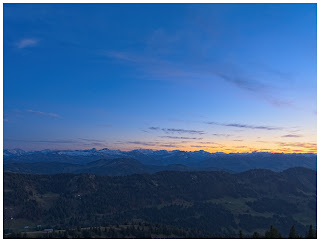
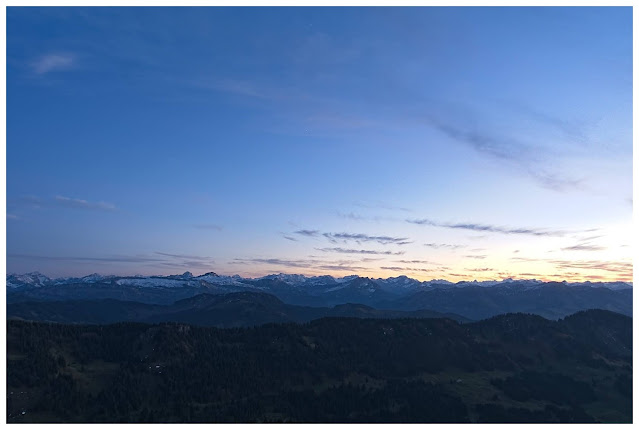
Blue Hour over the Allgäu last Saturday
Talking to friends, I have the impression that for a lot of photographers, post-processing is a book with seven seals and something that they'd rather not bother with. To be fair, a lot of cameras produce excellent quality jpegs, but what a lot of people don't realise is that a jpeg isn't an unprocessed image: It's an image that has been processed by your camera (or RAW editing software) using automated algorithms. 

So the question is - who do you want to edit your digital negative? your camera or other automated processing software, or yourself? If you're happy with the edit your camera/software has made, then there's not a lot of need for further editing. If, on the other hand, the jpeg out of camera doesn't meet your expectations, or more importantly (for me at least), if the final photo doesn't convey the emotion that you experienced in the field, the only solution is to get to grips with digital processing. That's deep isn't it? And that's the principle underlying most of my editing; I want to convey to the observer the emotion that I experienced when I took the photo. 

HDR Assembly

This photo is a high dynamic range (HDR) image. It has been assembled from three separate exposures taken one after the other; one exposed as normal, one for the dark parts of the scene and one for the bright parts of the scene. The camera has a much lower capacity for distinguishing between the brightest and darkest parts of an image for the human eye. Conservatively, my eye is 30x more sensitive to extremes of light and dark than my camera sensor is. To compensate for this, it's necessary to take multiple images and compact them together in order to arrive at a compelling image.

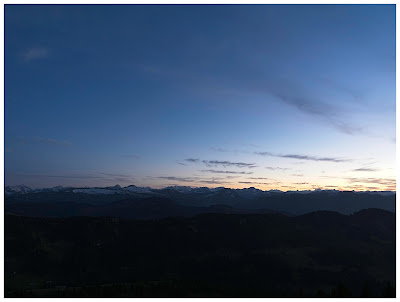
Base Exposure; 12 mm, f/8, 0.6 s, ISO 200
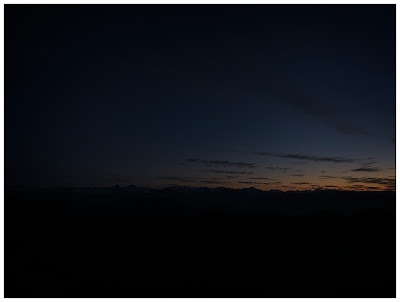
Dark: ibid with 1/13 s
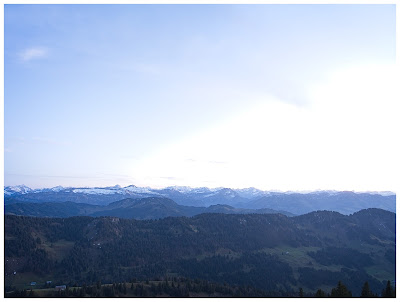
Light: ibid with 5 s
Normally I would set the camera to expose two stops over and two under for 1/4 and 4x the brightness (one stop= one doubling or halving of the exposure). Here I elected to use a three stop bracket due to the extreme conditions. The three base images are nothing special, as you'll see here. The basic image is exposed for the sky, the darker image has more colour in the brighter sections of the sky and the lighter one for the valley foreground.

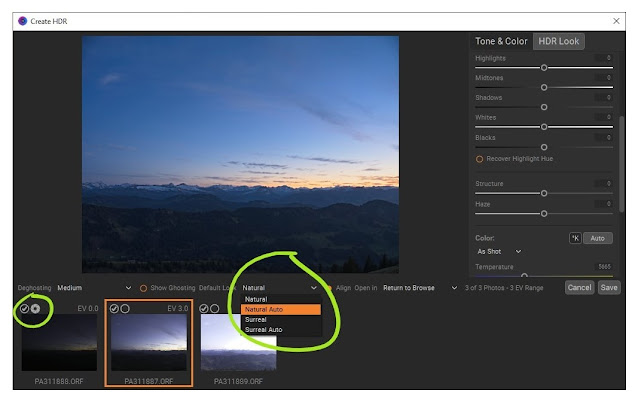
To create the HDR base image, you'll need to select the three images in ON1 Photo Raw Browse and then click the HDR button on the right. You'll now be confronted with a number of choices; Deghosting, Default Look and a bunch of sliders and options. 
Deghosting is all about how the programme processes compositional differences between the images, which will play a role if the shot was hand-held or if there are moving elements in the scene. Here neither is the case; the photo was shot from a tripod and there's nothing in the image that was moving sufficiently to cause problems over this distance and time-scale. The orange square reflects which image you've selected as the base image.

Selecting the base exposure and HDR algorithm
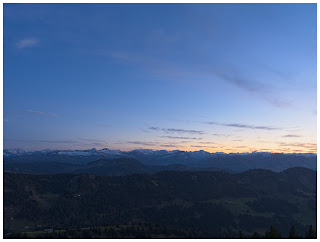
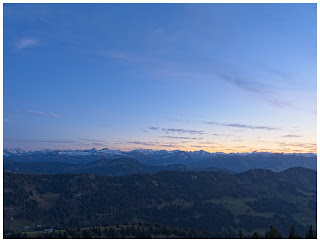
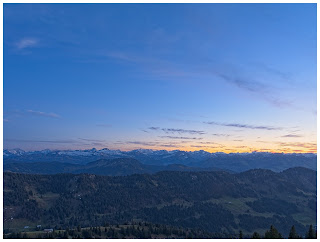
The next choice to make the Default Look. This dictates how ON1 processes your images into the final HDR picture. There are four options here; Natural and Surreal, both with and without Auto processing. Just for fun, I've tried all four options here below. The difference between Auto and native is that ON1 chooses how to set the basic level sliders for you. 

Natural

Natural Auto

Surreal

Surreal Auto

Because I want the image to reflect the darker mood of blue-hour, the dusk hour after sunset when there's still ambient light to see by, I've set the base image for the exposure using the iris icon in the left-hand image in the HDR window.

Effects and Local Edits

Once ON1 has generated a base image that you're happy with, it's off to the Develop module to do the actual editing. This is where the magic happens and where you can turn a good image into something special. Of course you've still got the option of just hitting AI Auto at this stage for ON1 to perform an automatic edit. If you really want to make the image sing, however, a little more finesse is involved.

Normally if I was editing an image, I would have applied one of a personal custom preset, applying a bunch of Effects and Local Edits to the image. Actually in my custom preset, most of these aren't actually applied, instead they're pre-loaded but not yet selected. This is a huge time- (and wrist-)saver, because it means that I don't have to click through a number of menus items to select the standard edits that I use on most photos. I apply this preset automatically at the import stage, but the output file from the HDR module strips the photos of all these filters.

I used the Natural Auto HDR as my base image as a starting point. Everyone has their own particular style. Mine tends toward the hyper-realistic feeling of Albert Dros or Fabio Antenore, two landscape photographers whose eye-catching Instagram images  really stuck out to me, but I don't take it quite as far as they do.

Having set the base image using the HDR sliders, it's down to some Effects and Local Adjustments:

1. Base Image
Here's the base image. I've cropped to a 2:3 format to cut out the immediate foreground.
 

2. Noise Reduction
I hate performing noise reduction. It's process I don't understand and usually involves me randomly sliding Luminance and Detail up and down until I arrive at a compromise I'm happy with. Unfortunately, cameras with small sensors are prone to noise grain. I normally avoid this by leaving the ISO at the native level. Even though I did that here, I seem to have picked up some noise in the sky. I've reached an unhappy compromise here with a Luminance of 40 and Detail 15.


3. Colo(u)r Enhancer: Increase Colo(u)r
Adds some colour saturation to the image, deepening the blue of the sky. I've applied it to the whole scene at 100% opacity except the yellower area of the sky because it became too dominant.


4. Tonal Enhancer: Highlights Darker
Darkens the sky somewhat, intensifying the colour even further. Applied to the sky with a gradient mask. There was no need to apply it to the foreground.


5. Tonal Enhancer: Tonal Contrast I
Adds a bit of sharpness to the scene. Applied using a large feathered brush at opacity 50% to the mountain area to restore some detail. 


6. Tonal Enhancer: Tonal Contrast II
I applied a second, more gentle tonal contrast filter as a gradient at 33% opacity to the bottom of the picture to give the trees a little more detail.


7. Split Tone
Using the split tone filter you can add different colours to both the highlights and the shadows of an image. Here I've used it as a diagonal gradient with the highlights unaltered (set to white) but the shadows given a purple tone. As you can see it subtly changes the darker blue tones into slightly purple ones. 
Note: the purple bottom-left was unintentional and removed in later photos.


8. Local Adjustment: Lighten
The foreground was looking just a little too dark for my taste, so I adjusted the Exposure to +0.6, Contrast to +20 and Saturation and Vibrance each to +15. Applied as a gradient to the bottom of the photo.


9. Local Adjustment: Reduce Highlights
The orange sky was still a little wan for my taste so I applied a radial gradient to the right-hand side of the photo in which I only pulled the Highlights down to -85. No Exposure adjustment, just the Highlights, it's a neat way of dealing with local Highlight (or Shadow) issues in a photo and here it just enhances the colour in the western sky towards the set sun.


10. Local Adjustment: Lighten
This last step is the salt in the soup and one I'm quite proud of: Instead of decreasing the highlights as one usually does, I selectively increase them - on the snow. Again, the exposure on this edit was left neutral and I just upped the Highlights by +40 and Midtones by +70. Then to rescue the snow a little bit out of the blue tone I increased the colour temperature by 5. This slider is incredibly sensitive at this level, but +5 really brings it enough towards white that it stands out.

Applying this brush wasn't easy and took me several attempts. In the end I opted for the ON1 AI Quick Mask, modified at the micro level along the ridge of the mountains and then removed from the immediate foreground. I love the way that you can set a gradient or mask in ON1 to tell the programme where to apply the effect that you want and then make micro adjustments to that mask to correct any mistakes.

Looking back up the series, the difference between steps is relatively subtle, so before I reveal the finished image, let's look again quickly at the starting point and then immediately on to the final photo for comparison:

Before

After: Blue Hour over the Allgäu

Anyway, that's the final edit (for now). Let me know below if you've found this helpful at all, or if you'd have done anything differently. Until then, stay safe and happy shooting.

Tuesday 3 November 2020

Sunset From The 'High Ridge'

Matthias' message warning me that the forecast was set for sensational sunsets at the weekend reached me on Thursday evening. At the same time he informed me that he was waiting for confirmation that he hadn't been infected by a colleague and so we'd have to play it by ear. In the meantime: where to go to catch the spectacle? I immediately recalled a tour that we'd done as a family earlier in the year in the western Allgäu mountains and where we'd had an uninterrupted view towards the Säntis in the north-eastern corner of Switzerland.

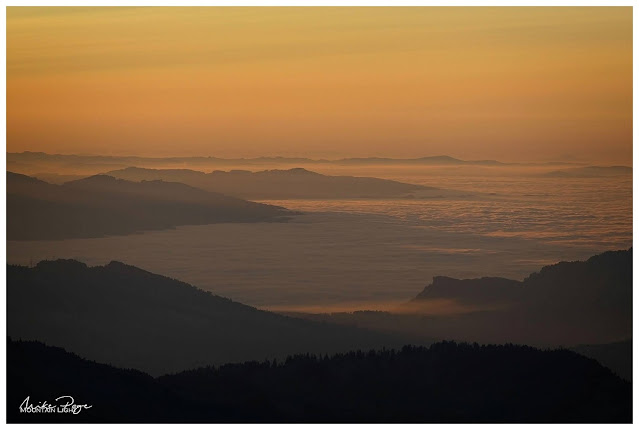
Cloud Inversion over Lake Constance || Olympus 100 mm, f/8, 1/100 s, ISO 200 
Looking through our hiking book for the Allgäu, Sharon found a suitable looking tour just north of our previous jaunt, involving the summit of the Hochgrat. Looking it up online, I noticed that they had a cable car up to a few meters below the summit with a mountain restaurant and that they were advertising late opening due to the full-moon. Slowly a plan was forming in my mind involving an epic sunset shoot followed by some cool blue-hour photos by moonlight.

By Saturday morning, Matthias still hadn't received the all-clear, so we reluctantly decided that we would be better off going our separate ways this time - a decision that I don't think either of us regret given the images we were able to capture. Given the fact that we were planning a relatively late shoot, we weren't in a hurry to leave on Saturday morning. 

Into the Aubach Valley || Olympus 44 mm, f/8, 1/160 s, ISO 200
We'd planned to park well up the Aubach valley at the Alpe Scheidwang, but after having have to wait for a small herd of cows to be ushered down to their winter quarters (the Alpine 'Almabtrieb' tradition - usually quite a photogenic event) we drove up to the bottom of the toll road to find it closed for the winter already. This put 8 km (5 miles) onto both ends of the walk, but we weren't going to be put off so easily.

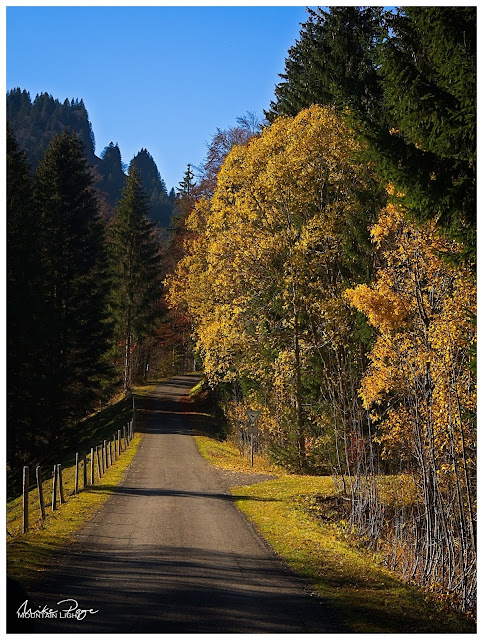
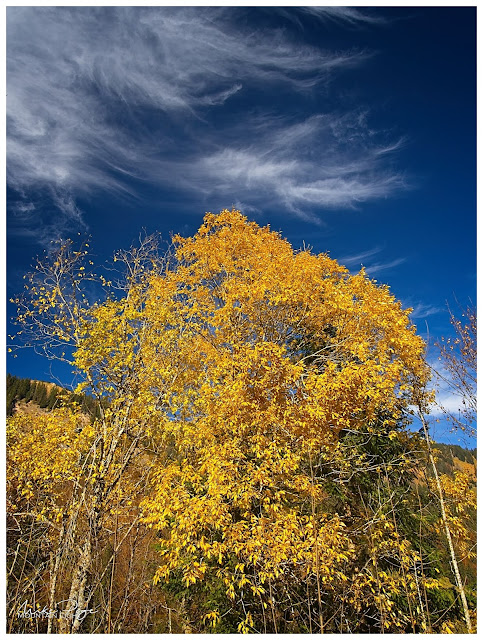
The Aubach valley is delightful and full of deciduous trees. Unfortunately we were a few weeks too late for the best colour ('peak fall'), but we were still treated to a few last silver birches glowing golden in the afternoon sun. The polarising filter really brought out the sky's colour, bringing the cirrus clouds drifting overhead into stark relief.

Golden Silver Birch || Olympus 12 mm, f/6.3, 1/125 s, ISO 200
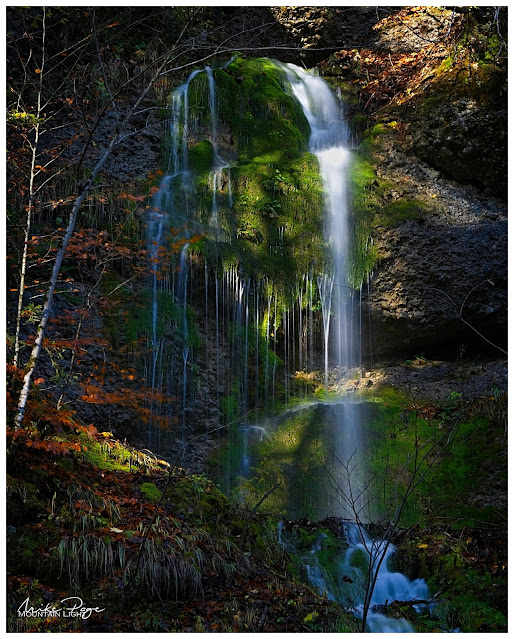
The unexpected extra mileage meant that we didn't have much time to enjoy the valley, but there are a number of waterfalls left and right of the trail that would warrant a more leisurely investigation another time under the right conditions. The live ND function on the new Olympus makes shots like this child's play (if you can find them that it). The on-board computer can simulate a 5-stop light reduction.

Roadside Waterfall || Olympus 61 mm, f/8, 1 s, ISO 200
One of the Olympus features that caught my attention and caused me to opt for this system over say those of Fuji, Sony, Canon or Nikon was the image stabilisation - an exceedingly clever system that compensates the movement of the photographer and enables you to still get remarkably sharp photos. The shot above, for example, is a 1 s exposure. As a rule of thumb, without any stabilisation (unless you have a really steady hand) is that the shutter speed shouldn't exceed 1/focal length (e.g. 1/50 s for a 50 mm lens). Being able to take shots like this hand-held is a huge advantage. Add to that the brand new in-camera ND filter (neutral density - a darkened filter that is pure grey) and you've got a winner. The Olympus E-M1X had this and so does the new E-M1 Mk III, of which I have been a very happy owner for about a month now.

Climbing out of the valley towards the ridge and our destination - the 1834 m high Hochgrat - the snowy tops of the inner-Alpine peaks began to show themselves. The previous morning there had been snow even on the northern edge of the Alps and there were signs of fresh snow, but they quickly disappeared over the course of the day. As we climbed out of the valley and could peer over the edge we could see that the main Alps hadn't shed their white blanket so easily.

Peeking Over The Edge || Olympus
As we climbed towards the ridge, it wasn't only more mountains that we could see, but more people as well. There's a cable car that runs up to a point about 80 m below the summit starting near the town of Oberstaufen on the other side of the mountain to where we started from. Due to the full moon, the cable car was running until 21.00 and a lot of people were understandably making the most of the last Saturday before the renewed lockdown to tank up on fresh air.

Catching the Sunset

Despite the larg(ish) numbers of people, there was plenty of room on the summit to settle, grab a snack and wait for the ensuing spectacle. There wasn't as much high cloud as there had been the previous evening, but the remnants of cirrus clouds, particularly on the western horizon, gave us hope. Although I'd deliberately chosen a spot on the very edge of the summit and demonstrably got my tripod out and ready, it didn't stop another photographer from setting up between us and the sunset. To be fair, he probably hadn't noticed me - my tripod was out but not extended, but it still left me fuming at him (silently of course, I am British after all) and so I demonstrably set up just left of him as we waited for the show to start.

Waiting for Sunset || Credit: Sharon Page, Huawei p30 Pro
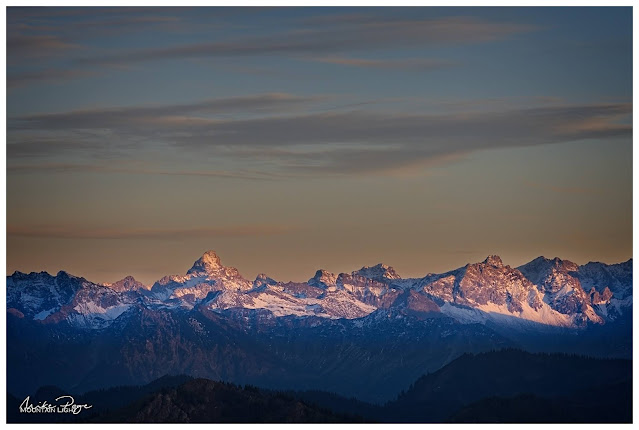
As well as the main view in front of us, the slowly setting sun was beginning to light up the bigger mountains of the Allgäu in a very alluring fashion. Taking panoramas like this I'm always torn between the bigger picture and detailed shots of individual mountains and larger panorama shots. I must have swapped between the 12-100 mm and 8-18 mm lenses half a dozen times as the evening progressed, depending on how the fancy took me.

Alps at Sunset || Olympus 38 mm, f/8, 1/500 s, ISO 200 
Hochvogel - Matterhorn of the Allgäu Mountains || Olympus 75 mm, f/8, 1/50 s, ISO 200
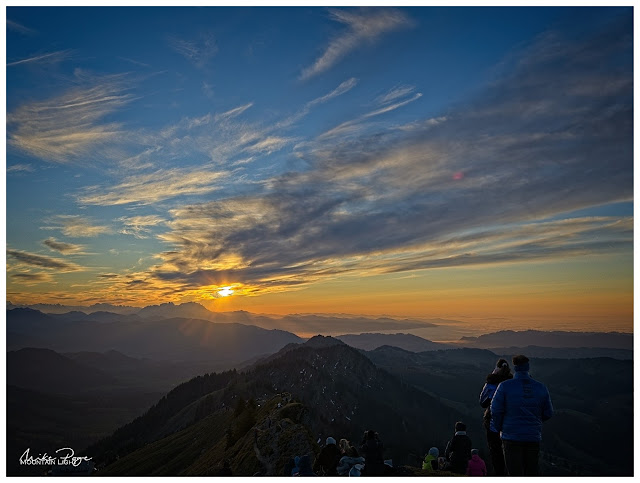
Then it was just a question of waiting. Exposing sunset photos is far from easy. Either you get a well-exposed foreground and a pale sky with a burnt-out spot where the sun should be, or a dark foreground and a brilliant sky. Working with a tripod it was relatively easy to take multiple exposures of each shot and put them together afterwards in ON1 Photo Raw. This is necessary because our cameras are not as good at resolving the range of bright to dark as the human eye is. Normally when I'm 'exposure bracketing', I'll set the camera to 1/4 and 4x the light (two stops under and two stops over), this time two stops wasn't going to do it and so I went to three (1/8 and 8x the light) and even then it was borderline shooting directly into the sun. 

Sunset with the Crowds || Olympus 18 mm, f/8, 1/100 s, ISO 200
Even with these precautions, the sun was almost too bright for the camera as it dipped behind the Säntis. 

Sunset over the Säntis || Olympus 100 mm, f/8, 1/125 s, ISO 200

Hardly Alone || Credit: Sharon Page

Always Wait for the Encore

About 18 years ago, the band Blackmore's Night was playing one of the local concert venues. The eponymous Richie Blackmore was the one-time lead guitarist of two of our favourite bands (you may have heard of them; Deep Purple and Rainbow 😉). The newer music style of Blackmore's Night is a bit twee and wasn't really worth hanging around for the encore for, so in order to beet the rush for the car-park (and keep the babysitter's fee to a sensible level) I suggested that we cut out early. We were just walking across the road when I heard the opening chords of "Difficult to Cure" - Rainbow's rock adaptation of Beethoven's 9th and one of my favourite tracks of theirs. The hairs immediately stood up on the back of my neck and we did a volte face and marched back into the courtyard to enjoy a great rendition of this rock classic. Why am I telling you this? Well the moral of the story is that as with concerts, when photographing sunsets, you should always wait for the encore. Once the sun dips below the horizon, it lights up the clouds from below leaving you with the classic breath-taking oranges, reds and purples - and yes, sometimes even deep purples.

Always Wait for the Encore || Olympus 25 mm, f/8, 1/50 s, ISO 200
Another good tip for photography in general is that you should always look over your shoulder for the unexpected scene. Despite wanting to get to the restaurant before the crowds did - we knew that we were going to be around for a while yet for the blue-hour - we spent a couple of minutes scouting the area for some last shots before setting off down the path to the top of the cable car to grab some well-deserved chow. I've had better food in the mountains, but sitting outside on the terrace of the restaurant I don't think I've had many better locations.

And Keep An Eye Over Your Shoulder || Olympus 75 mm, f/8, 1/50 s, ISO 200
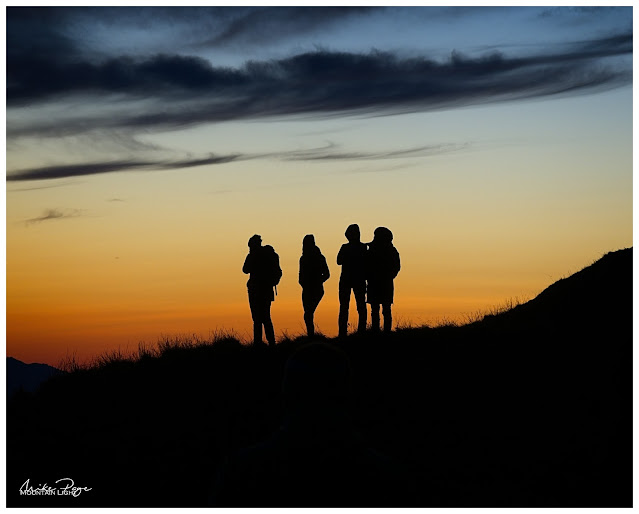
Friends || Olympus 75 mm, f/8, 1/30 s, ISO 200

On to the Blue Hour

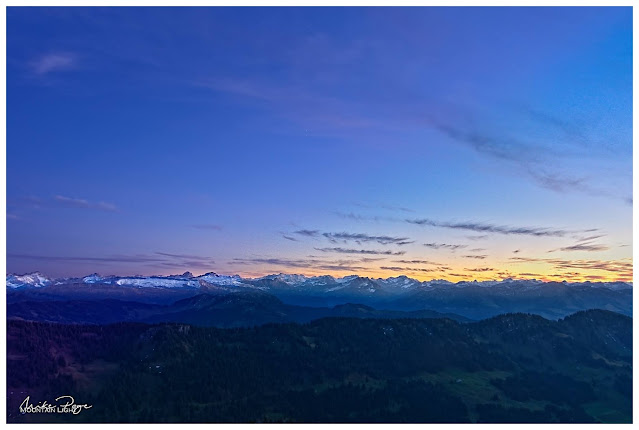
As we polished off our venison goulash on the terrace overlooking the valley, or Käsespätzle in Rhi's case, the lights started to come on, both in the valley and above us. I absolutely love blue hour photography. Since my stint in the Allgäu shooting the Milky Way back in June, I've become an ardent fan of this time of day. Every photographer has their favourite light. For some it's the hour before sunrise, when lakes are still mirrors and mist hangs in the valleys, for others it's the golden hour, that time just after sunrise or just before sunset when the light turns that gorgeous colour, illuminating subjects gently from the side. Mine is the evening blue hour, catching the sky as it turns pastel shades of yellow to purple. If I'm in the mountains, and even better, if there's fresh snow on the peaks, then I'm in heaven. I was in heaven:
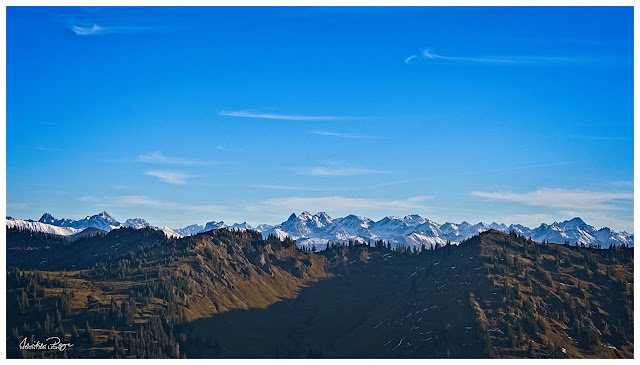
Photographer's Delight || Olympus 12 mm, f/8, 0.6 s, ISO 200
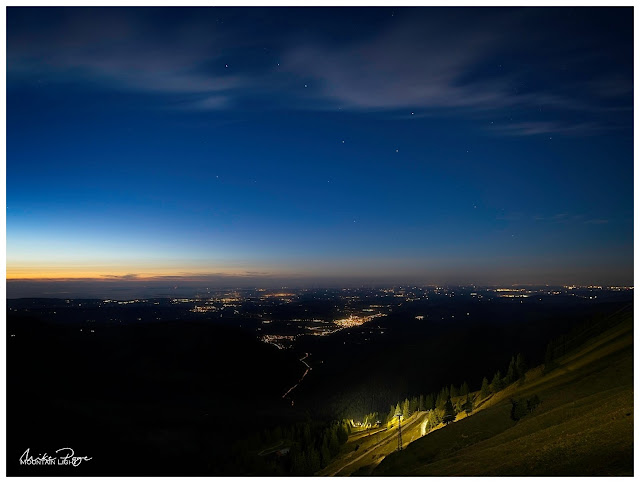
Not only was the view to the south hotting up (above), the lights were beginning to show in the valley. Dusk photography is always fun - you invariably end up getting details on the photos that the native eye didn't spot. Although the eye has a greater dynamic range than the camera sensor, the sensor is more sensitive to low levels of light, especially if you keep the shutter open for a few seconds as here. I never noticed The Plough when I was taking this photo, but it's staring you in the face here.

The Plough over Oberstaufen || Olympus 10 mm, f/3.1, 30 s, ISO 200
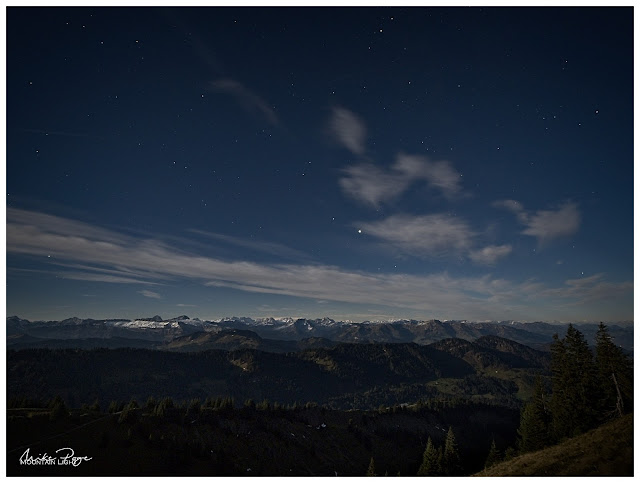
But the sunset wasn't the only heavenly spectacle that the evening had prepared for us, we still had the full moon to go. It was low on the eastern horizon as we started off on our three hour trek back to the car. I tried a couple of shots, but couldn't get the focus properly - always a problem with low light photography. Yes, yes, I know the Mk III has the super-duper star AF mode, but in my rush I completely forgot about that, and wouldn't have known where to find it in the dark even if I had. On top of several expertly exposed shots that would have looked brilliant if I'd got the focus right, I managed to squeeze this last shot off my focusing on Mars. 

Allgäu by the Light of the Moon || Olympus 9 mm, f/3, 30 s, ISO 800
The moon was so bright that we didn't even need the head torches that we'd brought with us. The long yomp along the Aubach really dragged on the way back, leading Rhiannon (girl-child) to issue the warning "the photos better be worth it!". I'll leave you to be the judge.
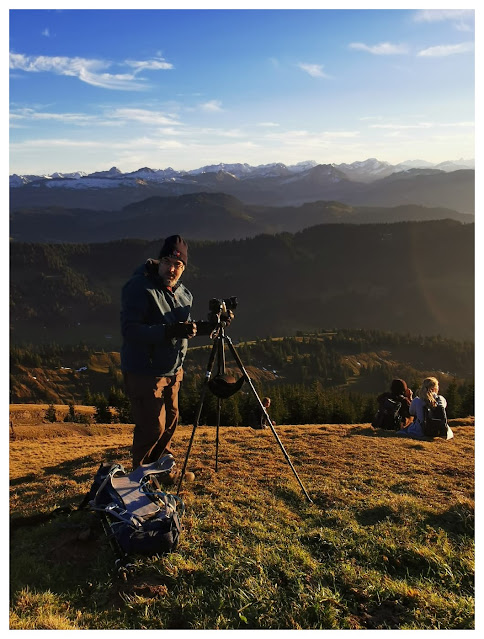
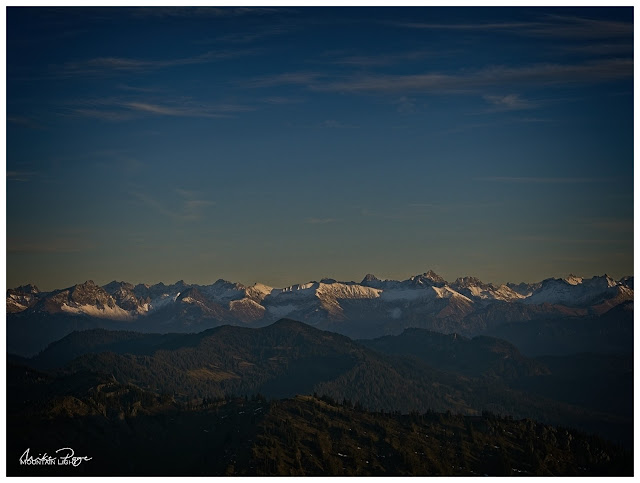
Oh, and Matthias tested negative.