Showing posts with label filters. Show all posts

Saturday 27 February 2021

Micro Four Thirds Filter Comparison: Kase Wolverine vs. Lee Seven5

I don't often do gear reviews, but I've recently had reason to change my filter system and I thought I'd compare my old Lee Seven5 filters with the new Kase Wolverine Magnetic filters for my m43 Panasonic Leica 8-18 mm f/2.8-4.

When I made the move from a high-end bridge camera to the micro four thirds system two years ago, I also invested in a filter system so that I could dabble my toes in the waters of long-exposure photography. These filters are essentially light-blockers of various intensities. Because they don't (or at least shouldn't) affect the quality of the light (i.e. the colour), they are referred to as neutral density or ND filters.

At the time I was looking around, the Lee filters were very highly thought of in the field and I quickly snapped up a filter kit designed specifically for cropped sensor cameras such as the m43 system without doing much research. Unfortunately, whilst optically excellent, the Lee Seven5 system is only good down to a focal length of 14 mm when you use the accompanying CPL which attaches to the front of the filter holder. Any wider than this and you can start to see the edges of the filter mount in the corners. Because my widest lens is the Panasonic Leica 8-18 mm, essentially I can't use this filter system with the CPL when using this lens.

Vignetting with the Lee Seven5 CPL


8 mm

10 mm

12 mm

18 mm

Lee Seven5 CPL Vignetting

Although I don't do a huge amount of long-exposure photography, I do some and so this has been an issue for me. Fast forward to 2021 and I've finally got round to doing something about it. A number of the photographers I follow on YouTube had been talking about a new system of filters from a filter manufacturer that I'd not heard of before - Kase. As well as the traditional filters involving a filter holder into which you drop the square sheets of glass, they also provide an innovative system involving circular filters that can be stacked on the front of the lens and which attach simply via magnets. This means a lot less faffing about than the traditional filter contraptions, and if nothing else I'm a huge fan of less faff!

A couple of weeks ago I drifted onto the Kase UK website. As I was browsing, an automatic chat window popped up, asking me if there was anything they could help me with. Because my question was very specific - 'what size filter system do I need to avoid vignetting on the Leica 8-18 mm lens?' I decided to give it a go and was pleasantly surprised to have a very quick reply from someone who clearly knew what they were talking about. A fellow Olympus enthusiast who was familiar with the lenses and issues involved but who couldn't say for sure whether I needed the 82 mm system or I could get away with the 77 mm filters. In the end we decided that I could order both and return the one I didn't need, but I'll save that saga for later.

There are a number of things to bear in mind when considering filters. First and foremost they need to be completely uniform, otherwise you'll get blotches on your photos that will be very difficult to remove in post. A close second requirement is colour fidelity; if the photos come out with a magenta or green colour cast it's a pain. It can be fixed to a certain degree, but it's less than optimal. After this, there are a number of further considerations, but if the filters don't fulfil these requirements then leave well alone. Durability, ease of use, cost, accessories and availability of replacements also need to be born in mind.

Optical Comparison

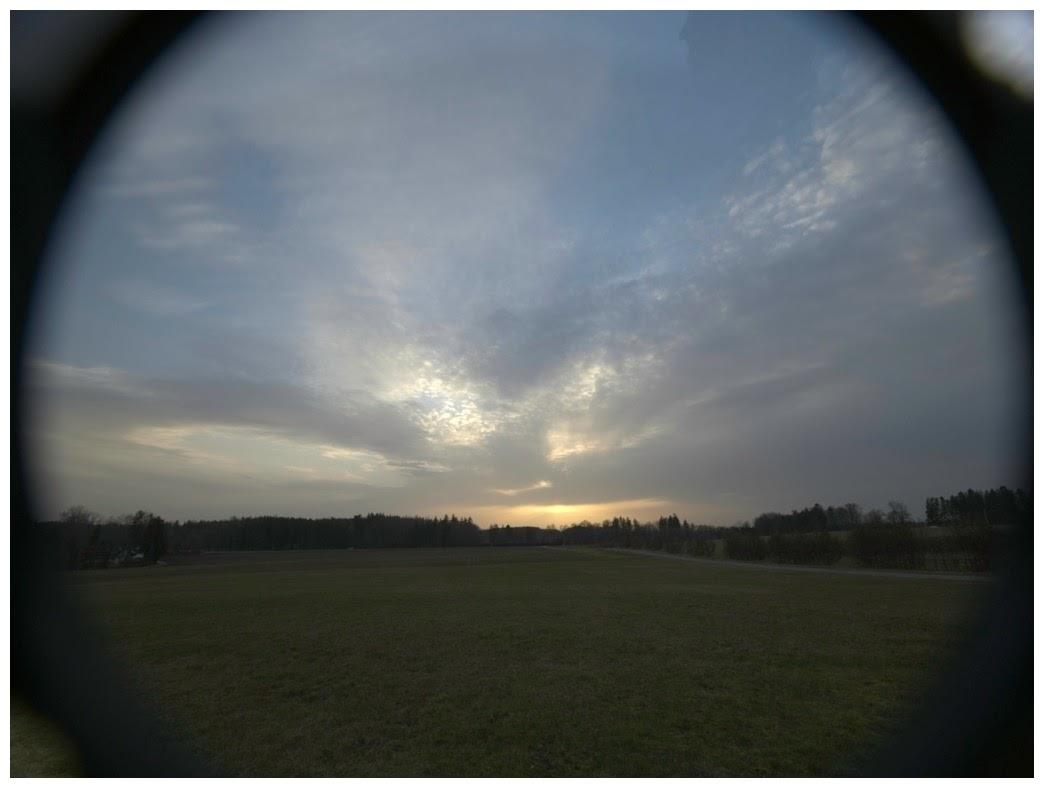
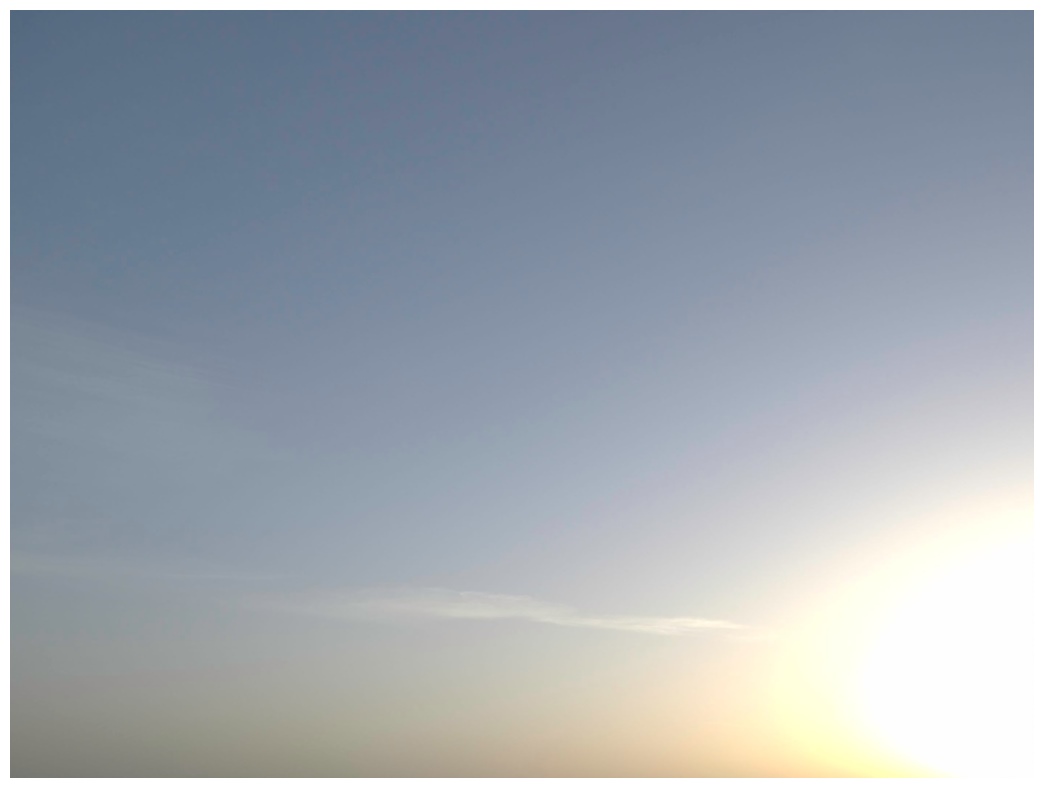
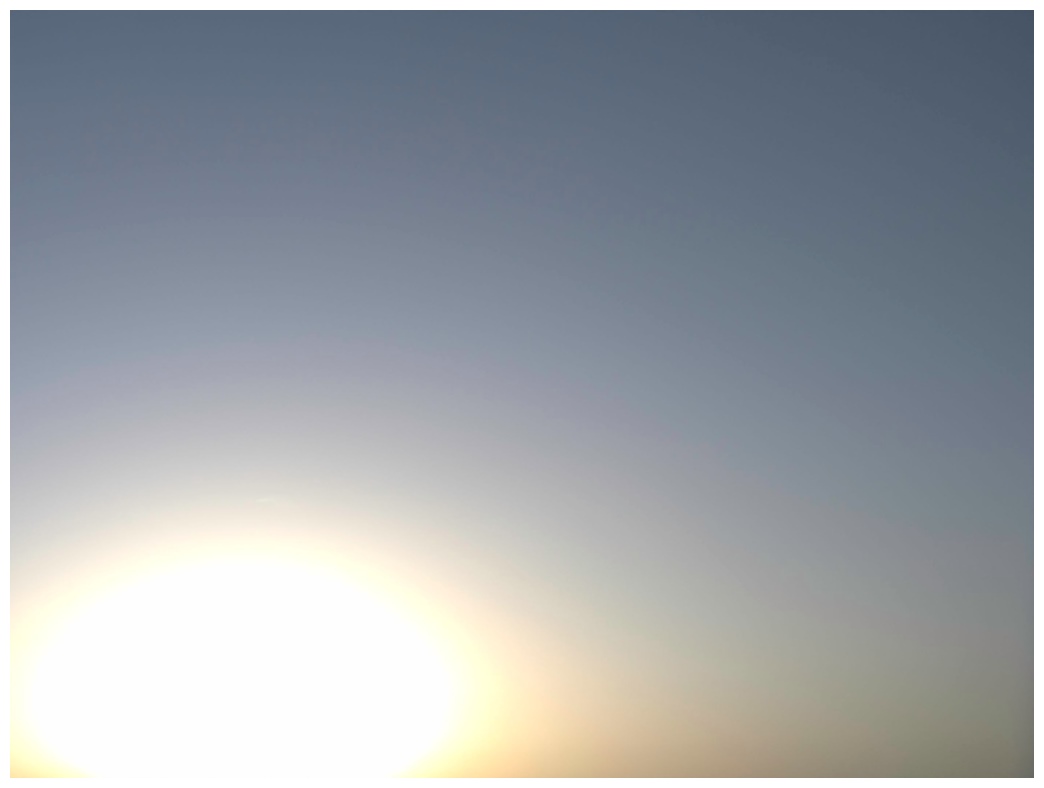
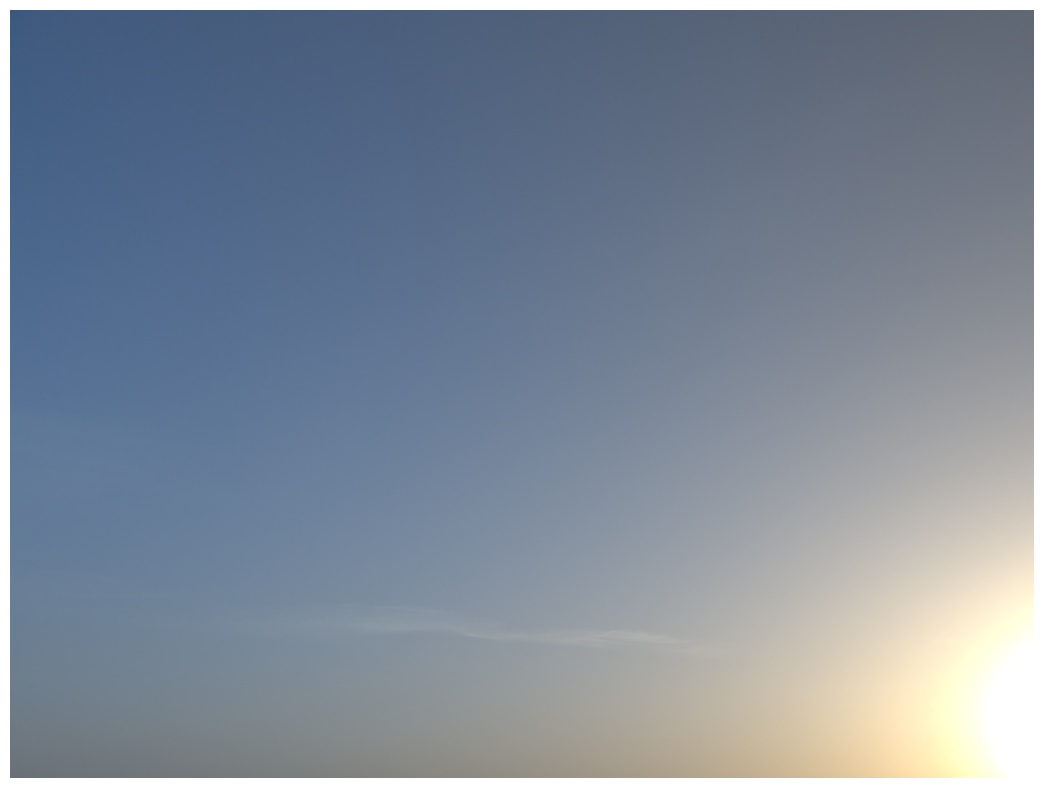
When the Kase filters arrived we were experiencing milky skies due to dust storms from the Sahara (we live in southern Germany). The morning after the packet arrived I slipped over the road to shoot some test shots against the rising sun. With zero cloud cover this made ideal conditions for testing the filters as there were no clouds to create artefacts - the sky should be a homogenous gradation. All the shots were taken within a few minutes of each other (I hadn't had breakfast yet and so was highly motivated to get through the various series) at a constant aperture of f/4 and ISO 200. The images are a 25% crop of the top left quadrant of the photos. They are from the raw files but are essentially unprocessed apart from lens correction. Although I had the camera, an Olympus OMD E-M1 Mk III, set on auto white balance, this only affects the jpeg images and not the raw files. I exposure-bracketed each time and have chosen the +2 EV images in order to give the lightest possible images to compare the exposures.

With the Lee filters I used the 0.45 and 0.9 ND filters (1.5 and 3 stops respectively), for the Kase filters I used the ND8, ND 64 (3 and 6 stops respectively) as well as the CPL filters - a stack of three filters (this will be important later - see below under Afterthought).

Filter

None

Lee Seven5

Kase Wolverine 77 mm

Kase Wolverine 82 mm

8 mm

*

10 mm

12 mm

18 mm

*top right corner chosen as a mis-aligned filter caused shadow on the corner - this was not a vignetting issue.

Lastly, I tested the 82 mm filter at 8 mm focal length with the tripod high-res mode. A friend had mentioned that he’d seen vignetting with HR that hadn’t been visible in normal mode. Not a biggy, but something to watch out for.

High-res mode with 3x 82 mm filters
The bottom line is that both systems appear to be colour neutral as well as highly homogenous and that the 77 mm Kase Wolverine filters vignette slightly with multiple filters at 8 and 10 mm but the 82 mm filters don’t - unless you’re shooting in the Olympus high res mode.

Afterthought

The reason I stacked three filters for Kase is because that's how I often used the Lee filters; the 1.5- and 3-stop filters are relatively weak and I often found myself stacking them. Having slept on it, I'd probably normally only use two Wolverine filters - the 3-, 6- or 10-stop with the CPL in front. In the meantime the clouds have come in and so I was restricted to lighting up a section of wall in the house to see whether reducing from three to two filters could overcome the last vignetting issues. Again, all photos at f/4, ISO 200 and this time all at 8 mm and top left hand quarter of image.

8 mm, no filters
8 mm, 2x 82 mm filter
8 mm, 2x 82 mm filter, tripod high-res
8 mm, 2x 77 mm filter
8 mm, 2x 77 mm filter, tripod high-res
As you can see, there's hardly any shadow with the 82 mm filters, but a little with the 77 mm's still. The 82 mm filter works fine with the Leica 8-18 mm at the widest end even in high-res mode.


Other Features

As I mentioned above, optical comparison is not the only feature to take into consideration; durability, ease of use, cost, accessories and availability of replacements. Both systems have their pros and cons, though I notice that the Lee Seven5 appears to have been discontinued in favour of their 85 mm square filter system - perhaps they realised that the CPL was essentially unusable for wide angle photography.

System

Lee Seven5

Wolverine Kase Magnetic Pro

Availability

Available, but no longer in production

Available

Filters provided

1.5, 3 and 10 stops, CPL, hard grad

3, 6 and 10 stops, CPL

Durability

Hard resin, resistant to falling damage but not to scratching.

Toughened optical glass, reportedly extremely durable.

Ease Of Use

Easy to use, though attaching the CPL can be a bit fiddly in low light

Extremely easy to use, though details regarding which filter is which written very small

Drawbacks

  • Bulky with the holder and CPL

  • Susceptible to light bleed from the side (unless using the big stopper which has a gasket)

  • Not readily combinable with graduated filters (there is a circular soft grad available, but unless your horizon is slap bang in the middle it’s not much use)

Accessories

  • Cordura filter pouch with strap

  • Cleaning cloths (separate cloth pouch for each filter)

  • Graduated filter

  • Leather filter pouch with sturdy clip

  • Cleaning cloth

  • Wax paper envelopes for filters


Bottom Line

I really like the look and feel of the Kase filters and will definitely be keeping the 82 mm set and pensioning off my Lee system. Anyone in the EU want a 77 mm set of Kase Wolverine filters? Otherwise I'll have to send it back to the UK. Somehow. Wish me luck! 

If you're interested in these filters, look up one of their affiliate photographers to get a 10% discount. In the UK you could go to Ian Worth (though you may need to sign up to his Clubhouse). Here in Germany I got a voucher from Manfred Zobrist. Otherwise, check out the Kase website of your country of choice and look up their affiliate photographers.

The Ordering Saga

Warning: Long, rambling story ahead: I live in Germany. My interaction was mostly with the UK Kase website simply because even after 30 years and despite being fluent in German, conversing in English is still my first language. Plus my initial contact via the website was extremely positive and this continued throughout. The people on the other side were very friendly, very knowledgeable, seemingly available at all hours and just willing to chat. In fact I don't think I've ever come across customer service this good. Believe it or not, Sauter Munich also rate very highly with me due to their help tracking down a camera and lens last year, but the Kase people were first in class.

After the initial contact I managed to get my hands on a 10% discount voucher via Ian Worth's website. Bearing in mind Brexit, I thought I'd be clever and order the filters from Kase Germany. Having sorted out the order, I got to the last step - entering the voucher code - and got bounced. Code not recognised. After asking around a bit we worked out that Ian's voucher was only valid with the UK site. I looked around a bit for a German equivalent, but at the time couldn't find one. So back to the UK site, Again, all the goodies in the basket (there were 6 items in all, the two filter systems plus two adapters each for for a 67 mm and 72 mm lens thread) - all from different parts of the website. Voucher accepted. Great. Shipping information: no shipping to Germany. Nuts! The chat box was active again and I brought up the shipping issue with the Kase colleague at the other end. "No problem sir, we'll have that fixed in an instant" - no sooner said than done and literally within seconds I was able to process the order on a Friday evening.

In the meantime, I'd managed to find a German photographer who was offering Kase discount codes on his website. I sent off a request, but unlike the UK people, he appeared to be off for the weekend already. Anticipating a positive response, I checked back with Kase UK (I did say this was a long, rambling story, didn't I?) to ask whether the order could be delayed for a couple of days whilst I waited for the German voucher. They checked, but unfortunately by this stage the order had been processed and couldn't be held up any longer.

A couple of days later I received an email from the package service asking me to pay the European VAT/MWSt. I'd envisioned having to drive several miles to my nearest customs depot to pay import tax, but contrary to the experience of other ex-pat friends, DPD appears to have all its ducks in a row. After filling out the requisite forms and giving my credit card details (yes, of course I cross-checked the package number from the DPD payment request with the Kase dispatch note), the order was once again on its way and a couple of days later in my hands. 

So now the filters are tested, the 77 mm Pro kit back in its box and waiting to either go back to Kase UK or on to some lucky person this side of the Channel. If you don't have anything wider than about 14 mm (m43 equivalent) and are interested in a set of top quality filters, get in touch, perhaps we can do a deal...

Thursday 23 January 2020

Chasing the Light: Where Matthias and I Spur One Another On


Some time last autumn, I spotted a photo of one of my local sites (not really a surprise, I live about 15 min from one of Bavaria's most photographed lakes) in one of the Olympus User FB groups and I got to chatting with the photographer, a young German guy living up near the Czech border. We seemed to have quite a bit in common in terms of the style of photography we were interested in and so I suggested that we should get together for an afternoon if he was ever in the neighbourhood.


Mill Race at the Pöllat Gorge || f5.6, 1/2 s, ISO 64

Towards the end of September he was travelling back home through Munich and so we arranged to meet up for an afternoon photoshoot at the Ammersee, a local lake with a few great spots for late light photos. We had a great afternoon, chatting about favourite YouTube photographers and filling in gaps in the other's education as we hiked up to Kloster Andechs, taking the occasional snap in the autumn woodland.


Autumn at the Ammersee || f8, 1/800 s, ISO 200

I left Matthias to shoot the sunset at the lake alone with the promise that I'd be in touch later in the autumn to show him a couple of my favourite local spots, the Pöllat Gorge at Füssen and the Stuiben Falls just round the corner in Reutte.


Now I'm not a great fan of my own company and so when Sharon planned a weekend visit to our kids who are both studying in the UK it seemed like a golden opportunity. I'm not usually one for sunrise shots, but somehow Matthias pursuaded me that it would be cool to catch the sun coming up down at lake Hopfensee, so we were out of the house by 5.30 on Saturday morning, chasing the light down to Füssen.


Hopfensee Google Maps


QUICK SUMMARY
Best Conditions
sunrise or sunset, pretty much any time of the year
Challengesavoid windy conditions, also, as mentioned below
Parkingall along the promenade (ticket required) or at the far end of Hopfen am See (limited parking)
Where to Stop
any of the cafes or restaurants along the promenade
Links-

Sunrise at the Hopfensee || f7.1, 1/2000 s, ISO 200
We parked the car at the end of the village whilst still in the blue hour. Normally, the northern shore is lined with jetties poking out into the lake and providing photogenic leading lines into the water and on to the mountains. Apparently, they take the jetties in for the winter, leaving only a couple for us to scrabble over. Not only that but the lake was far from still as were struck with a warm south wind, the dreaded Föhn.

So it was tripods and filters at dawn, playing around with long exposures and bracketing, things that I knew about in theory but little hands on experience with. Even though he's quite a few years younger than me, Matthias is a lot more experienced than me with these technical aspects of photography and it was good to have him on side with tips and advice.


Early Morning Light at the Hopfensee || f9, 1/60 s, ISO 200
With dawn wrapped up we headed back to Füssen to tackle the Pöllat gorge under Neuschwanstein. 

Pöllat Gorge Google Maps


QUICK SUMMARY
Best Conditionsessentially any, can get busy in the summer / carry on to the Marienbrücke with a view out over the castle
Challengesonly open in summer / avoid direct sunlight
Parking€7 in Schwangau (10 min walk), €1/h at the Tegelberg cable-car (20 min)
Where to Stopany of the places along the Alpseestrasse, our go-to restaurant has been the Alpenstuben
LinksPöllatschlucht (German), Schwangau Website (German)

I'm sure there used to be a small car park at the beginning of the Pöllat gorge for hikers (as distinct from the mere tourists flocking to castle Neuschwanstein), but not any more. These days you're funnelled into the €7 mega carparks. From there you have to follow Pöllatweg along the bottom of the hill to get to the beginning of the gorge. Do check whether the gorge is open before you go. Unfortunately this isn't shown on the Pöllatschlucht website, but you can find the information by searching the (German) website for Schwangau, which caught us out. The gorge really is worth a visit, but we got to the gate only to find it closed for the winter.

Closed for the Winter
We were about to give up and head off to our next location, but the bottom of the gorge is always worth spending a few minutes on. First and foremost there's the wooden mill race that leads to the sawmill by the Gippsmühle. I personally find this channel extremely photogenic and always worth building into a composition, either as the main element or a clear leading line. Even as a backdrop, the trestled trough is interesting, partly because it's not completely water-tight and is always dripping. But there's also something very special about the water and rocks here in the eastern Allgäu. Due to the minerals in the ground, the water has a distinct green cast, something that you'll see even more clearly in the photos taken at the Stuiben falls.

Green on Gold || f14, 1 s, ISO 200

Here at the mouth of the Pöllat gorge there was also a pool at the bottom of the last falls. Unfortunately, there were no clean shots to be had from our side of the river, partly due to the mill race. Matthias ended up soaked because he squeezed through under the leaking trestles. I ended up soaked as I had chosen to go the long way round and cross lower down. The rocks were predictably slippery and I ended up on my ass in the water.

One of the things that more experienced photographers always say when you're concentrating on a composition is: "turn round" - don't be so focussed on what's in front of you that you forget your surroundings. I'm so glad that I bore this advice in mind as I was looking for my shots, in the branches above us there was this verdant scene: 


Green on Green || f7.1, 1/50, ISO 1600

There was a particular image I had in mind and was keeping my eye out for; gyrating autumn leaves in a waterfall pool. The beech forest was particularly generous with the leaves at this time of year and I found a suitable pool, but to the naked eye, the leaves were not really moving much. Fortunately we both had our filters and tripods with us (yes, this time even I resorted to a tripod). A 10 s exposure with the Panasonic Leica f2.8 8-18 mm revealed that not only were the leaves gyrating, there was a double-centred flow and I ended up with an image that I was really happy with.

Orange on Green || f14, 1 s, ISO 200

Stuiben Falls Google Maps


QUICK SUMMARY
Best Conditionsall year
Challengesavoid direct sunlight
Parkingfree at the Wanderparkplatz E-Werk
Where to Stop-
LinksStuiben Falls hike suggestion

We grabbed a quick lunch in Schwangau before driving round the corner to the Stuiben Falls. I never knew this place existed even though I've lived nearby for over 15 years, but last year I happened on the website of a local photographer who was showcasing some images of the location. Even knowing where they are, it's extremely difficult to find the falls, but utterly worth it. The road to the parking spot feels like you're driving through a factory premises and even when you do find where to leave the car, it's not immediately obvious where the falls are. Once you've been there once it's relatively easy, but finding it the first time is a complete pig. The crazy thing is, once you've found them, you realise they're only 5 min from the road. Talk about easy access!

Upper Falls || f22, 5 s, ISO 64

Whilst not particularly high or spectacular, the falls are an absolute delight to shoot because of the colouring. The rock is light and varies from grey dolomite to golden where it's been in the water and the water is properly emerald green - no tone enhancement necessary! The gorge is deep enough to cut out direct sunlight for most of the day but open enough to catch plenty of light. We started at the upper falls, a short 5 min up the trail, and worked our way down from there.

Middle Falls || f10, 2 s, ISO 200

Middle Falls Detail || f20, 5 s, ISO 200

There are a couple of spots where it's worth crossing the river (provided you can do so safely), so bring wellies or river shoes, depending on the season. Working our way down from the top, we got a handful of solid images. There's a viewing platform for the bottom falls, but you have to be extremely careful shooting from here with a tripod if there are other people around as every footstep shakes the platform. The very best angle means placing the tripod the other side of the fence so it's balanced on the rocks, but make sure it's tethered somehow so you don't lose your gear into the pool below.

The Lower Pools || f16, 5 s, ISO 200

Matthias Making the Ultimate Sacrifice

At the very bottom, it's worth crossing the river again for close ups of the bottom falls, but be aware that you won't be able to catch the main flow from here unless you're prepared to take some crazy steps:
Lower Falls Detail || f20, 5 s, ISO 200

Hopfen am See Revisited


The light looked like it was closing down on us as we finished up at the falls. Not only that but we were tired - we'd been up since the wee hours and shooting all day. The forecast was inconclusive. Should we or shouldn't we swing by the Hopfensee to catch the sunset? We decided that we'd take the detour and keep our options open. The closer we got, the more interesting the sky was looking and whilst we didn't necessarily get the colours we were hoping for, there was definitely some magic in the sky. We piled out of the car with all our gear, eager to set up again at the head of one of the few remaining jetties only to find a photography workshop in residence. Each of the pontoons already had a cluster of eager photographers crowding for the optimal spot. We finally walked far enough that the crowds petered out and found ourselves a little jetty almost to ourselves. Several curious passers by asked what was going on, whether there was a special event that they weren't aware of? After carefully explaining that we were there to see the volcano erruption (oh yes I did!), they mostly scurried off on their evening perambulations, leaving us to shoot in peace.

The Competition Hogging the Jetties

Elusive Jetty || f20, 15 s, ISO 64

My usual photography style is to vaguely plan a day out and take the camera along to spontaneously catch the good views as they come. I think most people are like this because for most of us, our photography started as a way of documenting where we'd been. This day out with Matthias was very different, the first time I'd ever been out where everything was planned around the photography. Having another more experienced photographer to hand was great in terms of learning some new tricks. We also spot different compositions, which is mutually beneficial. The day out stretched me technically and was a great learning experience. I'd definintely recommend going out on a shoot with a fellow photographer as a way of continuing your mastery of the art.

What experience have you had shooting with another photographer? Leave your comments below.