Showing posts with label 2020. Show all posts

Tuesday 3 November 2020

Sunset From The 'High Ridge'

Matthias' message warning me that the forecast was set for sensational sunsets at the weekend reached me on Thursday evening. At the same time he informed me that he was waiting for confirmation that he hadn't been infected by a colleague and so we'd have to play it by ear. In the meantime: where to go to catch the spectacle? I immediately recalled a tour that we'd done as a family earlier in the year in the western Allgäu mountains and where we'd had an uninterrupted view towards the Säntis in the north-eastern corner of Switzerland.

Cloud Inversion over Lake Constance || Olympus 100 mm, f/8, 1/100 s, ISO 200 
Looking through our hiking book for the Allgäu, Sharon found a suitable looking tour just north of our previous jaunt, involving the summit of the Hochgrat. Looking it up online, I noticed that they had a cable car up to a few meters below the summit with a mountain restaurant and that they were advertising late opening due to the full-moon. Slowly a plan was forming in my mind involving an epic sunset shoot followed by some cool blue-hour photos by moonlight.

By Saturday morning, Matthias still hadn't received the all-clear, so we reluctantly decided that we would be better off going our separate ways this time - a decision that I don't think either of us regret given the images we were able to capture. Given the fact that we were planning a relatively late shoot, we weren't in a hurry to leave on Saturday morning. 

Into the Aubach Valley || Olympus 44 mm, f/8, 1/160 s, ISO 200
We'd planned to park well up the Aubach valley at the Alpe Scheidwang, but after having have to wait for a small herd of cows to be ushered down to their winter quarters (the Alpine 'Almabtrieb' tradition - usually quite a photogenic event) we drove up to the bottom of the toll road to find it closed for the winter already. This put 8 km (5 miles) onto both ends of the walk, but we weren't going to be put off so easily.

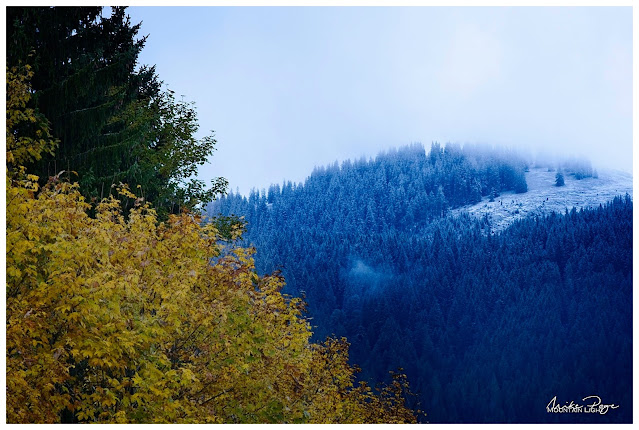
The Aubach valley is delightful and full of deciduous trees. Unfortunately we were a few weeks too late for the best colour ('peak fall'), but we were still treated to a few last silver birches glowing golden in the afternoon sun. The polarising filter really brought out the sky's colour, bringing the cirrus clouds drifting overhead into stark relief.

Golden Silver Birch || Olympus 12 mm, f/6.3, 1/125 s, ISO 200
The unexpected extra mileage meant that we didn't have much time to enjoy the valley, but there are a number of waterfalls left and right of the trail that would warrant a more leisurely investigation another time under the right conditions. The live ND function on the new Olympus makes shots like this child's play (if you can find them that it). The on-board computer can simulate a 5-stop light reduction.

Roadside Waterfall || Olympus 61 mm, f/8, 1 s, ISO 200
One of the Olympus features that caught my attention and caused me to opt for this system over say those of Fuji, Sony, Canon or Nikon was the image stabilisation - an exceedingly clever system that compensates the movement of the photographer and enables you to still get remarkably sharp photos. The shot above, for example, is a 1 s exposure. As a rule of thumb, without any stabilisation (unless you have a really steady hand) is that the shutter speed shouldn't exceed 1/focal length (e.g. 1/50 s for a 50 mm lens). Being able to take shots like this hand-held is a huge advantage. Add to that the brand new in-camera ND filter (neutral density - a darkened filter that is pure grey) and you've got a winner. The Olympus E-M1X had this and so does the new E-M1 Mk III, of which I have been a very happy owner for about a month now.

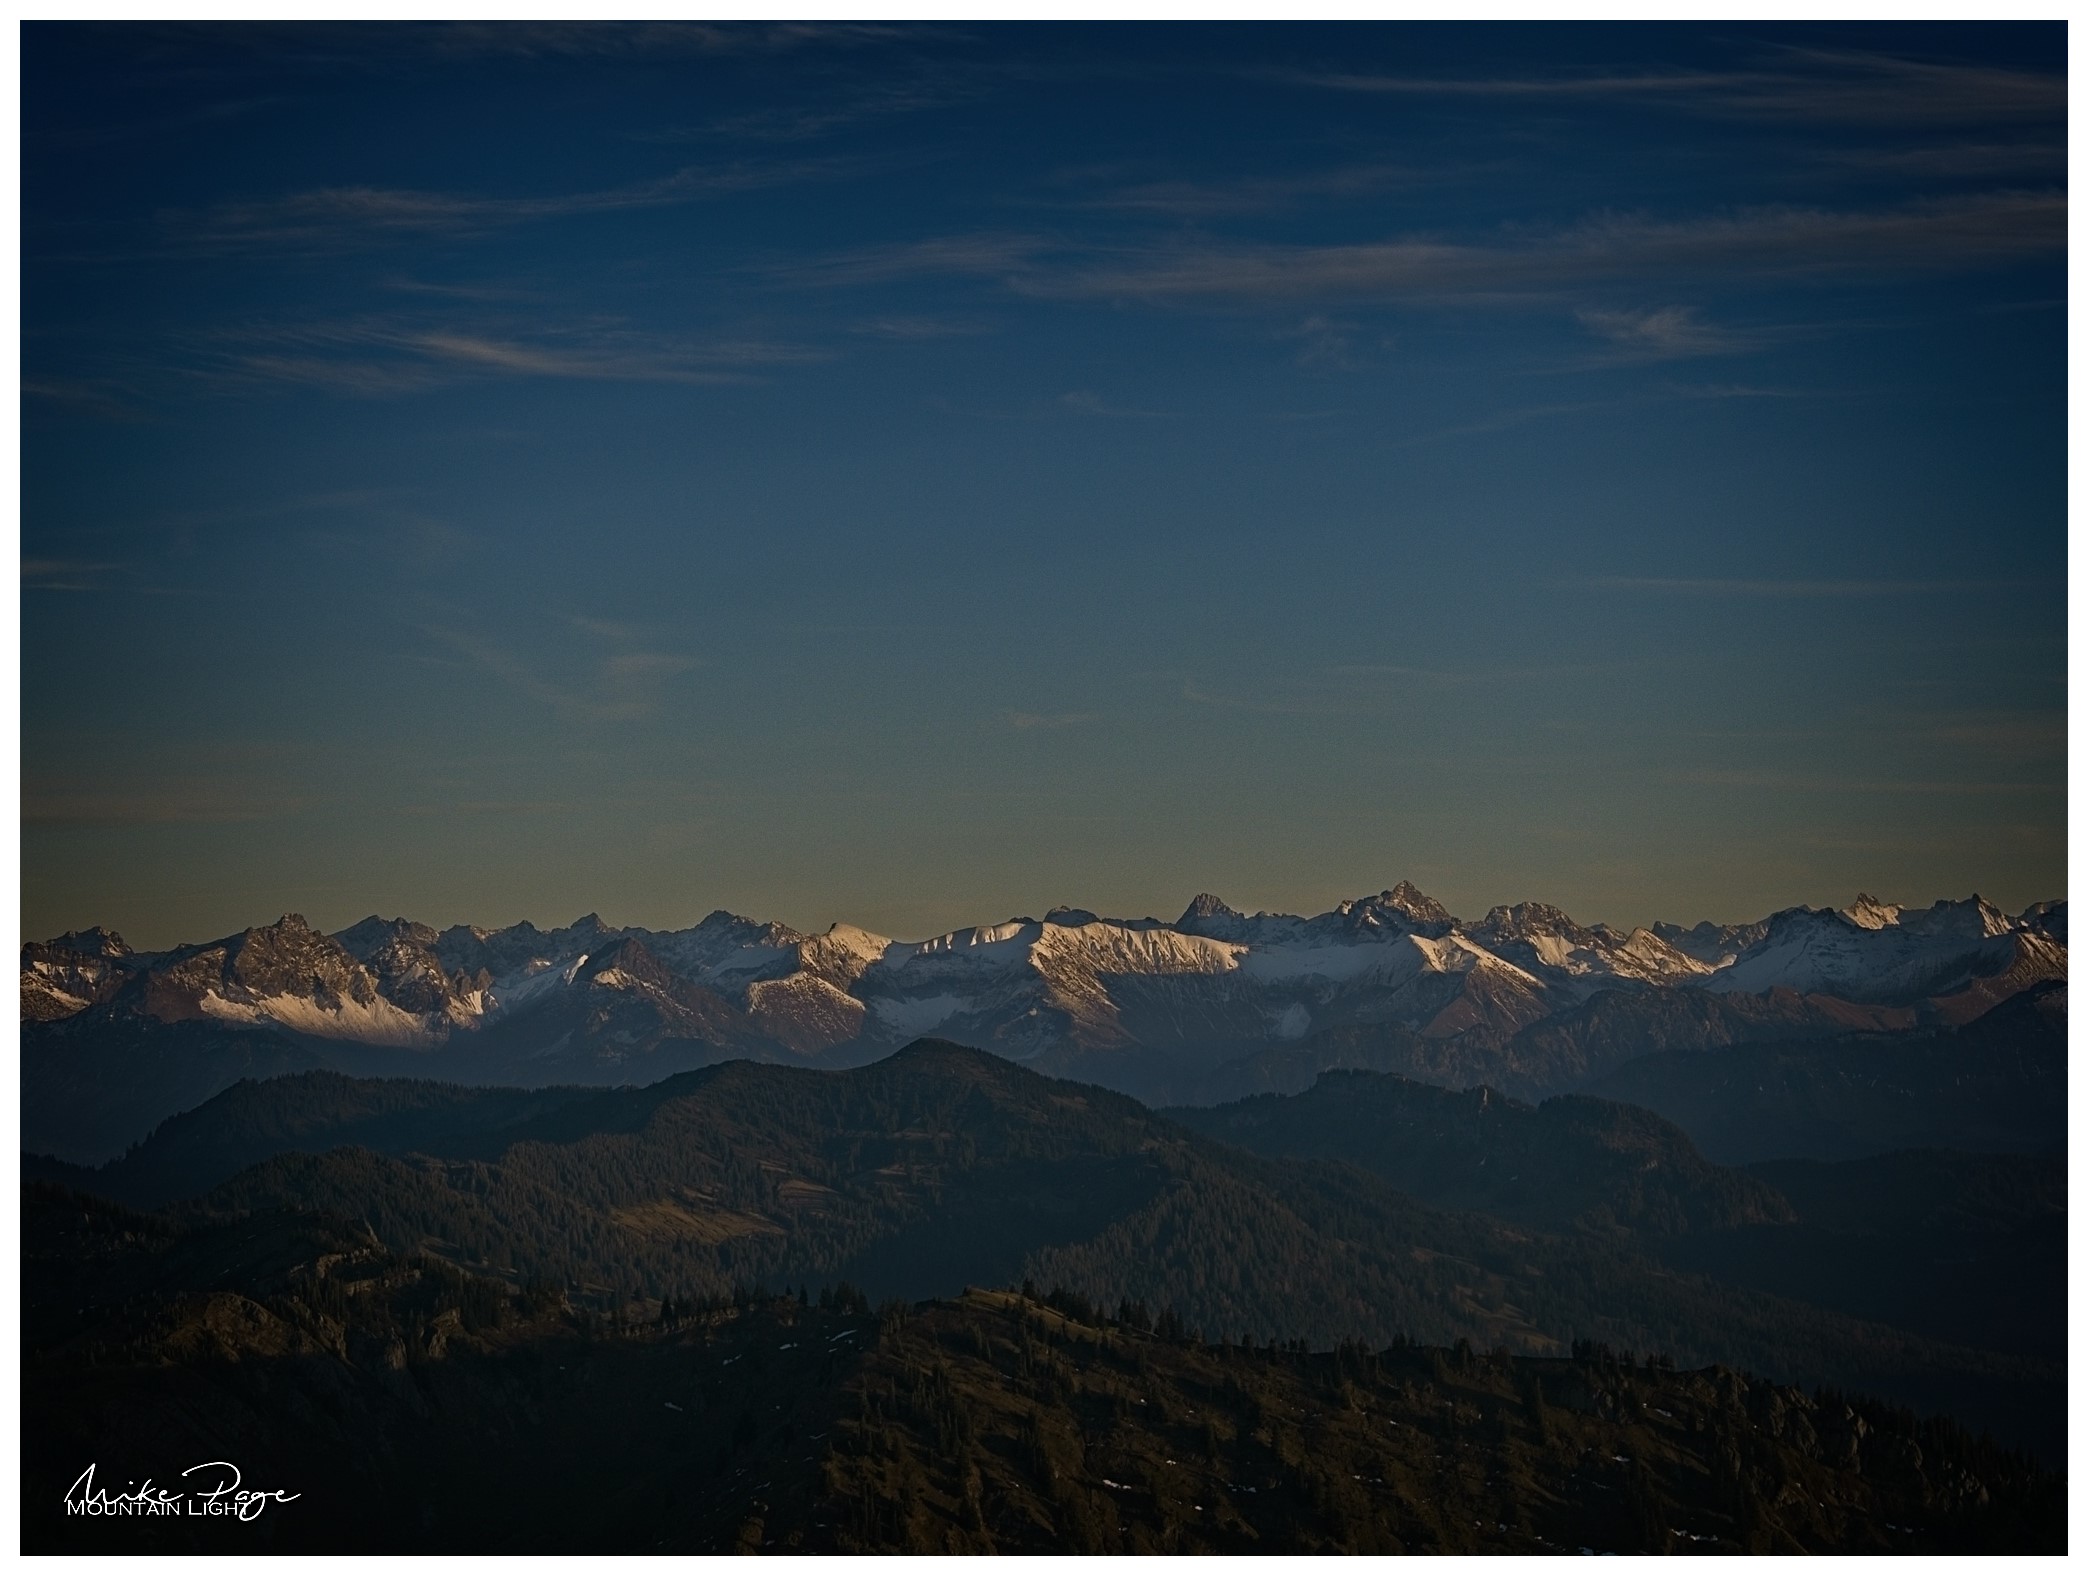
Climbing out of the valley towards the ridge and our destination - the 1834 m high Hochgrat - the snowy tops of the inner-Alpine peaks began to show themselves. The previous morning there had been snow even on the northern edge of the Alps and there were signs of fresh snow, but they quickly disappeared over the course of the day. As we climbed out of the valley and could peer over the edge we could see that the main Alps hadn't shed their white blanket so easily.

Peeking Over The Edge || Olympus
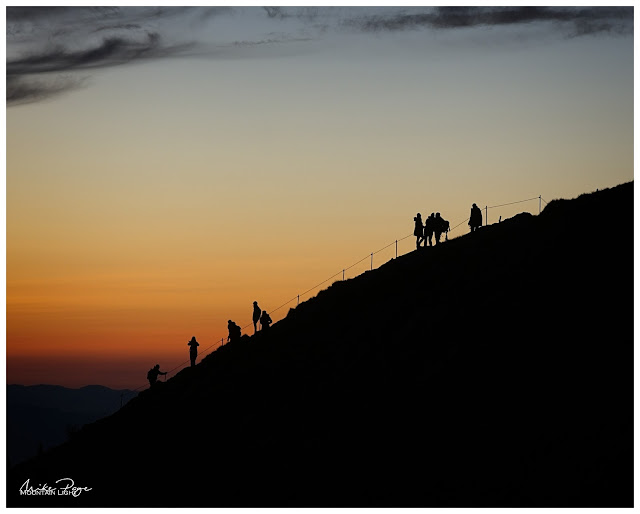
As we climbed towards the ridge, it wasn't only more mountains that we could see, but more people as well. There's a cable car that runs up to a point about 80 m below the summit starting near the town of Oberstaufen on the other side of the mountain to where we started from. Due to the full moon, the cable car was running until 21.00 and a lot of people were understandably making the most of the last Saturday before the renewed lockdown to tank up on fresh air.

Catching the Sunset

Despite the larg(ish) numbers of people, there was plenty of room on the summit to settle, grab a snack and wait for the ensuing spectacle. There wasn't as much high cloud as there had been the previous evening, but the remnants of cirrus clouds, particularly on the western horizon, gave us hope. Although I'd deliberately chosen a spot on the very edge of the summit and demonstrably got my tripod out and ready, it didn't stop another photographer from setting up between us and the sunset. To be fair, he probably hadn't noticed me - my tripod was out but not extended, but it still left me fuming at him (silently of course, I am British after all) and so I demonstrably set up just left of him as we waited for the show to start.

Waiting for Sunset || Credit: Sharon Page, Huawei p30 Pro
As well as the main view in front of us, the slowly setting sun was beginning to light up the bigger mountains of the Allgäu in a very alluring fashion. Taking panoramas like this I'm always torn between the bigger picture and detailed shots of individual mountains and larger panorama shots. I must have swapped between the 12-100 mm and 8-18 mm lenses half a dozen times as the evening progressed, depending on how the fancy took me.

Alps at Sunset || Olympus 38 mm, f/8, 1/500 s, ISO 200 
Hochvogel - Matterhorn of the Allgäu Mountains || Olympus 75 mm, f/8, 1/50 s, ISO 200
Then it was just a question of waiting. Exposing sunset photos is far from easy. Either you get a well-exposed foreground and a pale sky with a burnt-out spot where the sun should be, or a dark foreground and a brilliant sky. Working with a tripod it was relatively easy to take multiple exposures of each shot and put them together afterwards in ON1 Photo Raw. This is necessary because our cameras are not as good at resolving the range of bright to dark as the human eye is. Normally when I'm 'exposure bracketing', I'll set the camera to 1/4 and 4x the light (two stops under and two stops over), this time two stops wasn't going to do it and so I went to three (1/8 and 8x the light) and even then it was borderline shooting directly into the sun. 

Sunset with the Crowds || Olympus 18 mm, f/8, 1/100 s, ISO 200
Even with these precautions, the sun was almost too bright for the camera as it dipped behind the Säntis. 

Sunset over the Säntis || Olympus 100 mm, f/8, 1/125 s, ISO 200

Hardly Alone || Credit: Sharon Page

Always Wait for the Encore

About 18 years ago, the band Blackmore's Night was playing one of the local concert venues. The eponymous Richie Blackmore was the one-time lead guitarist of two of our favourite bands (you may have heard of them; Deep Purple and Rainbow 😉). The newer music style of Blackmore's Night is a bit twee and wasn't really worth hanging around for the encore for, so in order to beet the rush for the car-park (and keep the babysitter's fee to a sensible level) I suggested that we cut out early. We were just walking across the road when I heard the opening chords of "Difficult to Cure" - Rainbow's rock adaptation of Beethoven's 9th and one of my favourite tracks of theirs. The hairs immediately stood up on the back of my neck and we did a volte face and marched back into the courtyard to enjoy a great rendition of this rock classic. Why am I telling you this? Well the moral of the story is that as with concerts, when photographing sunsets, you should always wait for the encore. Once the sun dips below the horizon, it lights up the clouds from below leaving you with the classic breath-taking oranges, reds and purples - and yes, sometimes even deep purples.

Always Wait for the Encore || Olympus 25 mm, f/8, 1/50 s, ISO 200
Another good tip for photography in general is that you should always look over your shoulder for the unexpected scene. Despite wanting to get to the restaurant before the crowds did - we knew that we were going to be around for a while yet for the blue-hour - we spent a couple of minutes scouting the area for some last shots before setting off down the path to the top of the cable car to grab some well-deserved chow. I've had better food in the mountains, but sitting outside on the terrace of the restaurant I don't think I've had many better locations.

And Keep An Eye Over Your Shoulder || Olympus 75 mm, f/8, 1/50 s, ISO 200
Friends || Olympus 75 mm, f/8, 1/30 s, ISO 200

On to the Blue Hour

As we polished off our venison goulash on the terrace overlooking the valley, or Käsespätzle in Rhi's case, the lights started to come on, both in the valley and above us. I absolutely love blue hour photography. Since my stint in the Allgäu shooting the Milky Way back in June, I've become an ardent fan of this time of day. Every photographer has their favourite light. For some it's the hour before sunrise, when lakes are still mirrors and mist hangs in the valleys, for others it's the golden hour, that time just after sunrise or just before sunset when the light turns that gorgeous colour, illuminating subjects gently from the side. Mine is the evening blue hour, catching the sky as it turns pastel shades of yellow to purple. If I'm in the mountains, and even better, if there's fresh snow on the peaks, then I'm in heaven. I was in heaven:

Photographer's Delight || Olympus 12 mm, f/8, 0.6 s, ISO 200
Not only was the view to the south hotting up (above), the lights were beginning to show in the valley. Dusk photography is always fun - you invariably end up getting details on the photos that the native eye didn't spot. Although the eye has a greater dynamic range than the camera sensor, the sensor is more sensitive to low levels of light, especially if you keep the shutter open for a few seconds as here. I never noticed The Plough when I was taking this photo, but it's staring you in the face here.

The Plough over Oberstaufen || Olympus 10 mm, f/3.1, 30 s, ISO 200
But the sunset wasn't the only heavenly spectacle that the evening had prepared for us, we still had the full moon to go. It was low on the eastern horizon as we started off on our three hour trek back to the car. I tried a couple of shots, but couldn't get the focus properly - always a problem with low light photography. Yes, yes, I know the Mk III has the super-duper star AF mode, but in my rush I completely forgot about that, and wouldn't have known where to find it in the dark even if I had. On top of several expertly exposed shots that would have looked brilliant if I'd got the focus right, I managed to squeeze this last shot off my focusing on Mars. 

Allgäu by the Light of the Moon || Olympus 9 mm, f/3, 30 s, ISO 800
The moon was so bright that we didn't even need the head torches that we'd brought with us. The long yomp along the Aubach really dragged on the way back, leading Rhiannon (girl-child) to issue the warning "the photos better be worth it!". I'll leave you to be the judge.

Oh, and Matthias tested negative.

Wednesday 14 October 2020

The Wooden Bridge: Editing from Start to Finish in ON1 Photo Raw 2020

Once a year, I get together with a German friend that I met on an Olympus camera group on Facebook and we shoot together for a day or two. I say once a year, we managed it for the second year in a row last weekend, but it works so well that we're both adamant that we want to keep going. Both occasions have been incredibly productive photographically, partly as it's normally the only time in the year that I get up to catch sunrise on the Alps from home.

The Covered Bridge || Olympus 8 mm HDR f/8, 1 s, ISO 200 

Last year, we headed down to Füssen and the Stuiben Falls for some epic waterfall shots. This year I wanted to check out a composition that I'd driven past many times but never stopped for and then head to the Zipfelsbach waterfalls at Bad Hindelang. Covid prevented us from entering Austrian Tirol and so we had to stay on this side of the border. There was a chance of a decent sunrise, so I dragged myself out of a warm bed at 5.30 am, grabbed a quick breakfast and coffee before hitting the road. Matthias had driven down the day before and we'd had a productive afternoon in a nearby woods shooting mushrooms and fungi.

Dawn wasn't a huge success, but we did confirm that the composition was solid: a gently snaking farm track leading up to a village church with the Allgäu mountains in the background. Definitely something to be repeated in better conditions.

Dawn at Seeg || Olympus 8 mm HDR f/8, 1/3 s, ISO 200

The weather wasn't great - I tend to be a sunshine photographer, but Matthias seemed happy enough with the cloud cover. Grey days are great for waterfalls and so we headed down to Hinterstein to check out a location that I'd been to with the family earlier in the year and wanted to spend a little longer at. When we were there in May it was a hike rather than a photo jaunt and I wanted to spend a little longer trying to get some better compositions. Diffuse light is much better than direct sunlight for waterfalls due to the huge dynamic ranges involved - the highlights are really bright and the shadows are really dark, a challenge for any camera.

Driving up into the mountains from Seeg, the atmosphere became really moody and we had to actually stop once or twice to get the cameras out and take in the scenes around us, whether the misty fir trees or a hilltop signifying the change of season. It was nice to not have to be going anywhere or getting anywhere, just driving and being able to stop for 10 minutes here and there to take it all in and try to capture the atmosphere around us. I've long been trying to build in the communication of mood into my photos. The conditions made it easy.

Far Over the Misty Mountains Cold || Olympus 100 mm f/5.6, 1/13 s, ISO 200 

Autumn into Winter || Olympus 86 mm f/7.1, 1/5 s, ISO 200
We managed to get a few decent compositions of the waterfalls in the gentle drizzle before heading back down to Hinterstein with a view to finding lunch in the valley. On the road in, we'd noticed a covered wooden bridge on the side of the road and on a whim we decided to stop and check it out. After struggling to find a parking spot in the tiny village we took the cameras and tripods back to the bridge to see what we could find. Very quickly we realised that we'd struck gold. The bridge sits beautifully in the valley with wooded hills behind. The deciduous trees adjacent to the bridge were in good autumn colour and the river colour was a delightful turquoise.

Zipfelbach Waterfall || Olympus 21 mm f/9, 1/2 s, ISO 200


Not only that the bridge sat at the end of a horseshoe bend in the river. It was a bit overcast, but we reckoned we could make something of it nevertheless. We probably spent the best part of 30 minutes working the scene in order to get the best composition before we decided that there wasn't much more that we could do before heading back to the car and searching for an elusive lunch. One of us would spot one compositional element then the other another, walking up- and downstream looking for the best vantage point. From a certain angle you could just make out last night's snow on the hills behind, from another you could block out the road on the other side of the river, from another you could catch the whole river bend and bridge in one shot; it was a real game of cat and mouse to get the right composition. Personally I wasn't overly happy with the light, but I was very smug that once again my nose for a potential composition had proved right.

The Photo(s)

I tried a couple of standpoints along the river, shooting both portrait and landscape, trying to get the snow in and working with and without the grassy bank. Even in the dull-ish light we were having to take multiple shots to get the exposure right, underexposing to get the highlights and re-taking the shot over-exposed to get the shadow detail, a process called exposure bracketing that most modern cameras offer. 

I also used the on-board ND filter function of the camera to slow down the river. Rather than freezing the motion with a single short exposure, it adds a sense of calm to a water photo if you can take a longer exposure, evening out the flow.

Assembling the Panorama Images of the Bridge

On the single shots I also used a circular polariser to cut down the glare on the water, revealing the beautiful colours and stones beneath the surface. Using a polariser can make stitching panorama shots together tricky though, so for the panorama I took it off. Taking a panorama of a scene like this is relatively easy if you follow a few basic rules: 
  • always shoot in manual so that the exposure is exactly the same for all the shots, exposing for the brightest part of the scene
  • if necessary bracket the exposures (see above)
  • focusing manually can help too, making sure that you avoid inadvertently focusing on a blade of grass in front of the camera for the critical middle shot
  • make sure the camera is horizontal before you start
  • overlap each photo by about a third to make the stitching easier
I did a double exposure for each shot, which actually caused me difficulties in the end - I should have done three, but more of that in the processing.

The Edit

I first bought ON1 Photo Raw soon after buying my Olympus E-M1 Mk II in March 2019. Up until then I was using Photoshop Elements as my main processing software, which only allowed me to perform universal edits. I looked long and hard at the market leading Adobe Lightroom, darling of professional landscape photographers all over, but was put off by the subscription-based approach to purchasing the software; you could only rent the software rather than buying it outright, a concept I couldn't warm to. Looking around for suitable alternatives I finally landed on ON1 (pronounced "on one"), a software that started out as a plug-in for Photoshop but which had relatively recently become a standalone product.

In the meantime I consider myself a relatively advanced user; I develop all of my photos with ON1 - with the exception of astro- and lunar photos as the sole image processor - and I think that I have a relatively good grasp of its capabilities.

Nevertheless, this next shot almost cost me my composure. I couldn't for the life of me get it to look how I wanted it, and in no way did it match Matthias' HDR image of the scene. 

To start with, I had a 9-shot panorama taken at 18 mm (36 mm full-frame equivalent) in portrait. Each shot was double - one light one dark for the sky.

The first step was to stitch each of the two panoramas separately in ON1 and then combine them to get exposure blending. I'd previously done a quick HDR exposure blend of another shot to get a feel for how it might turn out:

Colours are working, but missing the river bend...

The colours of the shot above are relatively pleasing (to my eye at least), as is the tonal range, so imagine my surprise when I stitched my panorama together and got this:

A Pale Comparison

No manner of shifting the white balance and trying to modify the colours would let me get anywhere near this. ON1 wouldn't let me combine the two panoramas for an HDR image. At first I thought it was  because there were only two images and an HDR customarily uses three, but it wouldn't accept the format of the stitched panoramas. So I created a third panorama of the darker series, artificially underexposed it and tried again, with the same result.

In the end, I had to create an HDR from each of the seven panels I ended up using for the final panorama, saving these as information-rich TIFs and then stitching those together to get the final image. Fortunately, this worked, but by this time I'd burnt through the best part of the evening trying to bend the original panoramas to my will.

And the Three Shall Be One!

This is the raw product of the panorama of the HDR images:

Our Starting Point

Now the editing can start. I don't generally do much in the way of global edits in the Develop tab of ON1 unless it's to rescue some highlights at a later stage. Most of my editing I do using a bunch of Effect Filters that I pre-load into each image prior to processing using a privately created preset. A preset is a bunch of amendments that you can apply to a photo in one go. I have one with all of my commonly used Effect Filters loaded and ready to go, but unselected. These are (in no particular order):
  • Vignette: Big softy, set at 50% and active
  • Curves: Unmodified but active
The following Filters are pre-loaded but in an inactive state:
  • Tone Enhancer: Clarity
  • Tone Enhancer: Shadows Lighter
  • Tone Enhancer: Highlights Darker
  • Tone Enhancer: Midtones Lighter
  • Tone Enhancer: Tonal Contrast
  • Colo(u)r Enhancer: Increase Colour
  • Colo(u)r Enhancer: Warmer
  • Dynamic Contrast
  • Glow: Angel Glow
Many of these effects could be achieved using the Curves filter, but I find it convenient to process my images this way. Each of the Filters is clearly labelled and ready to switch on at the click of a radio button. In addition, I have four Local Effect Filters charged and ready to go: Darken (-1 EV), Lighten (+1 EV), Dehaze Adjustment and Vibrance Adjustment. The main differences between Effects and Local is that the former are normally applied to the whole image by default and the latter applied locally with a brush and the Local Effects are basically a repetition of the global adjustments of the Develop tab, whereas the Filter Effects go way beyond this.

I'll briefly go through all the edits I made to this image together with a quick explanation of why I did it and what part(s) of the image I did it to. The differences between individual images will be very subtle, especially at this resolution, but compare the starting point above with the final image at the bottom and you'll find a very different picture.

Crop

My first step with any image is to crop and level it using the crop tool. Here I just pulled in a bit of the image from each end and lost some of the unnecessary grass in the foreground. At the same time, I stamped out the awkward sapling centre picture and the electric fence by the logs and dulled down the repaired plank on the left of the bridge by locally reducing the saturation.

Colour Enhancer: Increase Colour

Applied just to the river to increase the saturation of the water. Applied using a gradient filter to exclude the trees in the middle as well as the grass in the foreground. Set at 40% opacity.

Tone Enhancer: Darken Shadows

The HDR process took a little too much contrast away, so instead of the usual Lighten Shadows, I used the opposite to bring a bit more substance to the image. Applied globally at 50% opacity.

Dynamic Contrast

There are at least five ways of adding sharpening detail in ON1; Structure in the Develop module or Sharpening, Tone Enhancer: Clarity, Tone Enhancer: Tonal Contrast and Dynamic Contrast. All five do the same or similar things in subtly different ways: they increase contrast in small areas of the image where there are light and dark edges - so-called micro contrast. The theory isn't terribly important, but it's something that should be used with caution. It's easy to add a ton of clarity (generic term, common also to Lightroom) to a picture and it'll look awful.

The different types of sharpening work best for different aspects of a picture. For example, I've found in ON1 that a little bit of Tonal Contrast works really well on adding a bit of detail to forest foliage. Dynamic Contrast, on the other hand, is great at bringing out a bit of detail in wood grain or rocks. In this image I used a masking brush to apply a little Dynamic Contrast to the rocks left and right of the bridge by the water and a little more to the bridge itself.

Tone Enhancer: Tonal Contrast

As mentioned above, a little Tonal Contrast gives a hint of crispness to the edges in forests. I used a radial filter here to add it to the centre of the picture.

Colour Enhancer

Painted in to reduce the saturation and brightness of the grass bank in the foreground whilst at the same time shifting the hue from green towards yellow. The bright green was too dominant in the photo and keeping the eye from progressing to the water and autumn foliage.

Colour Enhancer: Warmer, Colour Enhancer: Fall

Added globally at 100% and 50% respectively to bring out the autumn colours.

HDR Look

I very rarely use this quite strong filter, but here I used it at 45% across the picture to add a bit of brightness to the picture. A Sunshine filter would have had a similar effect, increasing brightness and decreasing darker portions of the photo.

Sunshine

Having mentioned the Sunshine filter, I thought I'd try it out. It adds an extra pep to the image too. Applied at 50% globally.


Glow: Orten

The Orten Effect is an interesting one, again I don't use it often. It adds a sort of ghostly glow that fits a slightly gloomy image like this.


And that's more or less it. I desaturated a tree that looked a tad over-saturated, darkened the grass bank a little more, opened up (lightened) the shadows under the roof of the bridge, lightened the rocks to the left of the bridge and I think that's about as good as I can get it. It sounds like a lot, and it is a lot more than I would do on most images - the easy ones I process in about 2-5 min, but it was necessary and, I believe, worth the effort.

The Covered Bridge || Olympus 7 Shot HDR Panorama


Sunday 11 October 2020

Homage to Home II: Wales

So. Wales. I only lived there three years, Sharon six, but it was a very significant time for both of us. We studied there, found our faith there, fell in love with the mountains there and met each other there. And love for each other? Well that came a bit later. But wild wet and windy Wales will always have a special place in our hearts.

Following on from last week's first instalment looking at parts of Somerset, Dorset and Wiltshire, this week I'm focusing on a previously unvisited part of Wales.

Tenby: All the Weathers || Olympus 11 mm, f/8, 1/50 s, ISO 200 

Last year after taking Joshua to Pontypridd to carry on the family tradition of studying west of the Wye we spent a week in a cottage on The Gower, the peninsular west of Swansea. We had a great time exploring a corner of the country that we hadn't seen before, but despite the fantastic scenery, I struggled to find great images.

This year we (i.e. Sharon) found a cosy harbour-front cottage in Tenby (view from the kitchen window above). I don't think I'd ever been to Pembrokeshire before and fell in love with it on the spot. It took us a while to get our bearings though - we couldn't work out why the main beach faced east rather than south, facing the morning sun. Once we got our heads around the concept of the south beach all was well.

Tenby Town and Beaches


Tenby Harbour and Castle || Olympus 14 mm, f/8, 1/200 s, ISO 200

The tidal range in Tenby was incredible. At the time we arrived it was spring tide with a massive 7.5 m tidal range. Seeing the harbour rapidly empty and fill twice a day was unnerving to start with. 

Tenby by Night || Olympus 14 mm, f/f, 3.2 s, ISO 200

Old Tenby || Olympus 16 mm, f/3.8, 1.3 s, ISO 800 

Tenby has two icons, the old lifeboat house and the painted houses along the top of the east bay. Both are very grateful photographic subjects and I unashamedly shot both to death in all sorts of conditions. And we had all the conditions bar snow.

The Old Lifeboat House || Olympus 12 mm, f/8, 1/160 s, ISO 200

And the New One... || Olympus 47 mm, f/6.3, 1.3 s, ISO 800

Sundown over the Old Town || Olympus 12 mm, f/8, 1/400 s, ISO 200 
Driftwood on the Beach || Olympus 29 mm, f/8, 2.5 s, ISO 200
Harbour by Night || Olympus 12 mm, f/8, 1/8 s, ISO 200
St. Catherine's Island || Olympus 18 mm, f/8, 1/200 s, ISO 200
First Light || Olympus 12 mm, f/8, 1/250 s, ISO 800

Castle Bandstand at Dawn || Olympus 31 mm, f/22, 1/15 s, ISO 200

Tenby Surroundings

After having had to drive through the pedestrian centre of the old town in our massive Kodiaq, we essentially didn't dare move the car for the first 48 h after arriving, exploring the town and walking along the coast to Manobier and beyond.

The rest of the coast is as stunning as the town, if not more so, offering gorgeous views over the craggy cliffs and turquoise waters.

Rocks below Giltar Point || Olympus 50 mm, f/14, 2 s, ISO 64

Pembrokeshire Coastal Path || Olympus 17 mm, f/5.6, 1/320 s, ISO 200
Pembrokeshire also has a north-facing coast - the Angle Headland on Milford Haven, a huge natural harbour. Here views across the Haven to St. Anne's head were just as stunning as anything we'd seen on the south coast.

Angle to St. Anne's Head || Olympus 29 mm, f/8, 1/125 s, ISO 200
Surprise Bracken || Olympus 12 mm, f/8, 1/80 s, ISO 200

Abandoned Inn || Olympus 12 mm, f/8, 1/200 s, ISO 200

Right outside our cottage there were several booths offering a variety of boat trips along the coast. Most of these were closed due to Covid, but the 90 min trip round Caldey Island was still running. Unfortunately, it was impossible to land on the island when we were there - the 40 elderly Cistercian monks were self-isolating to avoid succumbing.

Sightings of seals are almost guaranteed year round. Sadly we were too late for the puffins, razorbills and guillemots (oh dear, we'll have to come back!), but the close-up views of the blubbery sea dogs more than made up for it.

Caldey Seals || Olympus 300 mm, f/5.6, 1/640 s, ISO 800

Caldey Cliffs and Gulls || Olympus 100 mm, f/4, 1/640 s, ISO 250

Lastly, a trip to Amroth and the Colby Woodland Garden gave us some wonderfully green Welsh woodland, moss and ivy growing abundantly on ancient oaks.

Ancient Forest || Olympus 66 mm, f/4, 1/600 s, ISO 1600 

I hope you've enjoyed my visual homage to Wales (and England). We'll definitely be back to chase the waves and try to spot some of the other wildlife visitors. Until then it'll be back to our usual haunts in Bavaria and Austria.

Glass Mural || Olympus 44 mm, f/8, 1/20 s, ISO 800
St. Catherine's Island || Olympus 16 mm, f/8, 1/200 s, ISO 200
South Beach Surf I || Olympus 18 mm, f/8, 1/250 s, ISO 200 
South Beach Surf II || Olympus 18 mm, f/8, 1/250 s, ISO 200 

South Beach Bar and Grill || Olympus 13 mm, f/8, 1/250 s, ISO 800 


Goodbye Tenby || Olympus 8 mm, f/8, 1/80 s, ISO 200