Showing posts with label philosophy. Show all posts

Wednesday 29 July 2020

Feedback on the First Workshops

"Apparently, if you try to cram two years of learning into 4-6 hour 1-2-1 workshop, the participants can find it a bit too much. Who knew?"
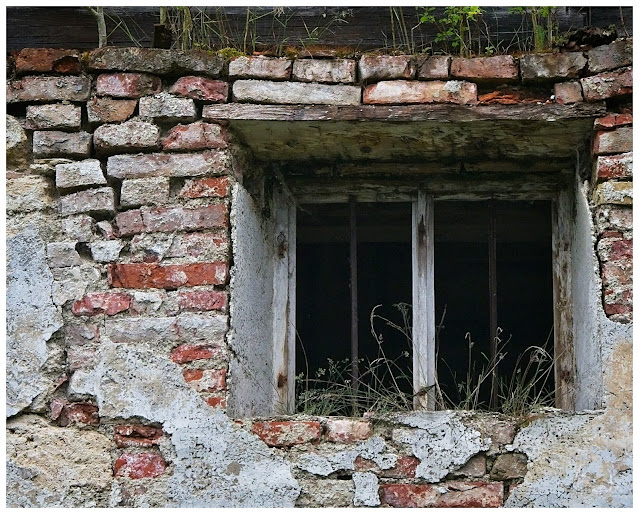
The Old Gypsum Mill || Olympus f/5.6, 1/125 s, ISO 1250 

I’ve now run my first two workshops for volunteer guinea-pigs recruited from among my local friends on the understanding that they would give me in-depth feedback on the sessions in lieu of payment. We had two great afternoons, one hiking in the local mountains in less than perfect weather and one shooting flowers in a friend’s back garden. We had several “aha” moments as they learned things about their cameras that they didn’t know before and both have got some great shots out of the sessions. But what did I learn?

Over the last 18 months I’ve invested a lot of time in my photographic education. I’ve read books, I’ve watched a ton of videos and online courses on photography and post-processing and I’ve endeavoured to put a lot of it into practice in the field. I think that most people would agree with me when I say that I’ve come a long way photographically in that time. I’ve almost completely changed my approach to photographing and my philosophy of photography. A lot of things are now obvious that would have been a complete mystery to me even two years ago. I was an idiot to think that I could convey the significant parts of that learning in a single session, but that’s what I set out to do. Twice. In my defence, the second session was probably much better structured than the first. But I need to trim it down much further, or at least give the students more time to take each aspect of the teaching on board before progressing to the next.

Let’s take a look at the two sessions and try to assess what works and what doesn’t and look at how to build this into planning future workshops.

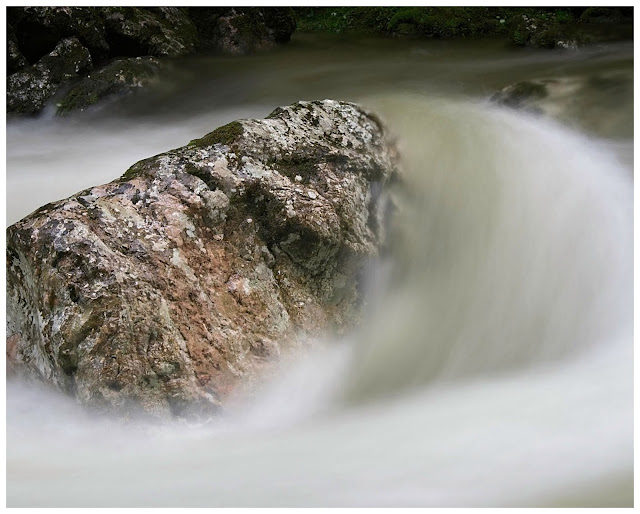
In the Pöllat River || Olympus f/11, 2 s, ISO 200


Session 1: In The Pöllat Gorge

The first session was held at one of my favourite local spots – the Pöllat gorge below the fabulous Neuschwanstein castle near Füssen. My student, a friend from the Munich choir that I sing with, had previously been a teacher – a huge plus for me, as this was someone who had first-hand experience of teaching methods and knew what he was talking about when it came to feedback. We’d had a chance to chat a little about photography on the way down in the car and I’d already sounded him out concerning what he wanted to learn.

The fun part about this session was that Andrew had a relatively clear idea of the images he wanted to get, but wasn’t always clear on how to achieve those images technically. This was definitely something I could help with.

Parking the car at the Tegelberg car park (much cheaper than parking in Hohenschwangau at the bottom of the castle), we trekked along the base of the mountain, the clouds lingering in the trees above us. Excellent opportunity for composition questions 1 and 2: (1) What catches your attention, and (2) what aspect of the subject do you want to emphasise or caricature? (thanks Joshua Cripps!)

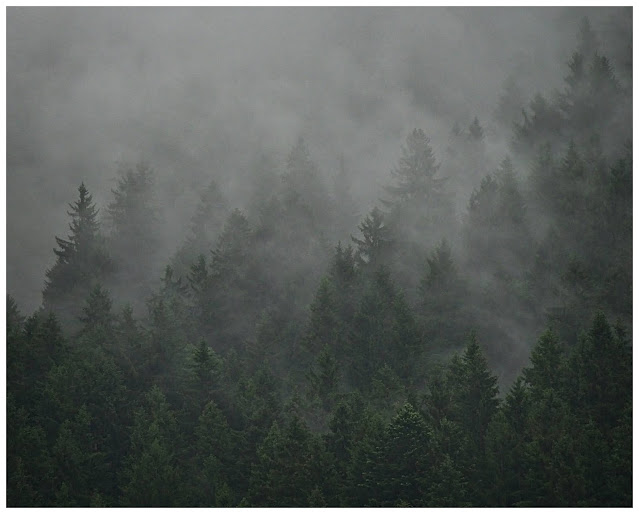
Moody, Misty Forest || Olympus f/5, 1/200 s, ISO 500

Arriving at the bottom of the Pöllat gorge, I was dismayed to see that the gorgeous wooden mill race had been very badly damaged in the recent storms. I sincerely hope that they repair it using the original wood, since this has always been a complete eye-catcher and really strong element for photos here. As it was, the heavy flow was just gushing out of the broken end of the trellis into a mess of tree branches. Such a shame.

After we'd walked around the bottom of the gorge for a bit, scouting compositions, we went a few meters downstream where it was a little quieter so that we could chat about how to emphasise the water movement, leading into a discussion of long exposures and tripods. I'd established in advance that Andrew would be using the Nikon 18-55 mm kit lens and managed to source a cheap step-up ring of the right diameter so that he could use my filter system to create a series of shots with different exposures.

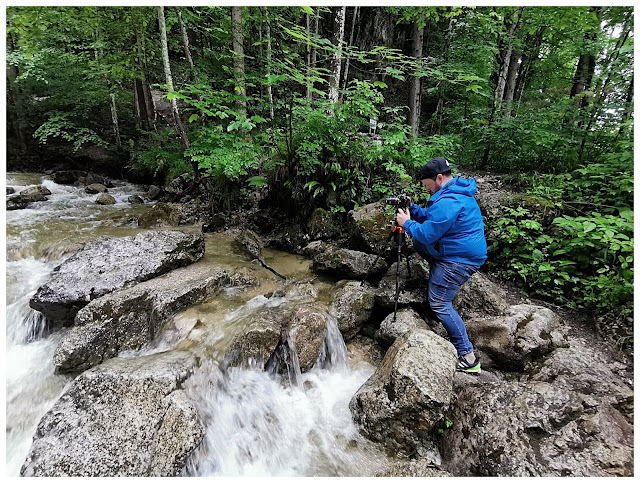
Shooting in the Pöllat || Huawei P30 Pro

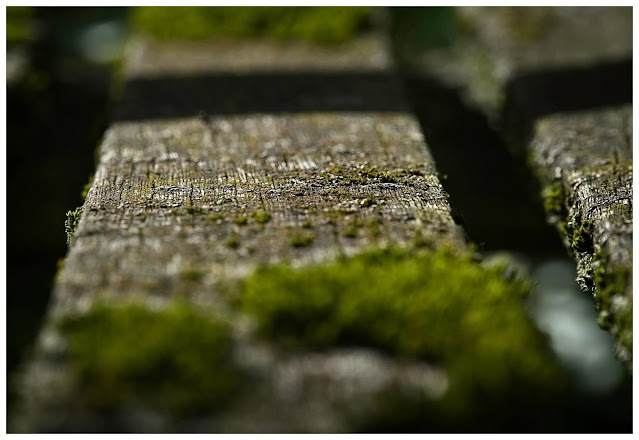
Having had a good long session at the bottom of the gorge, we walked up through the shady forest, looking for other compositions. There are some nice shots to be had of the falls as well as some nice intimate forest landscapes - what my father calls my signature shots. The moss was particularly appealing 

Moss Micro Landscape || Olympus f/4, 1/8 s, ISO 200

At this point, I forgot a bit that I was supposed to be leading a workshop and got side-tracked by taking my own images - wrong of me I know, but too easy to do in the circumstances. In future, I'm really going to have to put my own shots in the background, unless they're to make a teaching point.

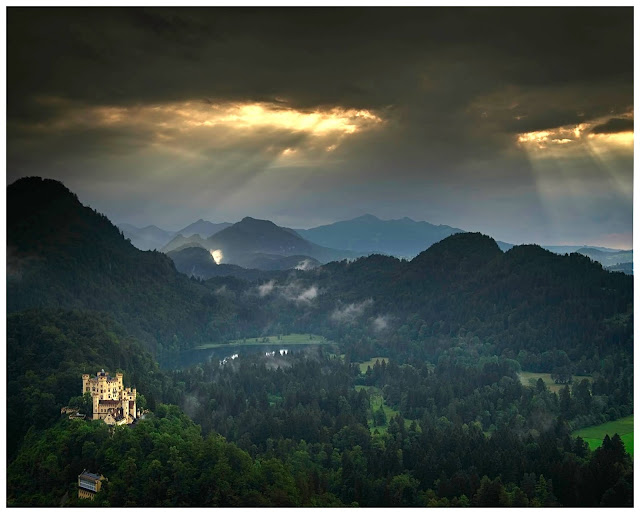
Carrying on up to the path between Neuschwanstein and the Marienbrücke, we were rewarded by a moody view over Hohenschwangau with the sun breaking through the clouds. An impossible shot for Andrew's camera, but no match for modern exposure bracketing. Once again, I was putting my own photos first. But come on, who would have said no to this:

God-Rays over Hohenschwangau || Olympus Exposure Bracketing

After waiting a while in vain to see whether the weather would provide us with anything better, we headed on up to the Marienbrücke, the bridge overlooking Neuschwanstein, to see whether the light would allow us to catch any useful shots. Andrew took quite a few from the bridge and we toyed with the concept of including some foreground in a shot in order to establish a bit of 3-dimensionality to the scene.

It was quite late by the time we got back to the car and we were both starving, so we looked for a suitable hostelry. Waiting for food, I had a chance to go through my workshop cheat-sheets with him. In my mind I had planned to shoot and then go over the theory in the hope that he would be more receptive to the concepts - a teaching style that we often use at work. In reality, it would have been helpful to look at them beforehand and then try to put some of it into practice in the field.


Session 2: A Munich Garden

For the second session I visited my friend in her garden in Munich. Because one of her primary photographic interests was flowers and because they have a beautiful flower garden, this really worked out nicely. The weather was definitely playing ball this time as well, which really helped. It had rained just before I got there, but we had a great 4 h in the garden in lovely late afternoon light, shooting anything and everything in sight.

This time we were able to sit down before we started and look at some of the concepts that help me focus on what makes a good photo. I was delighted that my friend was able to make the intuitive jumps from the things I was pointing out (more here) to compositional consequences. Once we'd got some of the basics out of the way, we were able to knuckle down to the two issues that she had highlighted approaching the workshop; exposure and focus.

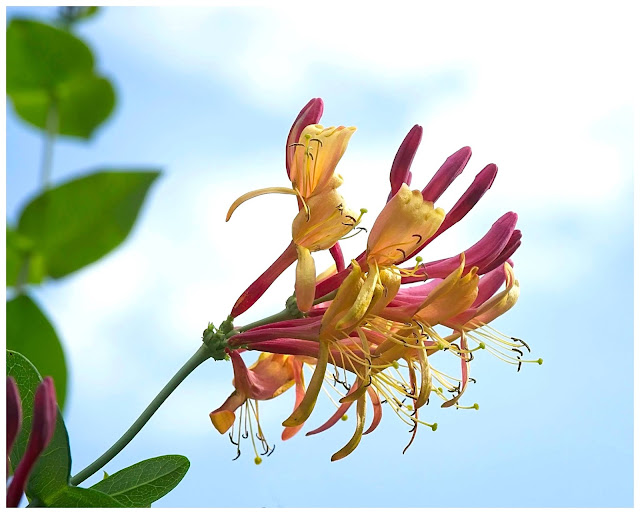
Reach for the Sky || Olympus f/8, 1/250 s, ISO 200

After explaining the various ways in which cameras measure exposure and the shortcomings of assuming that everything is 50% grey, we looked around for potential examples. She has a beautiful honeysuckle growing up the side of the garage. Against the sky, most cameras will underexpose the subject to avoid an overly-bright image, leaving the subject quite dull. Exposure compensation to the rescue (once we'd found out how to in the manual).

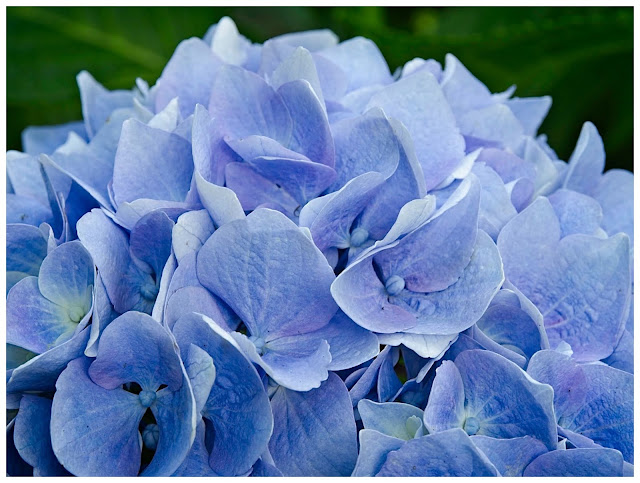
Essence of Hydrangea || Olympus f/8, 1/40 s, ISO 200

Looking back, we should have spent a little while at least concentrating on exposure, but I was so excited with the progress that I was all for moving swiftly on to the next issue; focus. Once we figured out how to give her back the control over what the camera was focusing on we even got a chance to look at the concept of depth of field before switching over to her macro lens and fiddling about with focus magnification in a foreign camera system.

Old Wooden Chair || Olympus f/8

All in all we had a great afternoon/evening working through various technical and compositional aspects before I was gently told to stop - I'd passed on enough information and time was required to process and practice.

Lessons Learned

What Went Well

Let's start with what went well:
  • The second workshop was much better structured than the first, working through the teaching materials and having a chance to put it all into practice.
  • Knowing both locations well before the shoots was essential. Even then there were surprises, like the demolished mill race at the Pöllat gorge.
  • Both locations were good and had some 'gimme' images where you couldn't really go wrong, whether Schloss Neuschwanstein or my friends gorgeous garden.
  • Having a few toys to hand to play with worked well, such as the ND filters for the gorge and my tiny fish-eye lens as a demonstration of how aperture works.
  • Getting the students to fill out a self-assessment form (below) well in advance of the workshop so that I could prepare a session to fit their individual needs worked really well.
  • The handouts I had prepared turned out to be really good teaching aids.
  • After the first workshop we sat down and went through a handful of the best images, looking at technique and possible tips. The offer is still out on the second workshop, but, life!

Challenges

  • One of the time-consuming aspects of both workshops was becoming familiar with other peoples’ cameras. After 18 months with my Olympus I can operate it pretty much blindfolded. Previously I’d been using a Panasonic bridge camera and so had at least a working knowledge of the menu structure. My students had Nikon and Cannon cameras respectively and finding functions in the various menus took time. If students aren’t familiar with their cameras, it’s essential that they bring the manual with them. It was also challenging switching between a mirrorless camera with all of the associated ease of use and the more flighty DSLRs.
  • The weather and, more importantly, the light during the first workshop was extremely challenging. But that’s life sometimes.
  • It’s important to establish ahead of time which lenses your students are bringing to the workshop. I’m used to the flexibility of being able to choose between ultra-wide angle, long telephoto and everything in between. Students aren’t always going to be able to bring that variety to the workshop and the location needs to be planned accordingly.

What Didn’t Go So Well

  • Looking back, although the first workshop was fun, setting out without covering at least the basic theory was a mistake. I was all gung-ho for the location and thought I could explain as we went. I couldn’t.
  • After the first few shots, I also assumed that the student was doing ok and didn’t need as much help or feedback. In future I’ll have to be more proactive in checking in with them.

Looking Forward

Looking forward, I think I will have to offer either one or the other; either a photo safari or a photography workshop. It’s much easier to concentrate on teaching skills in a calmer environment with few distractions, where we can sit down, talk about the principles and then put them into action.

On the other hand, once someone has mastered the basics, it will still be fun to head out to the hills to look at how to put those skills into practice.

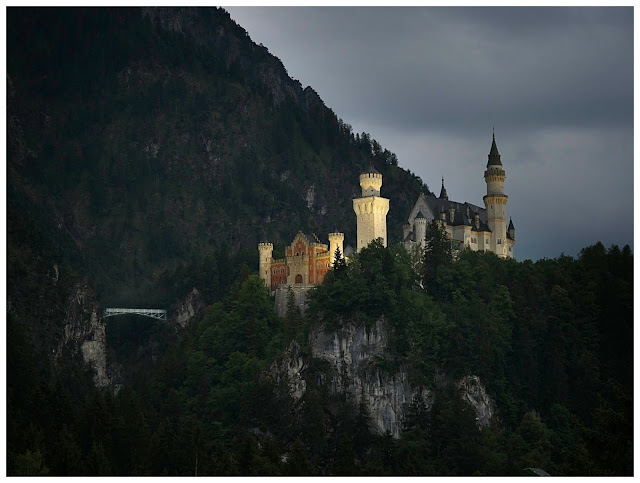
Fairy-Tale Neuschwanstein || Olympus f/4.5, 1/8 s, ISO 800

My Questionnaires

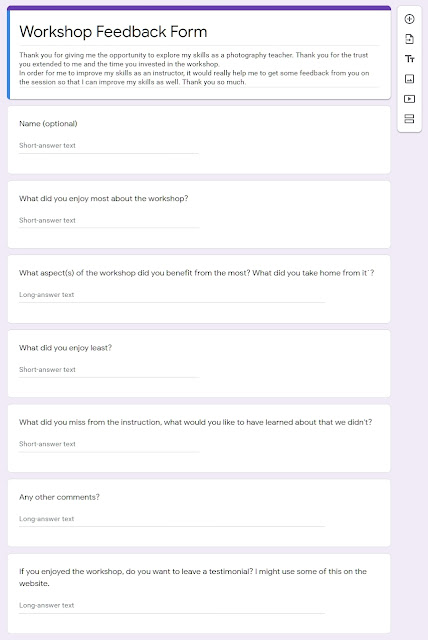
I've created two questionnaires, one to give me a feel for the student's needs, one for them to give me feedback on the workshop so that I can continue to improve as an instructor. I'll reproduce them here for anyone wanting to use and adapt. I've created these using Google docs, and the answers flow directly into a table. I'm a huge fan of Google docs as they allow me to access the information on the go using a variety of platforms.

Student Assessment Form

I ask a lot about my students because I really want to understand their needs and offer a tailor-made session. It also helps them to assess where they are and think a bit about the issues involved. I also ask them either in advance of - or during the session how they would define a "good" photo. Although a straightforward question, it really helps focus on the issues.


Student Feedback Form

Feeback is critical to the process of becoming a better instructor - which is a huge part of the process for me. Here's my Student Feedback Form


Sunday 24 May 2020

When What You See Is Not What You Get

or 'How to Suck Less at Photography'


So often I'll get back from a day's shoot and I'm disappointed by a greater or lesser portion of my photos. Things that looked great in the field simply look bleurgh on my computer screen and I'm not always sure why. A mountain vista, a forest scene, a great skyline all looked really impressive in real life, but for one reason or another the picture fails to live up to the reality. There are as many strategies for improving the quality of our images as there are photographers, and believe me, I've listened to a lot of them. In the field I've tried to concentrate on the conventional rules of composition, but sometimes something still just isn't right. With experience I've started recognising more and more frequently what will and what won't work - a photographer's spidey-sense. I've come to realise that part of the problem lies in the differences between what we perceive in the field and what the camera sees.

Sometimes It Does All Come Together


Of course there are technical mistakes we can make in the field too that result in images being sent straight to the recycle bin; too slow shutter speed resulting in motion blur, missed focus, over- and under-exposure, but those are rookie mistakes we don't make any more, aren't they? (I wish!)

Three Differences Between your Eyes and your Camera

There are (at least) three significant differences between our eyes and even the best camera that negatively affect the images we create. Knowing what they are can seriously improve our photography. Forewarned is forearmed, as they say, and if we know ahead of time what isn't going to work, we can either avoid those shots or we can try to compensate for our cameras' 'deficiencies'.


Vision or Gaze Focus


Let's start with focus. How broad is your vision focus? What do I mean? If we include our peripheral vision, most people can see approximately a 170° arc in front of us. Coming forward we pass from far- to mid- and near-peripheral vision before we reach centre gaze. There's a great little Wikipedia article about it. Not with me? Try this. Put your finger in the middle of a piece of text such as this page of writing. Focus on your finger and now try to read a word at the edge of the page without shifting your focus. Chances are, depending on the size of the font and the size of screen that you're reading this on, you'll only be able to read a couple of words either side of your finger before you have to start making educated guesses. 

Our focal range is extremely narrow and has to do with the concentration of light receptor cells in a narrow part of the retina in our eyes. It's actually extremely efficient to see like this - peripheral vision is our radar for detecting things of potential interest, but we don't need to be able to discern all the information in this part of our sight, especially when we're in a familiar environment. It would take up far too much of our attention. Instead, the ability to discern detail in a scene is limited to a few degrees directly in front of direction of gaze.

By way of contrast, our camera picks up all the information equally over the whole picture. There's no concentration of pixels at the centre of an image, we're presented with all of it at once. Of course, when we're looking at a photograph we can only focus on a narrow part of that image, but all the information is there.

Why is this important? Of all of the differences between our eyes and cameras, I think that this is the one that's most difficult to get our heads around. At least until we become aware of it, and even then it catches me out as often as not. Take this image of a mountain woodland scene taken on a recent excursion to the alps. Walking down the path I was struck by the glossy lime green beech tree left of centre. The photograph doesn't work though, there are too many details competing for your attention. It's one of those scenes that is almost impossible to capture well unless the conditions are on your side, but we'll look at that in a minute.


When Selective Focus Lets Us Down

3D

This is the obvious one. Stereoscopic vision affords us the ability to perceive our surroundings in three dimensions, particularly objects at close range. There are three mechanisms we use to estimate the distance of an object - stereoscopic vision, experience and motion. If we know how big an object is, we can estimate its distance depending on its size independent of stereoscopic vision, similarly, if we know the type of object we're looking at our brain is quite good at interpolating that object's speed to distance. Surprisingly, our 3D vision is only reliable to about 6 m (!). Nevertheless, the fact that we perceive in 3D is very different to the way a single lens camera depicts an image. We're afforded an instant snapshot of a scene. We can only discern the three dimensional context based on visual cues that we're familiar with.

Dynamic Range

Dynamic range is the difference in light intensity between the darkest and lightest parts of a scene. Photographers like to talk in terms of stops, a stop being a doubling or halving of the amount of light. A good camera can differentiate up to 14 stops of light at its native ISO (the standard ISO of the camera, not necessarily the lowest). That's a factor of 16,348 from the darkest point to the lightest point. Impressive, huh? Sure. Until you realise that the eye is able to distinguish 18-20 stops - up to a factor of just over a million. So the eye is 64x better at distinguishing between light and dark than your camera.

So How do we Overcome the Deficiencies of our Cameras?

To make good images, we have to compensate for these differences and bring the viewer's eye to the subject of the photo using some tricks. This is the art of composition, creating a strong image using the tools available to us. 

There are ways of overcoming our cameras' 'deficiencies' (actually I prefer to think about differences between eye and camera rather than deficiencies of the latter - our cameras are actually pretty advanced tools): In order to overcome issues associated with dynamic range, we can take multiple shots at different exposure settings and combine them either in camera or in post-production (high dynamic range or HDR images). There are numerous techniques for enhancing the 3D-feel of our images, for example by shooting low to the ground or using a wide angle lens. The aim of all these techniques is to lead the viewer's eye to the subject of our composition. There are also numerous composition tricks we can use to do this, structuring our photos using the rule of thirds or the golden rule, geometry, leading lines and the like. There's plenty of good content out there on how tame our cameras to compensate for these differences.

Vision focus isn't so easy though and requires that we think about our images slightly differently. One way of understanding how to bring the viewer's attention to the subject of our image is to think in terms of separation: How can I separate the subject of my photo from its environment in order to make it clear to the viewer that this is what the image is about? Of course, this pre-supposes that we know what the subject of our image is ourselves, which isn't always obvious, particularly when it isn't even a concrete object.

Achieving Separation

What do I mean by separation? It's the skill of highlighting the subject of your image in such a way that it's obvious to the viewer what the photo is about. This separation can be subtle or obvious, there are a number of tricks we can use. I want to mention five here. The list is not exhaustive and they can all be combined with one another for more or less effect. Sometimes using just one of them can lead to really strong images though.

Light

Light is the easiest of the five tools to use. The eye naturally falls on the brightest parts of an image. Spotlights pick out the members of a band at a concert to focus your attention on them rather than the mess of back stage. Parts of our image that are unintentionally bright distract the eyes and pull them away from what we want the viewer to look at. 

Of course, we can turn this on its head and use dark to highlight the subject of the image, but the default setting is that light attracts. By using light to emphasise the subject of our photograph, we're effectively shining the spotlight on it. Woodland can be very effective for this, such as this picture of wood sorrel. On a stormy day gaps in the clouds can yield similar effects, such as the photo of Cinque Torri in the Dolomites in my gallery.

Spotlight On Sorrel


Colour

After light, the next most obvious tool to draw your viewer's attention to the subject of your image is colour. Bold, saturated colours are more effective than muted, pastel colours (think of text highlighters!). Many photographers will talk to you about colour theory and complementary colours. All well and good, but instinctively I think we know which colours work together and which colours contrast (if we didn't it wouldn't work).

The red-purple marsh orchid really stands out here against the lush green spring grass of this Bavarian pastorale.

Outstanding in its Field

Depth of Field

Depth of field is the relative distance in front of and behind the focal plane of the camera that is effectively in focus. A narrow depth of field means that focus is restricted to a short distance around the focal plane, a wide depth of field puts more of the image into focus.

We can control it using the camera's aperture; an open aperture generally results in a narrow depth of field, a closed aperture in a broader depth of field. The closer the subject matter and the longer the focal length of the lens used, the narrower the depth of field too.

Like with light, the eye naturally wanders to what's in focus in an image, like the dandelion centre left here. The closer and further flowers are out of focus thanks to an aperture of f5.6. A similar effect can be achieved in mist or fog.

The Eye Flies to the Focal Point


Composition

I showed you an example of poor composition earlier; the beech tree against the woods. It was literally impossible to see the wood for the trees! If, though, you can put a bit of empty space between your subject and its environment - what photographers classically call separation - it's easier for the eye to find its intended target. It's a frame within a frame, like a bulls-eye saying 'look at me'.

Parting is such sweet sorrel - using the roots to frame the greenery

Texture

Texture is particularly powerful in monochrome photography, where it can really stand out in an image. It's probably the subtle changes in light that stick out and help the viewer to focus.

I didn't have a good example of this from the field so I took this quick and dirty photo of the rug in our living room. Rug, edging and tiles all have a very similar tones, but the texture of the three elements is clearly distinct, allowing the viewer to visually separate the elements.

Texture Separation


Separation using Light


Separation using Colour


Separation using Depth of Field


Separation using - Separation


Bringing it all Together

So how do we put all this into practice? When something catches your eye in the field, before you raise your camera to your eye, stop a second and analyse what's in front of you. What is that has caught your attention? Let your eye wander over the scene for a second or two so that you can identify the subject and ask yourself whether there's enough separation between the subject and the background that the viewer can identify what the subject is. If there isn't, how can you generate separation using some of the tools I've mentioned above?

If you've found this article useful, let me know below. Also, if you're in the Munich area and would be interested in exploring putting some of this into practice together in the field, drop me a line (contact details on the right) and we'll see if we can set something up!

Friday 7 February 2020

Picture Editing - Philosophy and Workflow

There are some people who suggest that anyone who uses Photoshop (or equivalent) to process their photos is cheating in some way. What you can't forget though is that the jpeg straight out of the camera has already been processed - by the camera. If you compare a RAW photo OOC with the corresponding jpeg (if you shoot this way), the former will look drab, maybe a bit skewed and with colours which don't really match the original. This is because every camera has a built-in RAW processor which interprets the RAW based on pre-ordained settings, pre-ordained either by the camera on its own or by certain criteria that you have determined.

Spotlight on the Cinque Torri - Final Photo
Saying then that any post-processing is cheating is akin to saying that anyone who bakes a cake from scratch rather than using a pre-assembled baking mix is cheating. Actually, all that you're doing is giving away some of the creative control in the process to the camera. I suspect (correct me if I'm wrong) that a lot of people who are strongly anti-processing are simply baffled by the process and think that it's unfair that others can do it.

The original RAW image converted to jpeg
"The aim of post-processing is to convey to the viewer the impression the photographer had when they viewed the scene."

But how much is too much? Most of the photographers that I follow essentially use the same principle when it comes to post-processing. Their aim with a photo is to convey to the viewer the impression they had when they viewed the scene. I like this principle, it gives both leeway and limits. It allows correction and enhancement but veers away from embelishment.

There is a certain legitimacy to this approach; as good as modern cameras are, they still don't have the dynamic range of the human eye; the eye is still able to perceive a greater difference between the brightest part of a scene and the darkest significantly beyond the ability of any present camera.

Of course at the end of the day this can only ever be a philosophical question, a question of style or preference or choice, one of artistic licence, but it's never a moral issue as some would seem to suggest. If you enter a photo into a competition which includes in its conditions that no composite images are permitted but submit just such a photo, then the moral issue is not how much digital manipulation has occurred, but whether or not you misrepresented your photograph, stating that it complied with the rules when it did not.

So, philosophical questions aside, how do I go about processing my images? Over the last few years I've developed (see what I did there?) a system. It was originally based on a very helpful eBook by Ken DuFault called "The Ultimate Guide to Fundamental Editing", which does an excellent job of explaining the basic steps involved in processing an image as a whole (in comparison to local adjustments). Although based on Photoshop and Lightroom, the principles of cropping, white balance, white and black points, contrast and saturation are universal to all common processing software.

When I upgraded from the Lumix FZ1000 to an Olympus mirrorless SLR in early 2019, of course the first thing I had to update was the photo editing software I was using at the time since the RAW converter - the filter that is able to interpret the Raw data from your camera into a usable image - was no longer current. Each camera or camera system essentially has its own format. In light of the Ken DuFault's book I looked long and hard at Lightroom, but like many was put off by the fact that it is no longer (easily) possible to buy a copy of the software but are forced into a monthly subscription to be able to use it.

Opening the image on ON1 Photo Raw 2020

Looking around at alternatives, my attention was caught by the relatively new ON1 Photo Raw, once a Photoshop plug-in and now a standalone product. Rather than go into the various pros and cons of the software, it'll be simpler to just walk you through my present practice step by step.

The first I do when I get back from a photo excursion is to download the images to the camera and sort through them. I look through them all in the ON1 browser and use the rating system to mark which images I'm going to actually edit. For me this tends to be about a 75% cull out of the box. ON1 (like Lightroom) allows you to generate so-called 'presets' - a set of standard modifications that you find yourself making to every image you process. To generate one of these you need to have edited a few photos first in order to see for yourself which steps you are regularly employing.

Still in the browser module I apply my standard preset(s) to all of the selected images - I say presets because I have a different one for each of my three lenses, each including a separate lens correction to the image. 

Presets are en vogue at the moment, with lots of photographers selling their own - mostly for Lightroom - in order to allow others to reproduce their particular editing style on their own photos. These presets can go for serious money. The whole process is anethema to me. Yes, the learning curves in these photo editing programmes can be very steep, but at the end of the day, I want my photo to be recognised as a Mike Page original, and not confused with someone elses style. I could only ever envisage buying someone else's preset in order to work out how they achieve a particular effect, not to 'mask' my own photos.

Coming back to the photo, it's a question of applying a series of adjustments in order to render the RAW image into a closer approximation of that which I saw on the day, to convey the impression I had of a scene to a third person. Before I start working, it's important for me to have an end-point in mind. How do I want the image to look? If I don't have a clear idea where I'm going, there's a very real danger that I just keep correcting and tinkering until I wreck it. A light touch is important, and ON1 makes it easy to 'paint in' adjustments with a relatively soft touch.

A lot of my present workflow I attribute to the wonderful Robin Whalley of Lenscraft Photography, who not only put out a great Essential Filters tutorial on how to use Tone Enhance and Colo(u)r Enhance to really subtly strengthen an image, he gave me some valuable feedback on the following photo, some of which I'll use to illustrate the steps below (although the global edits are a legacy from my previous work flow). The difference between the images at each step can be rather subtle, and that's intended, but comparing the end points reveals the overall effect. 

Cropping

One of the first steps I perform with any image is a crop to try to communicate the aspect of the image that caught my attention. Here I'm not too interested in the immediate foreground or the upper sky. The attention should be on the tower of rock in the sun in the context of the moody mountains in the background. I could have cropped in even tighter, but I liked the overbearing feel of the Tofana in the background and I wanted to use the clouds to convey our impression of the weather on that day, going from bright sunshine (top left and tower) through to the dramatic cloudburst top right. My standard crops tend to be 5:4 or, like here, 16:9. Occasionally I'll use a square crop if I think it helps the image.

The Cropped Image


Global Edit (Develop Tab)

Global edits include adjustments to overall Exposure, which I try not to change too much, Highlights and Shadows, which let me bring more visible details into the brightest and darkest parts of the image, White Balance, Saturation and Vibrance. My current workflow doesn't change these settings too much.

Something which I do always apply is the lens correction tool. This automatically corrects any lens-created distortion, chromatic aberration or possible darkening of the image towards the corners. The reason that I have three basic presets is that I have three lenses. In the browser module I'll allocate a specific colour tag to the images according to which lens was used and then use the tag colour as a filter to select which images each preset is allocated to.

Global edit complete

Effects (Effects Tab)

There are five effects that I have pre-loaded in my preset. Two are always on, namely Vignette (big softy, set to about 50% opacity) and Curves (unmodified but ready to be applied) and three are present but deactivated; Dynamic Contrast, Tone Enhancer and Colo(u)r Enhancer.

One of the great things about ON1 is that you can choose which elements of a given image the effects filter is applied to and by how much. By default, the filter is applied to the whole image, but you can elect to 'paint' the filter in (or out) using the brush tool, apply one of a number of gradients or apply it to particular aspects of the image (the brightest parts, for example, or to a particular hue).

Dynamic Contrast is great for adding detail to particular parts of an image, such as rock faces or places that I want to enhance the texture of. Here I used it judiciously on the Cinque Torri and the Tofana, but avoided applying it to the clouds or foreground.

Dynamic Contrast to add detail to the rock faces

The Tone Enhancer lets me control what happens to the light at various intensities or luminosities and I often use it to tone down the highlights or lighten up the shadows.

Using the Tone Enhancer to add some detail to the forest

The Colo(u)r Enhancer lets me control how individual colours appear in a scene. I can elect to make my greens duller, for example, or push them further towards yellow.

Lastly, I sometimes employ a Glow filter or a Sunshine filter to enhance the quality of the light in the image.

One of the most tricky aspects of this picture was getting the dark forest light enough and with sufficient detail that it wasn't a black splodge without taking away from the drama of the image. In the end I acchieved this with a Tone Enhance filter.

Lastly, I applied a Colo(u)r Enhancer to the foreground to warm the image up a little without affecting the sky too much (thanks Robin!).

With some warmth added

Local Edits (Local Tab)

I tend to use local edits to subtly brighten or darken smaller parts of the image that need it. Other aspects that can be applied here include changing the colour intensity or enhancing details. Care needs to be taken on how they're applied, otherwise they can result in unsightly edges or borders in the image.

Here I used a drop down darken filter to put a bit more shade on the Tofana in the background.

And that's about it. The signature is added as I save the final image to jpeg format (the Export function in ON1), leaving the original Raw file unchanged. All the steps I applied to the image are stored as a set of instructions in a separate linked file, ready for me to return to at any time.

What are your thoughts and experiences on photo editing?