Showing posts with label long exposure. Show all posts

Monday 15 February 2021

Winter Sundowner at the Ammersee

I have the enormous privilege of living about a 10 min car ride from one of Bavaria's most picturesque lakes, the Ammersee. We've seen it in all conditions, from balmy sunny evenings, after torrential rain with mosquito plagues, autumn storms with huge waves and speeding kite surfers to completely frozen over in 2006. Working from home it's really easy to get there for a quick excursion. Although it's really chilly here at the moment - we're talking negative double digit Celsius - I was really surprised not to find more ice when I took off after work on Friday afternoon to check it out. Dawn that day had been really pretty and I had high hopes for the sunset despite the lack of significant cloud.
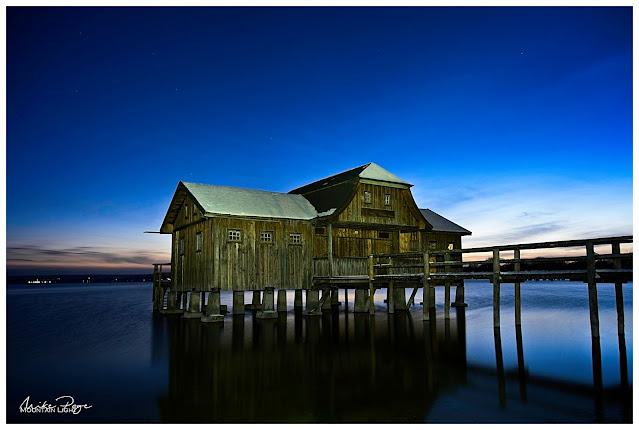
The Boathouse at Stegen I || Olympus 12 mm, f/4, 15 s, ISO 200 
Dressing up warm is critical in conditions like this. I knew I was going to be spending quite a while outside and so I put on downhill ski trousers over my jeans, heavy mountain boots with a second pair of socks, a windproof jacket, scarf, woolly hat and my latest acquisition, my Vallerret Markhof Pro 2.0 photography gloves. These are great thick gloves with foldable tips on the index fingers and thumbs allowing you to access all the necessary dials and buttons on the camera without exposing your whole hand. The finger tips fold back on strong magnets hidden unobtrusively within the fabric to keep out of the way.

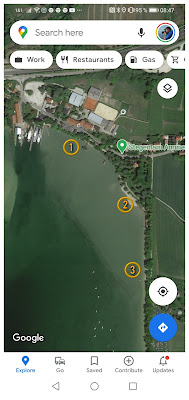
I've included a screenshot of a Google map of Stegen (am Ammersee) detailing where each shot was taken in case you're interested. For more original ideas and inspiration regarding where to shoot at the Ammersee, Google images of the Ammersee or check out some of the local photo websites, such as Werner's Fototräume (also great for other photo spots in the vicinity).
Photo Locations from this Blog


The Solitary Boathouse at Stegen (1)

Arriving at the car park as most people were beginning to leave - not that the car park was very full anyway (had I mentioned how nippy it was?) - I was at first disappointed at the lack of ice, but I'd had the foresight to bring my neutral density filters and was confidant that I'd be able to get a few decent images out of the evening.
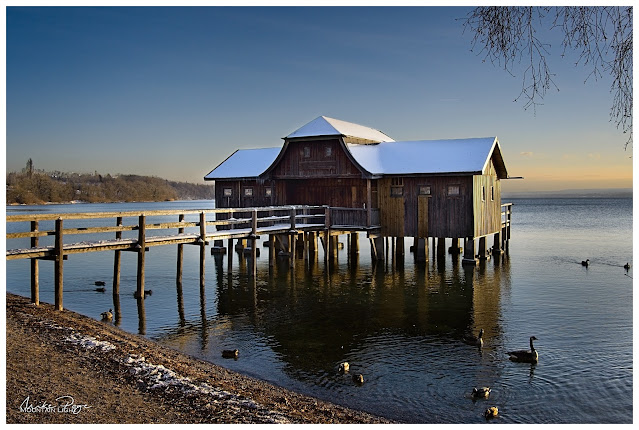
The Boathouse at Stegen II || Olympus 16 mm, f/8, 1/50 s, ISO 200
Once you get past the restaurants, the first landmark is the boathouse next to the beer garden. Always a thankful motive in the evening sun. The light was quite challenging so I slipped the Olympus into exposure bracketing mode and hand-took this image. It's not an HDR, but it is an exposure blend, with the sky, water and boathouse are all taken from separate images and assembled in ON1 Photo Raw - though any decent processing software will do the trick.

Boathouse Row at Stegen (2)

The second landmark is the row of boathouses with the Wasserwacht or lifeguard station. Again, sunset is always kind to these huts as you can see here. Whether or not you use the shoreline as a curved leading line is entirely up to you. On a clear day, the Alps form a pleasing backdrop to the right inviting you to taking a wider panorama. This time I had to be content with a pleasant orange glow on the horizon, which also works. The way the trees echo the line of the houses and the reflection all emphasise the structures in the scene.
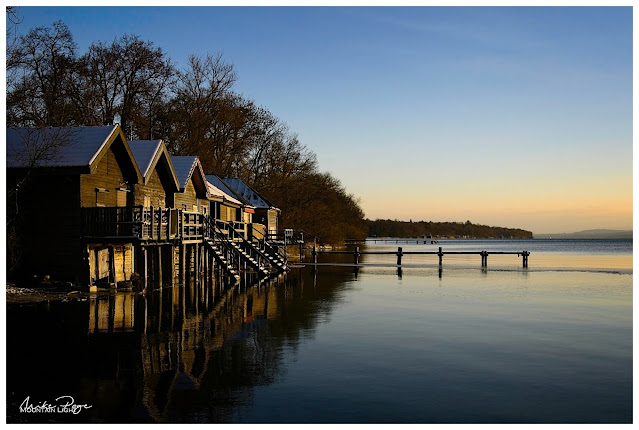
Boathouse Row I || Olympus 23 mm, f/8, 1/125 s, ISO 200

The Jetty at Stegen (3)

The third stop and my actual destination was the background jetty in the photo here. The jetty leading from the beach huts doesn't work as there are no crosspieces down at the moment and looking along it you just get a wooden skeleton. I took my time setting up for this shot. At other times of the year you can line up the jetty pointing at the sun, but in February that's just not going to work. In order to bring a connection between the elements I elected for this 'compromise', placing the setting sun just over the end of the jetty. Tripod out, filters out. Assemble everything together, careful not to zoom out too far as my filters tend to vignette below about 14 mm. It was here that I noticed that the L-bracket had come loose. The clever people at Vallerret had anticipated this eventuality though. The back of each glove has a little pocket that you can stuff things like lens cloths in. The left pocket comes with a tripod key on a lengthy lanyard and so instead of having to fumble around in the fading light for the necessary tool, it was literally to hand.

You can see from the previous shot of the huts that the although the water near the shore was protected and relatively flat, further out the wind was ruffling the surface. In order to reduce the impact of the phenomenon it was time for the Big Stopper, an almost opaque piece of glass that goes in front of lens to reduce light, turning a 1/60 s exposure into a 20 s exposure, the minimum that was needed to iron out those waves. The almost direct sun was a bit of a problem so the next tool in the bag was the graduated filter. This is less dark than the Big Stopper but is gradated, one half being clear and the other darker for bringing down dark skies.
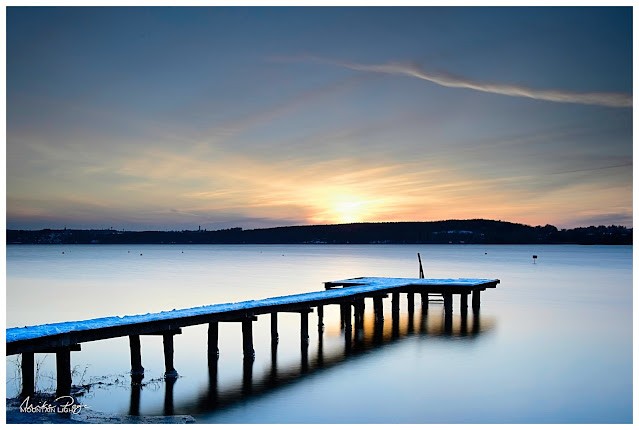
The Jetty I || Olympus 16 mm, f/5.6, 20 s, ISO 200
Processing-wise there wasn't a lot to do here. I've further darkened the sky and actually de-saturated it a bit to make the colours more pastel. I've done my usual trick of actually brightening the snow on the jetty to emphasise the line. As long as you don't blow the exposure, this is a really great technique to make an image stand out that I discovered when astro-shooting in the Alps in the early summer and revisited in my November edit of an image of the first snow of the season. They say that a good photo has rhythm - a difficult thing to define. One of the things I like about this photo is the repeating structures of the lines which are nicely parallel, from the jetty to the clouds and contrails (remember them?).

I shot quite a few of this scene as the sun sank below the horizon, but I think this one was the best of the set. There are always going to be shots that are blurred due to slight movements of the tripod, so shoot a few and sort out the best when you get back to the warm.

Back to Boathouse Row (2)

With the sun well and truly set it was time to start walking back to the car. A couple more 'togs were lingering around the boathouses and so I stopped to scout around to see what the fuss was about. I found this tiny inlet in the shore that caught my interest. Not a classical leading line, but it still takes the  viewer's eye in the right direction. I went as wide as I could, having put the Panasonic Leica 8-18 mm on the camera for this shot. The tripod was set low to the ground too.
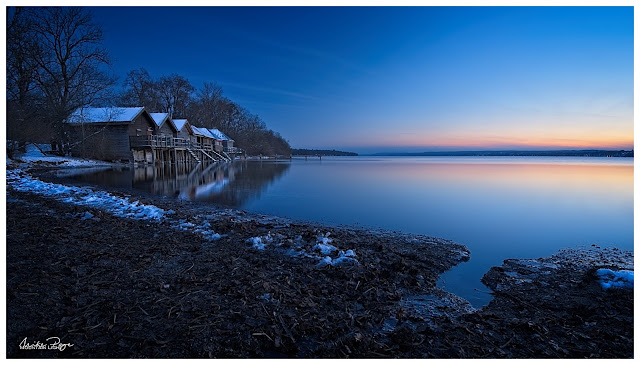
Boathouse Row II || Olympus 8 mm, f/4.5, 5 s, ISO 64
Satisfied that I'd got the best out of the boathouses for the day I combed the beach back towards the restaurants. The sky still had a lot of interesting colour in it and it looked beautiful above the docked pleasure steamers at Stegen. Unfortunately, looking beautiful doesn't always translate to a great photo. I took a few, but none made the cut.

The Solitary Boathouse Revisited (1)

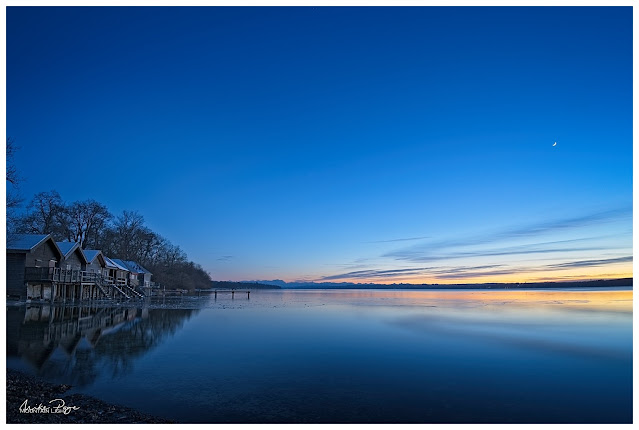
The last port of call was the original boathouse. By now, even though there was still a bit of colour in the sky, it was getting quite dark. But I'd come prepared with both my LumeCube panel and a head torch. The panel didn't like the cold very much. Even though I'd charged it completely before coming out it was only showing 30% power, plus it wasn't really cutting through the dark as I'd hoped. It wasn't the light source for the job. Fortunately the head torch was. My first image was from the east looking towards the sunset (first photo above). You can imagine from the photo why a little extra illumination was necessary. The light beam from the torch was quite narrow and so I waved my head back and forth over the wooden structure over the whole 15 s exposure. If you look carefully you can see the first stars beginning to appear in the sky. This for me is the magic window of light for photography - enough ambient light to be able to see features on the ground, the first stars visible and with a bit of colour in the sky from the setting sun. As you can imagine, it's a very narrow window, but if you get it right you can get some stunning images.
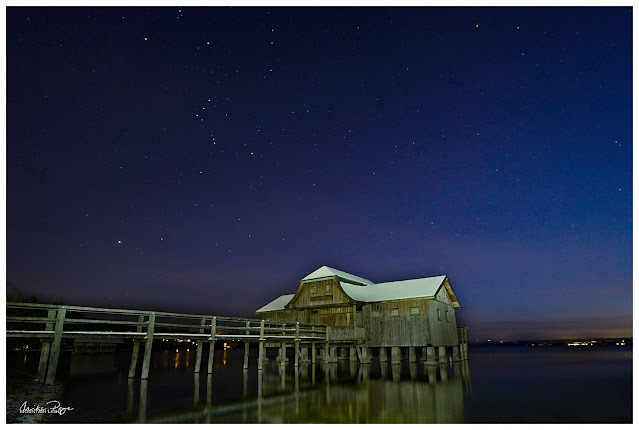
The Boathouse at Stegen III || Olympus 12 mm, f/4, 20 s, ISO 400
This last image is from the other side of the boathouse as the light was really fading. Again the boathouse was lit by my head torch. By playing around I found that if I illuminated for 10 s out of a 20 s exposure the light on the house was about right, though I did adjust it a bit in post - it's always difficult to accurately assess exposure in the dark as the camera screen always looks comparatively bright unless you dim it down. Keeping an eye on the histogram can certainly help, but here it was tricky to judge exactly how much light to add. I was certainly glad of the Vallerrets at this point. I really didn't want to have to be taking gloves on and off to fiddle with the settings in those temperatures.

I love how prominent Orion's Belt is in the winter sky here. Given the wide aperture I was surprised that the stars were as sharp as they have turned out here. That's micro four thirds cameras for you.

If you're local to us in Bavaria and are interested in a pair of Vallerret Markhofs, size L, drop me a line. They were just too small for me and I had to go XL. They're out of stock with Vallerret at the moment so if you want to do some winter photography this season I can warmly recommend them.

Afterword - If At First You Don't Succeed

A couple of the photography YouTube greats have recently released vlogs saying essentially the same thing. The one thing that will advance you as a photographer more than any other, the golden lesson of photography is... ...perseverance. I've had a couple of opportunities to practice this discipline over the last 12 months, whether the various attempts at astrophotography or trying again and again to get the right conditions on the covered bridge at Bad Hindelang, and every time it has paid off in spades. There were a couple of issues with the photos I took on Friday. I was especially unhappy with the photo of the jetty; the composition was off meaning that I had to heavily crop the image to get one that I was happy with and the aperture was so wide open that the depth of field was too narrow to catch the background ridge in focus (below). So tonight I returned, wife and girl-child in tow, to try and rectify my errors.
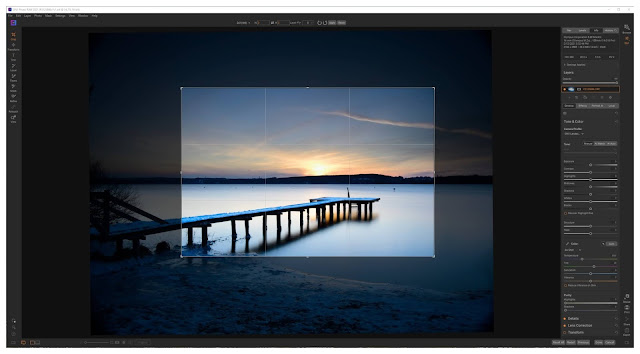
Reducing a picture to the essential elements

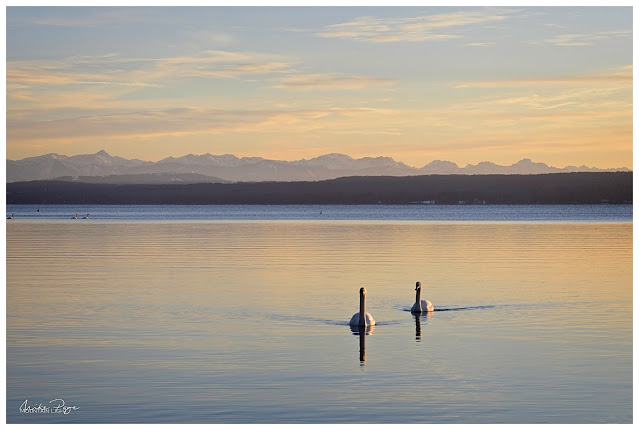
Valentine's Swans || Olympus 57 mm, f/8, 1/125 s, ISO 200
This time the view to the mountains was clear and there was some ice forming on the still water in front of the row of boathouses. On top of this, there were multiple pairs of swans on the water - how aposite for Valentine's day. I allowed myself to be distracted by both the birds and the boathouses before hurrying down to the jetty. I got a better crop, but the bitty ice detracts from the simplicity of the previous image and a lot of snow had gone from the jetty.
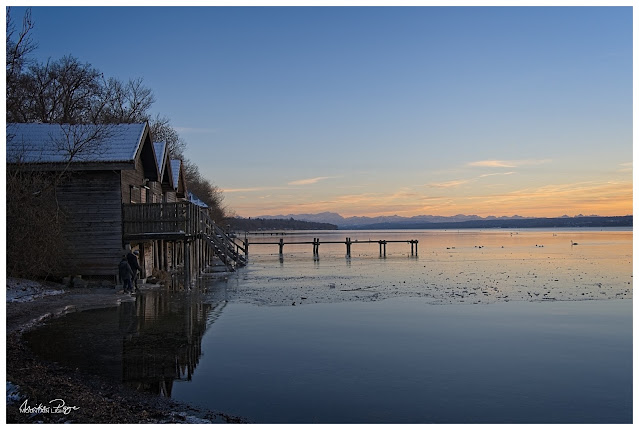
Boathouse Row III - HDR || Olympus 17 mm, f/8, 1/80 s, ISO 200 
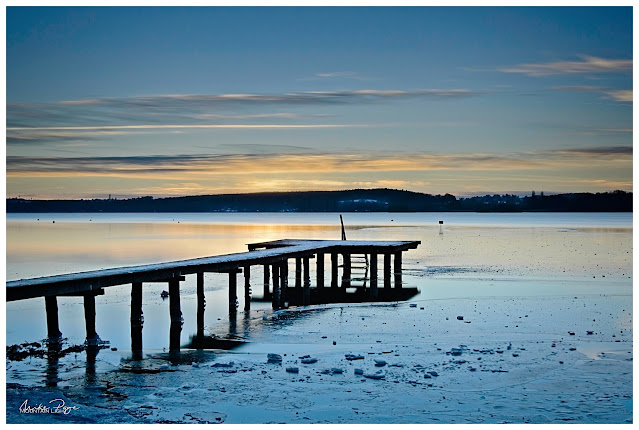
This time I could get the composition and focus fixed on the jetty... ...but the ice is too gritty after kids were playing on it all day and the colours in the sky weren't quite as good. But hey, ho.

The Jetty II || Olympus 24 mm, f/8, 10 s, ISO 100
It's always a good idea to look around even when you've got a specific composition in mind. Ice had formed around the legs of the jetty and the water level had subsequently decreased, leaving these feet around the bottom. Against the light they formed an interesting sculpture.
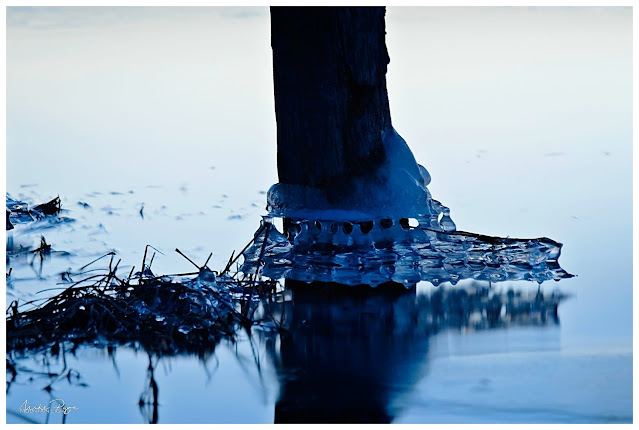
Icy Foot || Olympus 86 mm, f/4, 50 s, ISO 100
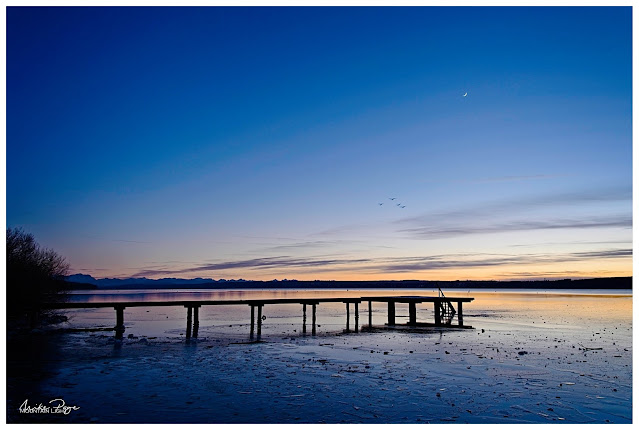
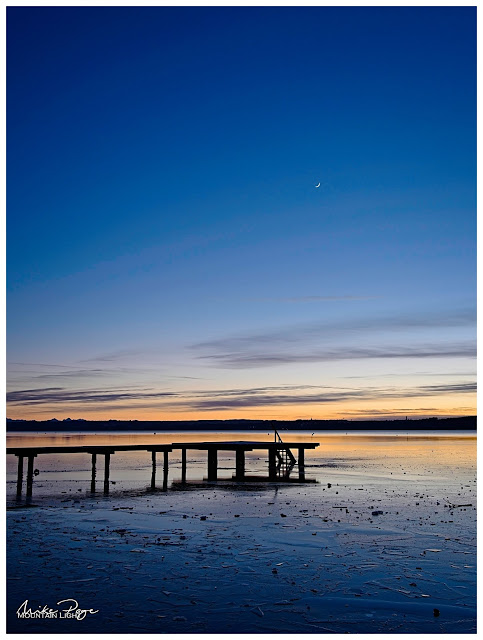
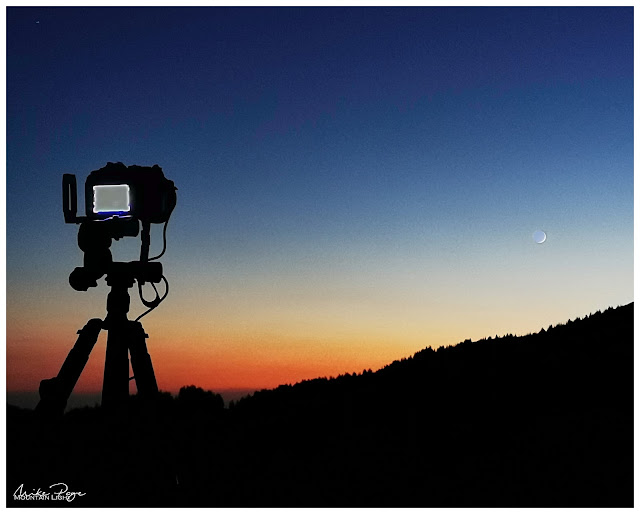
And then the new moon revealed itself in the southwestern sky, giving me a chance to try another composition with the jetty including the mountains in the background...

The Jetty III  with New Moon and Swans || Olympus 14 mm, f/8, 1/10 s, ISO 100

The Jetty IV || Olympus 17 mm, f/8, 5 s, ISO 100
...and yet another with the boathouses before I was dragged back to the car by my half-frozen ladies. But I had promised them that we wouldn't stay too long and I was happy enough with the blue-hour photos from Friday. 

Boathouse Row IV || Olympus 8 mm, f/8, 5 s, ISO 100

Lessons Learned

Every time I go out I make mistakes. Every time I make mistakes I learn something. On Friday I learned about the best composition for the jetty. On Sunday I learned more about the Olympus high res mode and that patience is required when using it in conjunction with long exposures. A couple of times I thought it had crashed, when in fact it was just taking its time. Because I thought it had crashed I turned the camera off mid-processing, leading to me losing the first 2 or 3 high res shots. This mode is also too slow for lunar photography in combination with these long exposures - the moon simply moves too fast. Fewer mistakes to make next time.

Photography is like sailing or hiking. In fair weather it's easy. Mistakes are easily rectified, items are easy to find in rucksacks, etc. But the practice of doing those mundane things in straightforward conditions pays dividends when the going gets tough. When it's so cold that you can't think straight. When it's so dark that you can't remember where you put that filter. When the conditions are changing fast and you need to access a particular function on the camera, if you don't have the fair weather experience to fall back on, you'll just go home frustrated. If you want to be a good photographer, if you want to come home with the great photos taken in challenging conditions, practice all you can. You will be rewarded.
Monday 25 January 2021

Some (N)Ice Winter Compositions

Saturday saw us in one of the local gorges looking for compositions in the snow again. In today's blog I go into a lot of detail concerning the thought processes and relevant settings behind each of the images and was pleasantly surprised just how much is going on - a lot of it is second nature. Hope you enjoy.

Beeches and Birches I || Olympus 18 mm, f/8, 1/60 s, ISO 800 
This was essentially an instinct shot - we were walking up the path above the gorge towards the Purschlinghaus - an excellent excursion on another occasion or at another time - and this scene manifested on our right just before a bridge. I made a note of it at the time because I thought it had potential and got this snapshot off. What caught my attention were the silver birch trunks, beech saplings and the stream behind - that you can't really see here. The tones were just so harmonious that they were screaming to be taken. Even though this was an instinct shot and the better composition had to be worked a little (see below), I'm quite happy with this as a stand alone image. Normally I try to stick to the camera's native ISO of 200, but I set it on auto today as it was quite overcast. One of the downsides to higher ISOs, particularly on smaller sensor cameras like mine, is that the image can become unappealingly noisy or grainy. I wasn't too concerned about this happening in the snow, however, as this would mask a lot of that problem.

There's a 2005 German folk song that goes something like this:
"Ob er aber über Oberammergau Oder aber über Unter-ammergau Oder aber überhaupt nicht kommt. Des ist net g'wiss"
- freely translated: "it's uncertain whether he'll come via Oberammergau or Unterammergau, or whether he'll come at all". It does loose something in translation though. What remains is the fact that Oberammergau and Unterammergau both have their own unique charm. Oberammergau, home to the world-famous Passion Play celebrating the end of the 17th century plague by retelling the story of the Passion of Christ, is quintessentially Bavarian but very touristic. It's less well known cousin, Unterammergau, is just 5 km down the road but still very much worth a visit, not least of which for a trip to the Schleifmühlklamm - the whetstone mill gorge. In other times the eponymous restaurant is also worth a visit, though for obvious reasons it's presently closed.

Smaller and less well known that, say, the Partnach or Höhlental gorges in nearby Garmisch, the Schleifmühlklamm is still very much worth a visit and has two or three waterfalls that are a photographer's delight. We'd recently equipped ourselves with ice spikes for our hiking boots and I was also keen to try out my newly acquired Vallarret photography gloves. They're regular winter gloves with removable tips for the index fingers and thumbs allowing camera operation in cold weather. Not cheap, but definitely effective.

Our new Grivel spikes || Olympus 
I want to spend a bit of time in today's post talking about photographic decisions and reasons for certain compositions. The above photo is a great place to start, even though it's pretty much a "B-roll" shot - it was a spontaneous candid and the camera was still in exposure bracketing mode. I knew wanted a slower shutter speed for this shot but also knew that I didn't have time to change to shutter priority mode, select a lower shutter speed, frame up and shoot, so it was literally a grab shot. I had three exposures, 2 EV apart. I could easily have chosen the first shot, though the movement wouldn't have been quite as pronounced. Instead I've gone for the slower, high exposure shot, giving motion blur as well as isolating the element that I want the viewer to be looking at - in this case the spikes. It helps that they're yellow and there are two pairs of them. Normally the eyes drift to light objects in a scene, but this is trumped by contrast. If the whole scene is bright, then the eyes drift to something else, in this case the bright spikes.

The sign at the bottom of the gorge stated explicitly no admittance due to the icy conditions, though the sign turned out to be a little superfluous in light of recent snowfalls. I would definitely not recommend hiking through the gorge in the winter without some sort of grip-enhancer however. There are places that would be impassable if it were icy.

The Stream || Olympus
As we were walking my eye was caught by this slash of stream showing through the snow. Because it had been very cold, ice had formed over parts of the water which had then become covered in snow. This short section of exposed stream caught my eye because it was discrete - closed at both ends - and isolated. The almost parallel lines of the banks, the fact that the whole section was open and not interrupted and the branches giving a bit of texture contrast meant that I couldn't pass this shot up. It's a hand-held HDR - otherwise the water would just have been a black gash or the snow a white gunk. It's got abstract quality, but the branches and leaves anchor it in reality.

Having been here a number of times over the years I knew which spots I wanted to visit in the gorge, but my eyes were open for new compositions as well. Winter changes the landscape as I've mentioned before. Things that work in the summer might not in the winter, messy scenes might suddenly work under a blanket of snow, some vantage points might not be accessible any more and, well, ICE!

Frozen Falls || Olympus 14 mm, f/16, 1/4 s, ISO 200
This is the first easily accessible waterfall - you have to branch right off the path to get to this point. I tried a couple of angles for this shot; there was a snow covered stone standing proud of the water that disturbed me and so I tried a lower angle, but that made the pool at the bottom too thin, so I went for the original composition and stamped the stone out in post. There are a couple of things I really like about this composition; the snow focusses the attention on the main actors, whereas in the summer there is a lot more rock competing for the eye. Also, the rock that does remain provides a nice set of lines pointing to the action. The green of the water and the orange-brown of the rock complement each other nicely and obviously I've chosen a longer exposure to emphasise the motion of the water. The low aperture was partly in order to achieve the desired shutter speed, partly to increase the depth of field. I focused on the rock next to the waterfall. Although it wouldn't ruin the shot if the foreground snowbank wasn't pin sharp, I wanted all the rock and the forest beyond to be in focus. The waterfall was as good as 1/3 of the way into the scene as I could find, plus at 14 mm AND m43, depth of field wasn't going to be an issue here.

Compositionally I could have cropped down to just the waterfall, but I wanted to include some of the environment. There's even a bit of sky at the top of the image, normally a no-no when photographing waterfalls, but a bit more white doesn't disturb the flow. I also tried an HDR version of this shot, but in the end was happy with the dynamic range I was able to winkle out of this single exposure.

Snow Family || Olympus 21 mm, f/8, 1/60 s, ISO1000

My daughter got bored waiting for me to take the previous shot and so made herself a little snowman family.

The next waterfall is tricky, particularly in the winter because the narrow path opposite traverses a steep slope. Finding a good vantage point for the waterfall where I could set up the tripod stably was not easy. Fortunately I wasn't disturbed as I was taking these shots - had I been so I would have had to lift up the tripod out of the way and then set up the shot again.

Upper Falls I: HDR || Olympus 14 mm, f/5.6, 2 s, ISO 200

Upper Falls II || Olympus 14 mm, f/7.1, 2 s, ISO 200
This one's tricky. I ended up taking two images, one landscape, which I cropped to 1:1 and made an HDR image of (top), the other a single exposure in portrait format. Both have things I like about them. In the top image, for example, I really like the rock face and the way the viewer's attention is drawn to the water coming out of a cave almost. In the second shot I like the addition of the green fir trees, the inclusion of the bridge and the symmetry afforded by the waterfall and the gap above it. However, the second image isn't sharp. The snow was soft and I think I must have disturbed the tripod a little.

The climb out of the gorge takes you up a steep path up a series of steps and bridges like the one above. In icy conditions, this would be the impossible bit without spikes. There's a hand rail for assurance for the most exposed parts, but in the snow this was more of a knee rail. The path then comes out on the forest track that doubles as a sledging run in the winter, a trail that we've used a couple of times and is great fun.

Leaving the Gorge || Olympus 17 mm, f/10, 1/13 s, ISO 1600
I've deliberately left this - and many of the other images here - high key, with most of the tones in the light half of the spectrum rather than spread over the whole tonal range from dark as this best reflects the bright scenery in the snow. I love the pale browns and greens with the frosted edges.

Four Friends || Olympus 66 mm, f/10, 1/80 s, ISO 1600
Another instinct shot. I was focussing on the fairy-tale hut in the winter forest and these four sledge enthusiasts passed through, so I grabbed this shot without really checking the camera settings. Not a great deal to say about it. The original was wider, affording a glimpse of the surrounding hilltops, but during processing I thought it might be more intimate to compact it down. Ideally I'd have included a bit more space below the bottom sledge, but, like I say, it was a grab-shot.

Following the path upwards, it was just a question of keeping the eyes open for further images.

Repetitions || Olympus 100 mm, f/4, 1/200 s, ISO 640
What struck me here was the series of repetitive elements. Tessellation is a powerful structural part of images, whether perfect as with man-made structures or natural with imperfections such as here. I had to get in close to isolate this set of branches, hence the focal length of 100 mm - the longest I can go with my 12-100 mm Zuiko lens.

Family Fun || Olympus 13 mm, f/7.1, 1/60 s, ISO 400
The backdrop is what caught my eye here, the various trees in the snow going from the firs behind the people through the brown birches and firs at the top. The family group added a human touch to an otherwise cold scene, accentuated by the bright colours of their clothes.

And then we had to turn home. I was itching to have a second go at the birches and beeches scene as I was sure that there was a strong composition to be had if only I could find the right angle. I wanted to catch the orange of the beech leaves as well as the stream behind, but from most angles I could either have one or the other. Getting closer to the trees let me have more view of the stream, but the thing that had grabbed my attention, insisting that I had a second go at the scene, was the combination of the leaves and the stream. It was a question of getting it all aligned perfectly for a really strong image.

Beeches and Birches II || Olympus 34 mm, f/16, 1/25 s, ISO 1600
This was the third attempt at the scene after I noticed an intrusive stump that you'll see to the left of the very first image. Here I've put more of the stream in the scene - this was what had caught my eye through the leaves due to the similarity in colour. Another consideration here was whether or not to include the base of the trees - something that I'd done in the first shot but not here as I'd gone closer to the trees. Hence the low aperture again. I was focussing on the trees and didn't want to lose depth of field at the log weir at the back. 

Beeches and Birches III || Olympus 35 mm, f/16, 1/30 s, ISO 1600
This was my final image though. Bottoms of trees included and a clear line of the stream leading through the image to the back. An added bonus is the holes in the snow showing the layers of snow nicely. The image has more space with the view through the trees, though perhaps with a bit too much negative space bottom left. What do you think?

I've surprised myself at how much thought goes into each photo in the field. Much of it has become second nature so I don't really think about it - it's almost instinct, but it's definitely interesting to go through the process and analyse what considerations were driving each individual shot. Anyway, I hope you enjoy them and call back next time.

Sunday 28 June 2020

In Seach of the Milky Way - From Dusk 'Til Dawn in the Allgäu

At the end of May I scouted a possible location for an astro shoot in the Allgäu mountains come next new moon. A good milky way photos lives and dies by the foreground and I wanted somewhere with a good view over the alps. The middle of June arrived and the forecast for Friday and Saturday was awful; clouds, rain, the lot. Nothing doing. The next weather window was going to be Tuesday night. To make matters worse, the initiator of the whole idea - my friend Matthias - couldn't make it as he was stuck up at work in northern Bavaria. But an old school friend who happens to live in Munich was interested enough to bite when I announced my intentions on Facebook and so Martin and I ended up heading down to Fischen im Allgäu early Tuesday evening to see what we could see. Meteorologically we were on a rising tide - there were still some clouds around but the weather was definitely clearing from the north and so we were optimistic.

The Shoot


Waiting For The Moon To Set || Huawei P30 Pro


Dusk

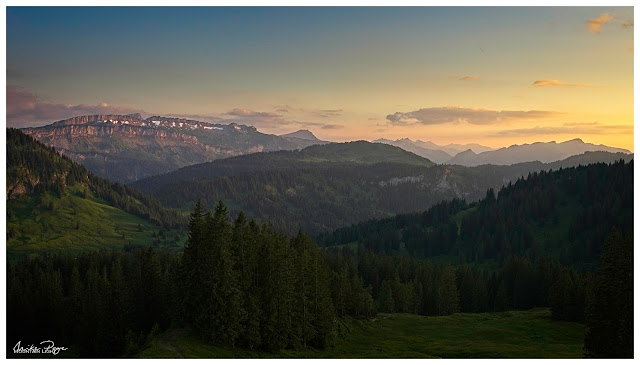
Driving down there were still cloud remnants lurking in all the wrong places, but the northerly wind was driving them deeper into the alps and so we weren't too concerned. We set off from the car-park in the early evening light. Normally, like most people, I spend most of my time in the mountains during the day. Unless I'm staying in one of the mountain huts, I'm generally back down in the valley for dinner. This evening's experience may get me to revisit that schedule. There's a good reason why landscape photographers choose to shoot at the ends of the day; the light quality is very different. It's softer, gentler and less blue. Watching the pastel colours changing on the Vorarlberg mountains in the gathering dusk made me start rethinking how I plan my days in the Alps.

As the Sun Goes Down || Olympus f/7.1, 1/80 s, ISO 200

It was great to see that not all of the snow had disappeared in the intervening weeks; I find the last snowfields really make a photo like this and I don't shy back from exaggerating them in post-processing like  here (above).

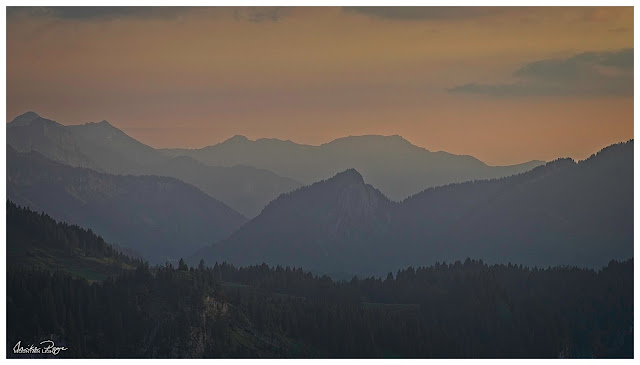
The Pastel Colours of Evening || Olympus f/7.1, 1/160 s, ISO 200

All the Layers || Olympus f/7.1, 1/30 s, ISO 200


Moonset

I'd promised my school chum a relatively easy hike up to the first mountain top that I'd identified. Unfortunately we didn't make it all the way and ended up about 100 m below the summit on a slight shoulder. The location was optimal for the first spectacle of the evening - the fresh new moon was due to set behind the peak above us and our location appeared to be optimal for that. My smartphone app (Sky View) was showing me where the moon should be in the sky, but for the life of me I couldn't find it. I was beginning to fret that either (a) the app was playing up, or (b) there wasn't going to be enough moon to see. As the sky darkened and I still couldn't see it Martin spotted it - why we hadn't seen it before was a complete mystery as it was so clear at this point.

Well It's Obvious Now! || Olympus f/8, 1/5 s, ISO 200


Setting Moon || Olympus 100 mm f/5.6, 0.6 s, ISO 400

Before we turned our attention to the stars that were beginning to appear in twos and threes there was one more dusk photo to grab before the technical stuff began:

When Purple Comes Out To Play || Olympus f/5.6, 40 s, ISO 200

As fun as it was to shoot the setting moon, it cost me my first milky way shots as I wasn't set up to get a good foreground photo during the blue hour that I could use to blend into the final image in post. The shot I ended up getting was ok, probably one of my better photos of the Milky Way per se, but the foreground is lacklustre. I don't know whether it would have been any better 100 m higher up either, but the lesson is that you need to be in position early, you need to get your foreground shots in in good time and you can only recon on about two good astro shots per night, one after the sun goes down and one before it rises, unless you're shooting with multiple cameras.

Collision Imminent || Olympus 300 mm f/5.6, 0.6 s, ISO 1600, Composite Image

Milky Way

The challenge with astrophography is the low light levels. You need an open aperture and relatively high ISO with a wide angle lens to get enough light to the sensor before the earth's rotation turns the star points into lines - the so-called star trails. As a rule of thumb, the maximum exposure time before this happens is 500/focal length* (400 if you're being conservative). So for my 16 mm equivalent wide angle lens, I can shoot for 25 s. In order to further increase light-sensitivity, we need to increase the ISO. Small sensor cameras (I shoot with an Olympus micro four-thirds crop sensor, technically a small sensor camera) are notorious for being sensitive to high ISO, the images tend to have a lot of unsightly noise - a random phenomenon that causes an unsightly buzz in the image. But being random, there's a solution: If you take multiple shots and then take the average of those shots, the noise is diminished. The challenge is that the software performing the calculations needs to take into account the fact that the stars are moving - if it didn't you'd end up with the trails again. All in all quite a technical feat, especially when there's a foreground involved. Fortunately the free Windows software Sequator can do all of this - it's what it was written for. It's not the most user-friendly app, but if you know what you're doing (or in my case if you know someone who knows what they're doing), it's extremely powerful. The trick seems to be not using too many of the features, but more of that below.
*25 mm equivalent, so with my micro four-thirds sensor I need to double my focal length

First Starlight - Stacked but Unprocessed || Olympus 8 mm, f/2.8, 25 s, ISO 6400, Stacked

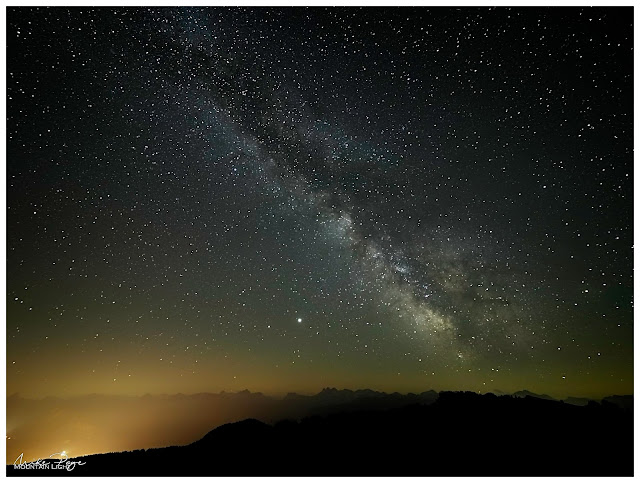
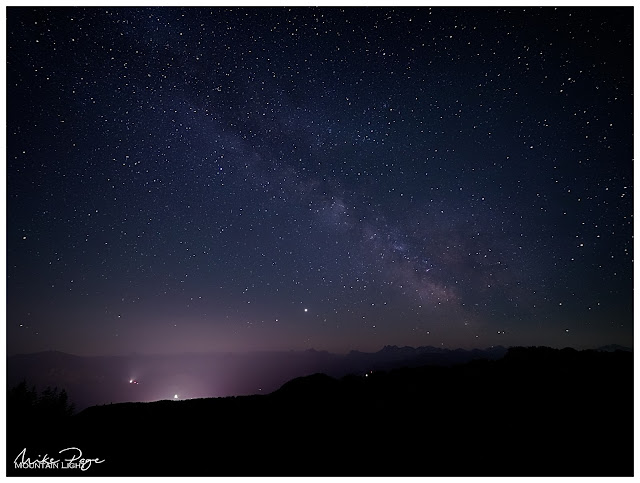
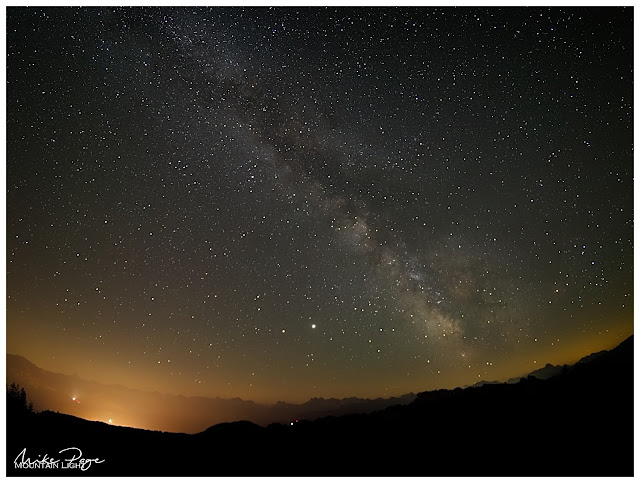
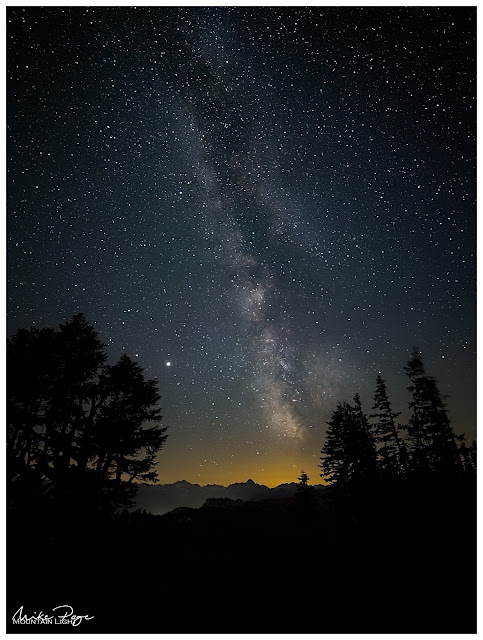
We could just about make out the trail of the Milky Way in the Allgäu sky. From our vantage point I tried several series of shots, with and without my Haida Clear Light filter and Tiffen Fog filter and with the new 7Artisans 7.5 mm fish-eye. In the end I liked the unfiltered images through the Panasonic Leica 8-18 mm the best. The above image is stacked to reduce noise but otherwise unprocessed. The sheer clarity of the image just blows me away. The detail in the Milky Way is amazing. But I don't think this is a good Milky Way photo. It's a good photo of the Milky Way, but like I said earlier, a good Milky Way photo stands or falls by the foreground and I wasn't satisfied with what I was getting here, so after a cup of tea  and a pasty (thanks Martin, those were life-savers) I lay down for a 45 min shut-eye before heading up to the ridge, where I knew just the spot.

With Haido Clear Sky Filter, Unprocessed

7Artisans 7.5 mm Fish-eye Lens, Unprocessed

One of the greatest challenges with astro photography is finding infinity on the focus dial. Looking through the viewfinder you're confronted with an almost completely black image - finding something to focus on can be extremely difficult. If there's a bright light a couple of miles off this works relatively well, as at this distance there's effectively no focal change between 2 miles and infinity. It was quite a challenge in the dark though, and I had to hunt through the magnified viewfinder on the Olympus to locate Jupiter (bright spot in the middle of the images above) and twiddle the focus ring of the lens to render the tiny fuzzy light as tight and small as possible. Then it's shoot and hope. You can examine the images on the camera display, but you're never entirely sure whether your photo is sharp or not until you get the image on the computer screen.

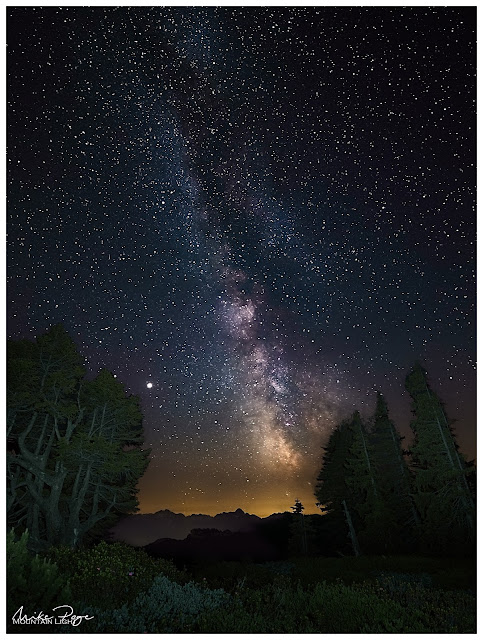
Despite being pitch dark, it was easy enough to find my way by the light of my head-torch, having scouted the area less than a month before. I located the second spot relatively easily and set up the tripod again. A few ultra-high-ISO shots helped me frame the photo correctly. I also tried some low ISO long exposures with a bit of light painting so that I would have a foreground to go with it. This is a separate image that is blended with the processed astro image in post processing (see last image). This final photo here has to be my favourite image of the year so far. I didn't get a huge number of finished shots that I was happy with, but at the end of the day, if you come away with at least one, that's a win.

Milky Way Over The Allgäu || Olympus 8 mm, f/2.8, 25 s ISO 6400, Stacked

I carried on shooting for a while after this into the blue light of pre-dawn before giving up and catching a few more minutes sleep lent against my rucksack. It was a mild night with little wind and the ground was comfortable and dry beneath me, not a sound to be heard.

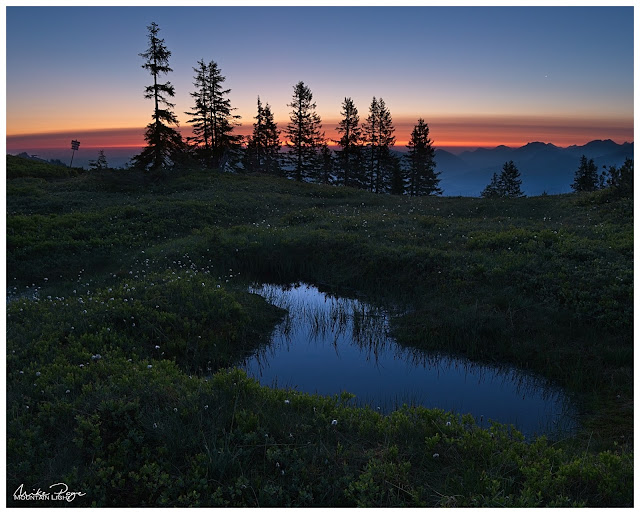
Birdsong and a yipping fox in the valley below alerted me to the coming dawn. By the light of the red band of cloud to the east I could just make out a small peat pond nearby that I'd just avoided in the dark. In retrospect I should have taken a lower vantage point for this shot. This is two images blended in ON1 Photo Raw, one for the sky, one for the foreground. I took the liberty of brightening the tufts of cotton grass to emphasise them in the pre-dawn light.

Mountain Tarn at Dawn || Olympus f/5.6, 1/6 s, ISO 200

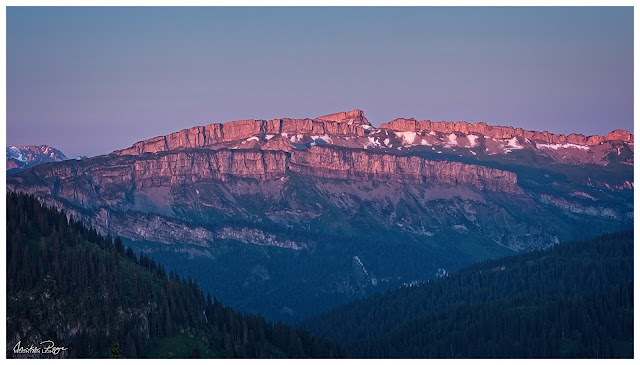
Then it was down to find Martin and head down to the car. I found him warming himself over his camping stove and ready to return to the valley. As I waited for him to pack his things there was time for one last shot of the sun rising on the mountain escarpment opposite us. 

The Red Light Of Dawn || Olympus f/5.6, 1/30 s, ISO 200

Processing the Images

If you're not interested in the nitty-gritty of processing astro photography you can probably stop reading here and scan to the last images. It's very easy to over-process Milky Way photos: I spent two evenings working on this last shot only to have Sharon (correctly) tell me that it was too speckled and she didn't like the foreground. I've left this technical bit to the end for my techie friends who'll be interested in this stuff (hi Matthias!). 

Before the images can be 'stacked' (averaged), they need to be in tiff format. ON1 Photo Raw, my post-processing software can export tiffs, but they're the wrong format for my stacking software, Sequator. The images have to be opened in Olympus Workspace and exported as tiffs from there. For each image I used 10 star images and two control images with the lens cap on (lights and darks respectively).

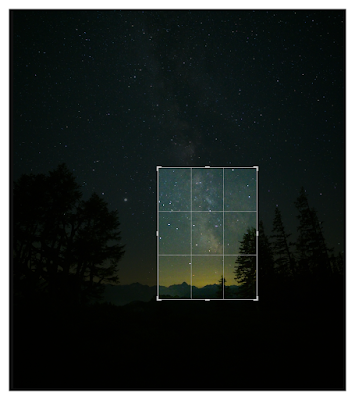
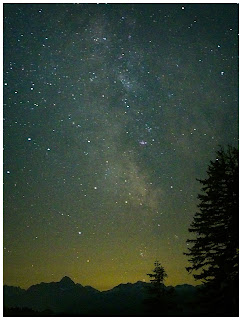
Crop of main image


Unprocessed image OOCStacked in Sequator
10 Star images, 2 Noise images (with lens cap on), Align stars, Freeze ground, Sky region: Partial, otherwise all default settings
Processed in ON1 Photo Raw 2020
Develop:
Contrast +24, Highlights +18, Midtones +15, Shadows -20, Whites +45, Temperature +40, Tint -3
Effects:
Sharpening, Noise Reduction (Moderate), Tone Enhancer (Shadows Lighter on foreground; Midtone Contrast Boost, 50%), LUTs (1983, 35%), Sunshine (Sunglow, 50%), Curves (mild S-curve), Dynamic contrast on Milky Way


I also tried a blend of my favourite image with the light-painted foreground in ON1 Photo Raw. It's not perfect as I seem to have adjusted the camera between frames and had to stretch the resulting images to fit. I'd be interested to hear which image you prefer, this one with more detail in the foreground trees, or the original "Milky Way Over The Allgäu" above. My jury is still out on this one.

Milky Way Over The Allgäu II || Olympus 8 mm, f/2.8, 25 s ISO 6400, Stacked and Blended


Sunday 14 June 2020

I Can Slow Down Time, What's Your Superpower?

A while back I talked about some differences between our eyes and cameras, focusing primarily on things that our eyes can do but our cameras can't (When What You See Is Not What You Get). But there are also some things that our cameras can do that our eyes can't. One of these is slowing down time. Well, actually it's accumulating time. Ok, it's not accumulating time, it's accumulating light over a longer period of time, but you get the idea. Sometimes a slow shutter speed can be a real hindrance, such as when we're trying to take a photo of something that's moving quickly, or we're using a telephoto lens (or both - photographing birds in flight, for example). But sometimes, just sometimes, it can give rise to really cool effects to emphasise movement.

Between a Rock and a Soft Space || Olympus f/20, 5 s, ISO 200

Probably the most common use of this effect is emphasising movement in water, either in waves or in a waterfall. Take a high-speed photo of a waterfall and you'll freeze the motion, giving you a glassy image (which can also be appealing).

Glassy Water || Olympus f/4, 1/800 s, ISO 1600

Slow things down to a fraction of a second and you'll get a real sense of movement in the scene. Even 1/5 s is enough to really convey what's going on such as with this waterfall above Saas Fee in Switzerland. I love the contrast between the rocks and the water in shots like this - solidity and motion. 

In the Swiss Alps || Olympus F/22, 1/6 s, ISO 100

You can easily apply the same principle to waves on the sea, such as in this Boxing Day photo taken in Lyme Regis on the English south coast. My portfolio of seascapes is very limited, but this one taken in the later afternoon light works for me. The wave crashing into the sea wall is clearly in motion, as is the foam soaking back through the pebbles towards the sea.

Waves at Lyme Regis || Olympus f/22, 1/2 s, ISO 80

If you want to go full-on motion blur, giving you that creamy, foggy appearance in the water you'll need to further increase the exposure time to multiple seconds.

At the Stuiben Falls || Olympus, f/22, 5 s, ISO 64

But how do you take an otherwise sharp multi-second photo? There are essentially two challenges; (I) reducing the amount of light entering the camera to a sufficient level to allow a long exposure in the first place, and (II) stabilising the camera so that the rest of the picture isn't blurred.

Reducing the Light

Why do we need to reduce the amount of light entering the camera, and how do we achieve this?

Why Do We Reduce Light? There are two physical limits in our cameras to the amount of light being registered by the sensor; the size of the aperture (the F-stop) and the sensitivity of the sensor (ISO). Most lenses are restricted to a minimum (smallest) aperture of about F/22 and most cameras to a minimum ISO of somewhere between 50-100. On a bright sunny day, even F/22 and ISO 50 aren't sufficient to achieve an exposure time close to 1 s. The image will be completely over-exposed - simply put too much light has entered the camera, plus there are good reasons not to push either the aperture or the ISO this far; at F/22 most lenses exhibit sharpness-limiting levels of diffraction and at low ISO the camera sensor's ability to distinguish between the brightest and darkest aspects of a scene (the dynamic range) is slightly diminished. So in order to get a decent image, we need to reduce the amount of light hitting the sensor.

Photography 101: Include a Pretty Girl in a Yellow Coat || Olympus f/4, 1/5 s, ISO 200

How Do We Reduce Light? Essentially there's only one way to do this; sticking a piece of darkened glass in front of the camera lens There is another way, but that goes beyond the scope of this article. Most of us are familiar with polarising filters for cameras and these certainly help to reduce the light in certain circumstances, but are limited to somewhere between 1 and 2 stops. What's a stop of light?, I hear you ask. A stop in camera-speak is a doubling (or halving) of the exposure. So a polarising filter will generally allow you to double or quadruple the exposure time, say from 1/10 s to 1/5 s - which really isn't much at all. You'd hardly see the difference between the two.

The next easiest option is a variable neutral density (ND) filter. Have you ever tilted your head whilst wearing polarised sunglasses and seen a screen go dark? That's probably because the screen you're looking at is also polarised. As long as both polarised layers are aligned, no effect is visible, but as soon as the two layers become misaligned, a decreasing amount of light passes through both layers. This is how variable ND filters work. They have two polarised layers that can be turned independently meaning that you can control how dark the filter is. Although convenient, there are downsides to using variable ND filters. If you were to take a photo of a perfectly uniform surface through one of these filters, the resulting image would in all likelihood look quite blotchy because the filter effect is normally uneven. You wouldn't want to use this filter to shoot blue sky, for example. But it can work for irregular images such as waterfalls.

Beyond that you're looking at fixed ND filters, darkened glass that reduce the amount of light without affecting the colour of the light. These can either be attached directly to the lens via a screw thread or using a special filter attachment system. The darkest commonly available ND filter, generally referred to as the Super Stopper, reduces light by 15 stops 😲.

Such filters can even tame wavy lakes to add a sense of calm to what would otherwise have been a very unsettled image. On this windy late November morning at the Hopfensee there were a lot of waves and they would have detracted from the sense of peace I was hoping for with this image.

Dawn at the Hopfensee || Olympus f/11, 8 s, ISO 64


Stabilising the Camera

The rule of thumb is that the maximum length of time the average person can hold a camera before camera shake renders the picture unacceptably blurry is 1/focal length in mm. Sounds technical, but the focal length is essentially the amount of zoom you're using. Assuming that the standard lens has a focal length of 50 mm (commonly referred to as "a 50 mm lens"), then the accepted maximal exposure is 1/50 s. If you're using a wider-angle lens, such as a 20 mm lens then that time decreases to 1/20 s. If you're using a 300 mm telephoto, then the maximal exposure is around 1/300 s, quite fast and much too quick to smooth out any desired motion blur.

There are two ways to achieve stabilisation; either in-camera image stabilisation (whether camera body or lens) or camera immobilisation (e.g. a tripod).

Image Stabilisation When I was looking for a new camera at the beginning of 2019, one of the features that caught my eye was the excellent image stabilisation capabilities of the Olympus cameras. My E-M1 Mk II boasts a massive 5.5 stops of image stabilisation, even more in combination with certain lenses. What's a stop of image stabilisation? The same as a stop of light. Going back to the 50 mm lens, we mentioned above, I can double (or is it halve?) the exposure 5½ times from 1/50 s to 1/25→1/12.5→1/6.25→1/3.125→ >1/1.56 s - so about a second. 

Olympus' image stabilisation with the newest generation of cameras - the E-M1X and the E-M1 Mk III  (💗) is rated at 7.5 stops with certain lenses - turning 1/50 s to 3.6 s - practically an eternity in camera terms. This is pretty much getting to the physical limit for in-camera image stabilisation, which I am reliably informed is limited by the earth's rotation! This is all done using a free floating image sensor chip which is held in place using magnets.

Anyway, enough technical details and Olympus fanboy-ism, suffice to say that most modern cameras come with a certain degree of image stabilisation, allowing you to break the 1/focal length rule.

Don't Just Rely on the Effect - Use Composition Rules || Olympus f/6.3, 1 s, ISO 200

Camera Immobilisation The other way to prevent camera blur of course is to immobilise the camera itself. Classically this is done with a tripod, though we don't have to limit ourselves to this option. In an emergency, anything stable will do, a rock, the crook of  a tree, a rucksack or a beanbag. Anything that will prevent your camera from moving. They say that you should always turn your image stabilisation off when using any form of camera immobilisation. Apparently, the camera expects a certain amount of user shake and gets confused when this is absent. In practice, half the time I forget to turn off image stabilisation anyway and I can't say that I've noticed a difference.

For this to work, the surface that your tripod is resting on has to be stable too. There are a couple of gorges near where I live that have metal bridges spanning the river below. These bridges start to swing noticeably as soon as anyone starts walking along them, so sometimes a little patience is required.

Just know that you'll seldom be alone at spots like the Hopfensee. Matthias and I ran into a photo workshop later the same day as above. Still, you don't have to include the other photographers in the image.
 

So that's the basics of camera immobilisation. Choosing the right tripod is also a matter of taste and usually ends up being a compromise between weight, cost and stability. Don't skimp too much though as you will ultimately regret it. I'm currently running two tripods; my main one is a doughty Tiltall TC-254 which is currently sporting a Benro GD3WH geared head. I also have a lighter Rollei Compact Traveller for when I want to cut down on weight.

Later the Same Day || Olympus f/11 8 s, ISO 64


How Much Motion Blur?

How long is a piece of string? Honestly, there's no correct answer to this question, it's purely a matter of taste and depends a lot on whether you want to simply convey a sense of motion, in which case you can get away with exposures of around 1/5 s, or whether you want to give your waterfall that silky fog appearance, in which case you're going to need exposure times of at least a couple of seconds.