A while back I talked about some differences between our eyes and cameras, focusing primarily on things that our eyes can do but our cameras can't (
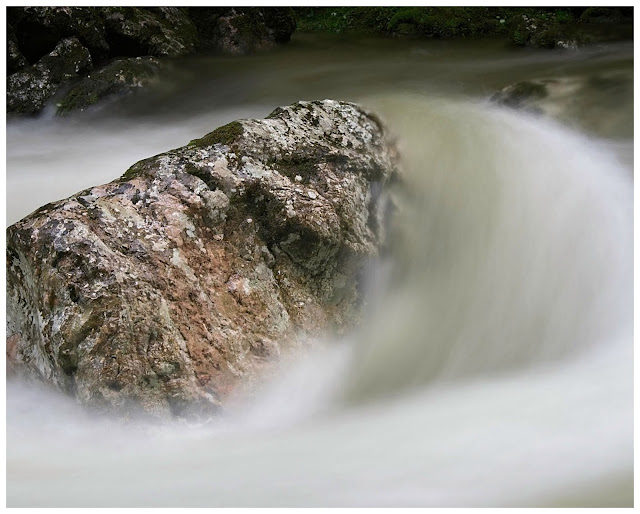
When What You See Is Not What You Get). But there are also some things that our cameras can do that our eyes can't. One of these is slowing down time. Well, actually it's accumulating time. Ok, it's not accumulating time, it's accumulating light over a longer period of time, but you get the idea. Sometimes a slow shutter speed can be a real hindrance, such as when we're trying to take a photo of something that's moving quickly, or we're using a telephoto lens (or both - photographing birds in flight, for example). But sometimes, just sometimes, it can give rise to really cool effects to emphasise movement.
 |
Between a Rock and a Soft Space || Olympus f/20, 5 s, ISO 200
|
|
Probably the most common use of this effect is emphasising movement in water, either in waves or in a waterfall. Take a high-speed photo of a waterfall and you'll freeze the motion, giving you a glassy image (which can also be appealing).
 |
Glassy Water || Olympus f/4, 1/800 s, ISO 1600
|
Slow things down to a fraction of a second and you'll get a real sense of movement in the scene. Even 1/5 s is enough to really convey what's going on such as with this waterfall above Saas Fee in Switzerland. I love the contrast between the rocks and the water in shots like this - solidity and motion.
 |
| In the Swiss Alps || Olympus F/22, 1/6 s, ISO 100 |
You can easily apply the same principle to waves on the sea, such as in this Boxing Day photo taken in Lyme Regis on the English south coast. My portfolio of seascapes is very limited, but this one taken in the later afternoon light works for me. The wave crashing into the sea wall is clearly in motion, as is the foam soaking back through the pebbles towards the sea.
 |
| Waves at Lyme Regis || Olympus f/22, 1/2 s, ISO 80 |
If you want to go full-on motion blur, giving you that creamy, foggy appearance in the water you'll need to further increase the exposure time to multiple seconds.
 |
| At the Stuiben Falls || Olympus, f/22, 5 s, ISO 64 |
But how do you take an otherwise sharp multi-second photo? There are essentially two challenges; (I) reducing the amount of light entering the camera to a sufficient level to allow a long exposure in the first place, and (II) stabilising the camera so that the rest of the picture isn't blurred.
Reducing the Light
Why do we need to reduce the amount of light entering the camera, and how do we achieve this?
Why Do We Reduce Light? There are two physical limits in our cameras to the amount of light being registered by the sensor; the size of the aperture (the F-stop) and the sensitivity of the sensor (ISO). Most lenses are restricted to a minimum (smallest) aperture of about F/22 and most cameras to a minimum ISO of somewhere between 50-100. On a bright sunny day, even F/22 and ISO 50 aren't sufficient to achieve an exposure time close to 1 s. The image will be completely over-exposed - simply put too much light has entered the camera, plus there are good reasons not to push either the aperture or the ISO this far; at F/22 most lenses exhibit sharpness-limiting levels of diffraction and at low ISO the camera sensor's ability to distinguish between the brightest and darkest aspects of a scene (the dynamic range) is slightly diminished. So in order to get a decent image, we need to reduce the amount of light hitting the sensor.
 |
| Photography 101: Include a Pretty Girl in a Yellow Coat || Olympus f/4, 1/5 s, ISO 200 |
How Do We Reduce Light? Essentially there's only one way to do this; sticking a piece of darkened glass in front of the camera lens There
is another way, but that goes beyond the scope of this article. Most of us are familiar with
polarising filters for cameras and these certainly help to reduce the light in certain circumstances, but are limited to somewhere between 1 and 2 stops. What's a stop of light?, I hear you ask. A stop in camera-speak is a doubling (or halving) of the exposure. So a polarising filter will generally allow you to double or quadruple the exposure time, say from 1/10 s to 1/5 s - which really isn't much at all. You'd hardly see the difference between the two.
The next easiest option is a
variable neutral density (ND) filter. Have you ever tilted your head whilst wearing polarised sunglasses and seen a screen go dark? That's probably because the screen you're looking at is also polarised. As long as both polarised layers are aligned, no effect is visible, but as soon as the two layers become misaligned, a decreasing amount of light passes through both layers. This is how variable ND filters work. They have two polarised layers that can be turned independently meaning that you can control how dark the filter is. Although convenient, there are downsides to using variable ND filters. If you were to take a photo of a perfectly uniform surface through one of these filters, the resulting image would in all likelihood look quite blotchy because the filter effect is normally uneven. You wouldn't want to use this filter to shoot blue sky, for example. But it can work for irregular images such as waterfalls.
Beyond that you're looking at fixed ND filters, darkened glass that reduce the amount of light without affecting the colour of the light. These can either be attached
directly to the lens via a screw thread or using a
special filter attachment system. The darkest commonly available ND filter, generally referred to as the Super Stopper, reduces light by 15 stops 😲.
Such filters can even tame wavy lakes to add a sense of calm to what would otherwise have been a very unsettled image. On this windy late November morning at the Hopfensee there were a lot of waves and they would have detracted from the sense of peace I was hoping for with this image.
 |
| Dawn at the Hopfensee || Olympus f/11, 8 s, ISO 64 |
Stabilising the Camera
The rule of thumb is that the maximum length of time the average person can hold a camera before camera shake renders the picture unacceptably blurry is 1/focal length in mm. Sounds technical, but the focal length is essentially the amount of zoom you're using. Assuming that the standard lens has a focal length of 50 mm (commonly referred to as "a 50 mm lens"), then the accepted maximal exposure is 1/50 s. If you're using a wider-angle lens, such as a 20 mm lens then that time decreases to 1/20 s. If you're using a 300 mm telephoto, then the maximal exposure is around 1/300 s, quite fast and much too quick to smooth out any desired motion blur.
There are two ways to achieve stabilisation; either in-camera image stabilisation (whether camera body or lens) or camera immobilisation (e.g. a tripod).
Image Stabilisation When I was looking for a new camera at the beginning of 2019, one of the features that caught my eye was the excellent image stabilisation capabilities of the Olympus cameras. My E-M1 Mk II boasts a massive 5.5 stops of image stabilisation, even more in combination with certain lenses. What's a stop of image stabilisation? The same as a stop of light. Going back to the 50 mm lens, we mentioned above, I can double (or is it halve?) the exposure 5½ times from 1/50 s to 1/25→1/12.5→1/6.25→1/3.125→ >1/1.56 s - so about a second.
Olympus' image stabilisation with the newest generation of cameras - the E-M1X and the E-M1 Mk III (💗) is rated at 7.5 stops with certain lenses - turning 1/50 s to 3.6 s - practically an eternity in camera terms. This is pretty much getting to the physical limit for in-camera image stabilisation, which I am reliably informed is limited by the earth's rotation! This is all done using a free floating image sensor chip which is held in place using magnets.
Anyway, enough technical details and Olympus fanboy-ism, suffice to say that most modern cameras come with a certain degree of image stabilisation, allowing you to break the 1/focal length rule.
 |
| Don't Just Rely on the Effect - Use Composition Rules || Olympus f/6.3, 1 s, ISO 200 |
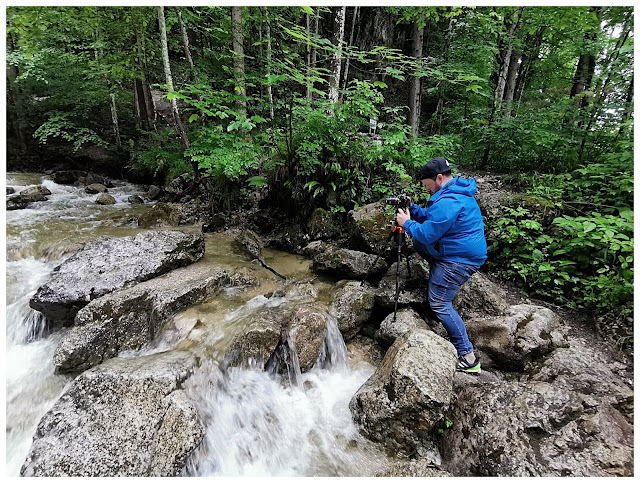
Camera Immobilisation The other way to prevent camera blur of course is to immobilise the camera itself. Classically this is done with a tripod, though we don't have to limit ourselves to this option. In an emergency, anything stable will do, a rock, the crook of a tree, a rucksack or a beanbag. Anything that will prevent your camera from moving. They say that you should always turn your image stabilisation off when using any form of camera immobilisation. Apparently, the camera expects a certain amount of user shake and gets confused when this is absent. In practice, half the time I forget to turn off image stabilisation anyway and I can't say that I've noticed a difference.
For this to work, the surface that your tripod is resting on has to be stable too. There are a couple of gorges near where I live that have metal bridges spanning the river below. These bridges start to swing noticeably as soon as anyone starts walking along them, so sometimes a little patience is required.
Just know that you'll seldom be alone at spots like the Hopfensee. Matthias and I ran into a photo workshop later the same day as above. Still, you don't have to include the other photographers in the image. | |
So that's the basics of camera immobilisation. Choosing the right tripod is also a matter of taste and usually ends up being a compromise between weight, cost and stability. Don't skimp too much though as you will ultimately regret it. I'm currently running two tripods; my main one is a doughty Tiltall TC-254 which is currently sporting a Benro GD3WH geared head. I also have a lighter Rollei Compact Traveller for when I want to cut down on weight.
 |
| Later the Same Day || Olympus f/11 8 s, ISO 64 |
How Much Motion Blur?
How long is a piece of string? Honestly, there's no correct answer to this question, it's purely a matter of taste and depends a lot on whether you want to simply convey a sense of motion, in which case you can get away with exposures of around 1/5 s, or whether you want to give your waterfall that silky fog appearance, in which case you're going to need exposure times of at least a couple of seconds.
